Lightroom Tip of the Day!
Lifesaver tip when you need to change the orientation of your crop in Lightroom.

Lightroom Tip of the Day!
Lifesaver tip when you need to change the orientation of your crop in Lightroom.
Winter for us photographers offers so many great opportunities for some amazing shots. We get excited to get out and shoot but as soon as we are out of the car for that amazing sunrise if we are not prepared its a nightmare and a few minutes later we dont even want to take a photo.
“Be Prepared”
Before you get out “be prepared” for the conditions you will be facing.
Today i’ll be giving you some tips and steps you need to take to enjoy your time out there and get some awesome shots!
There are some great applications out there for the weather, i personally use clear outside but any reliable weather app will do.
You need to know the temperature and the conditions (Rain/Snow/Ice/Fog…) before you are out on location
When you are out there the most important thing is to be warm and comfortable at all times so you can enjoy you time in nature.
When you are in the outdoors, you will spend some time standing still and some time walking, hiking and moving around. While you are on the move you will be much warmer than the time you stand still, and you need to do something about it. The trick is to use layering technique. This is when you use many light clothing layered on top of each other. This gives you the opportunity to take something off while you are moving and put it back on when you are still.
Keep your hands and feet warm at all times. if your hands are cold and frozen you will not be able to use the camera at all. Also is important to keep your feet and toes warm so you can move around freely. There are some heat patches you can apply over your socks in your boots that can keep you warm for several hours.
When you are in low temperatures you will soon notice your batteries are depleting much faster than usual. Cold weather can affect battery performance by negative 30-40%. What you can do to compensate other than bring extra batteries is to keep your fully charged batteries warm. A simple way to achieve this is to keep the batteries close to your body for heat, try an inner pocket of your jacket. The warmer the batteries are the longer they will last.
If you are using a drone in temperatures below 0ºC make sure you land at 50% battery because it can go down really fast and you will have issues!
Some of the high end cameras are weather sealed and that means they have more resistance to rain, dust and snow than some lower end cameras but dont be fooled they are not in any way waterproof! Moisture and water will damage them if it gets inside.
If you get you camera from the cold outside weather and stick in a backpack in your car and turn on the heating in the car then you will cause some condensation to be formed on your camera and IN your camera and that will cause problems! I suggest putting your camera in plastic zip back while you are still out of the car and then put it in your backpack after you seal it off. That will cause all the contestation to be formed on the outter side of the plastic zip bag and not on your camera!
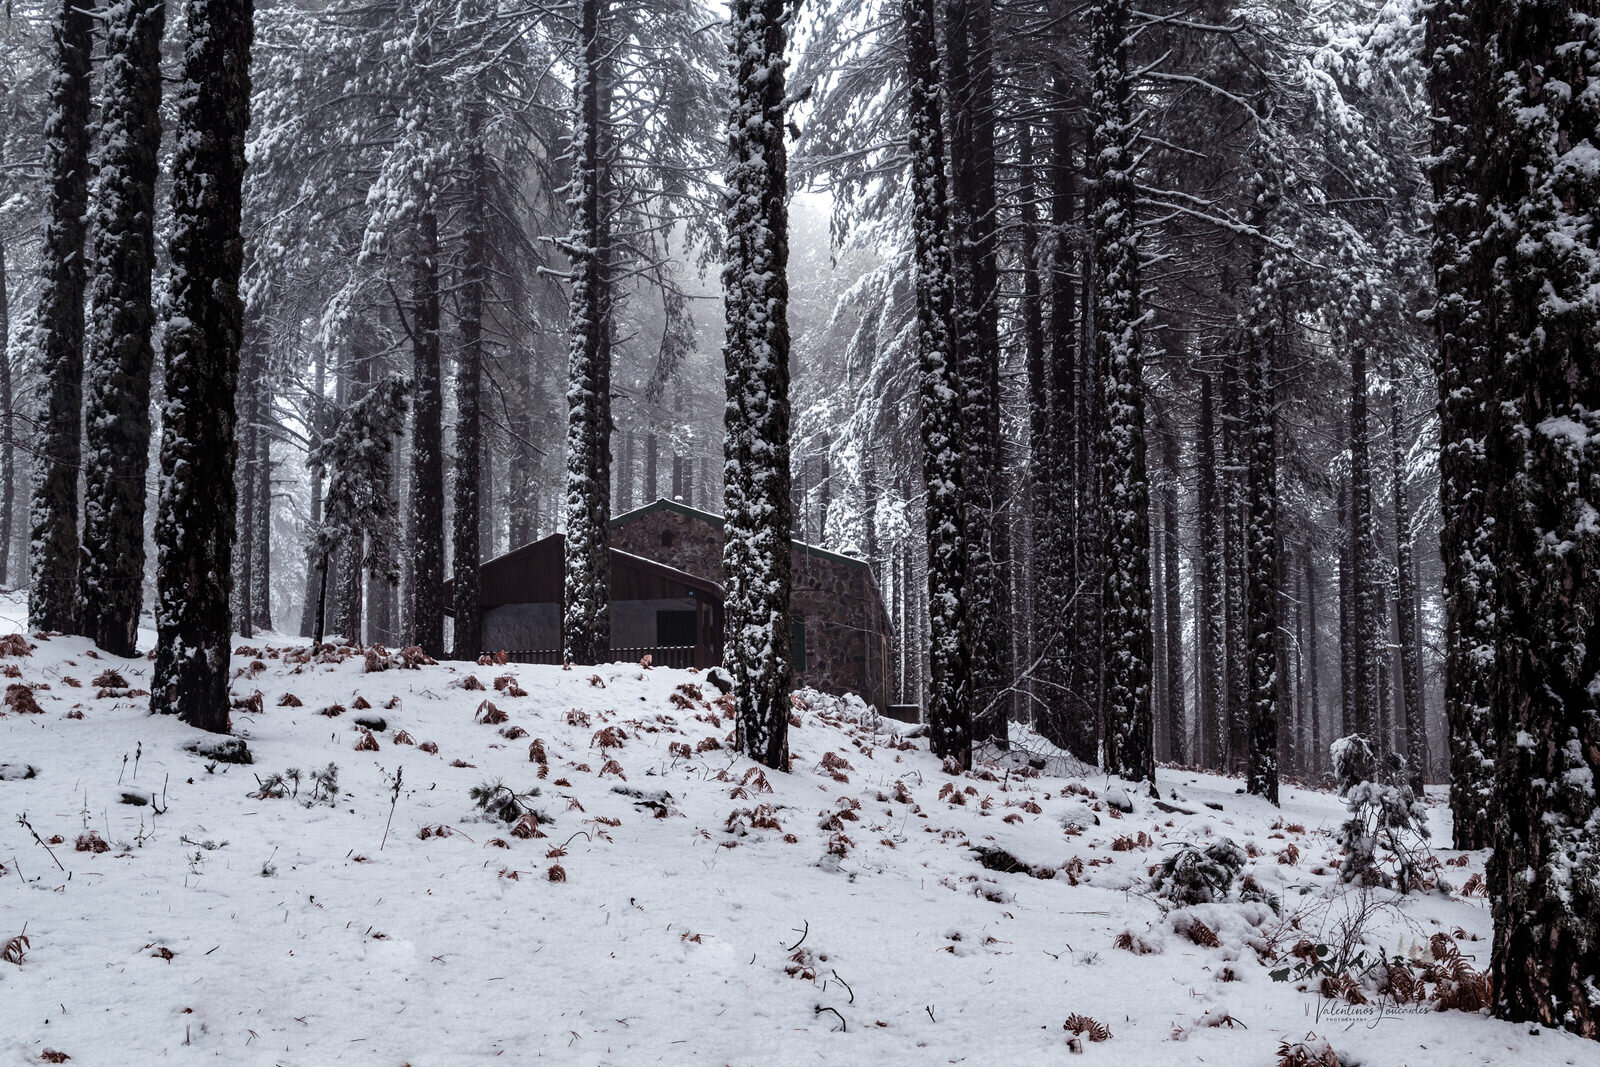
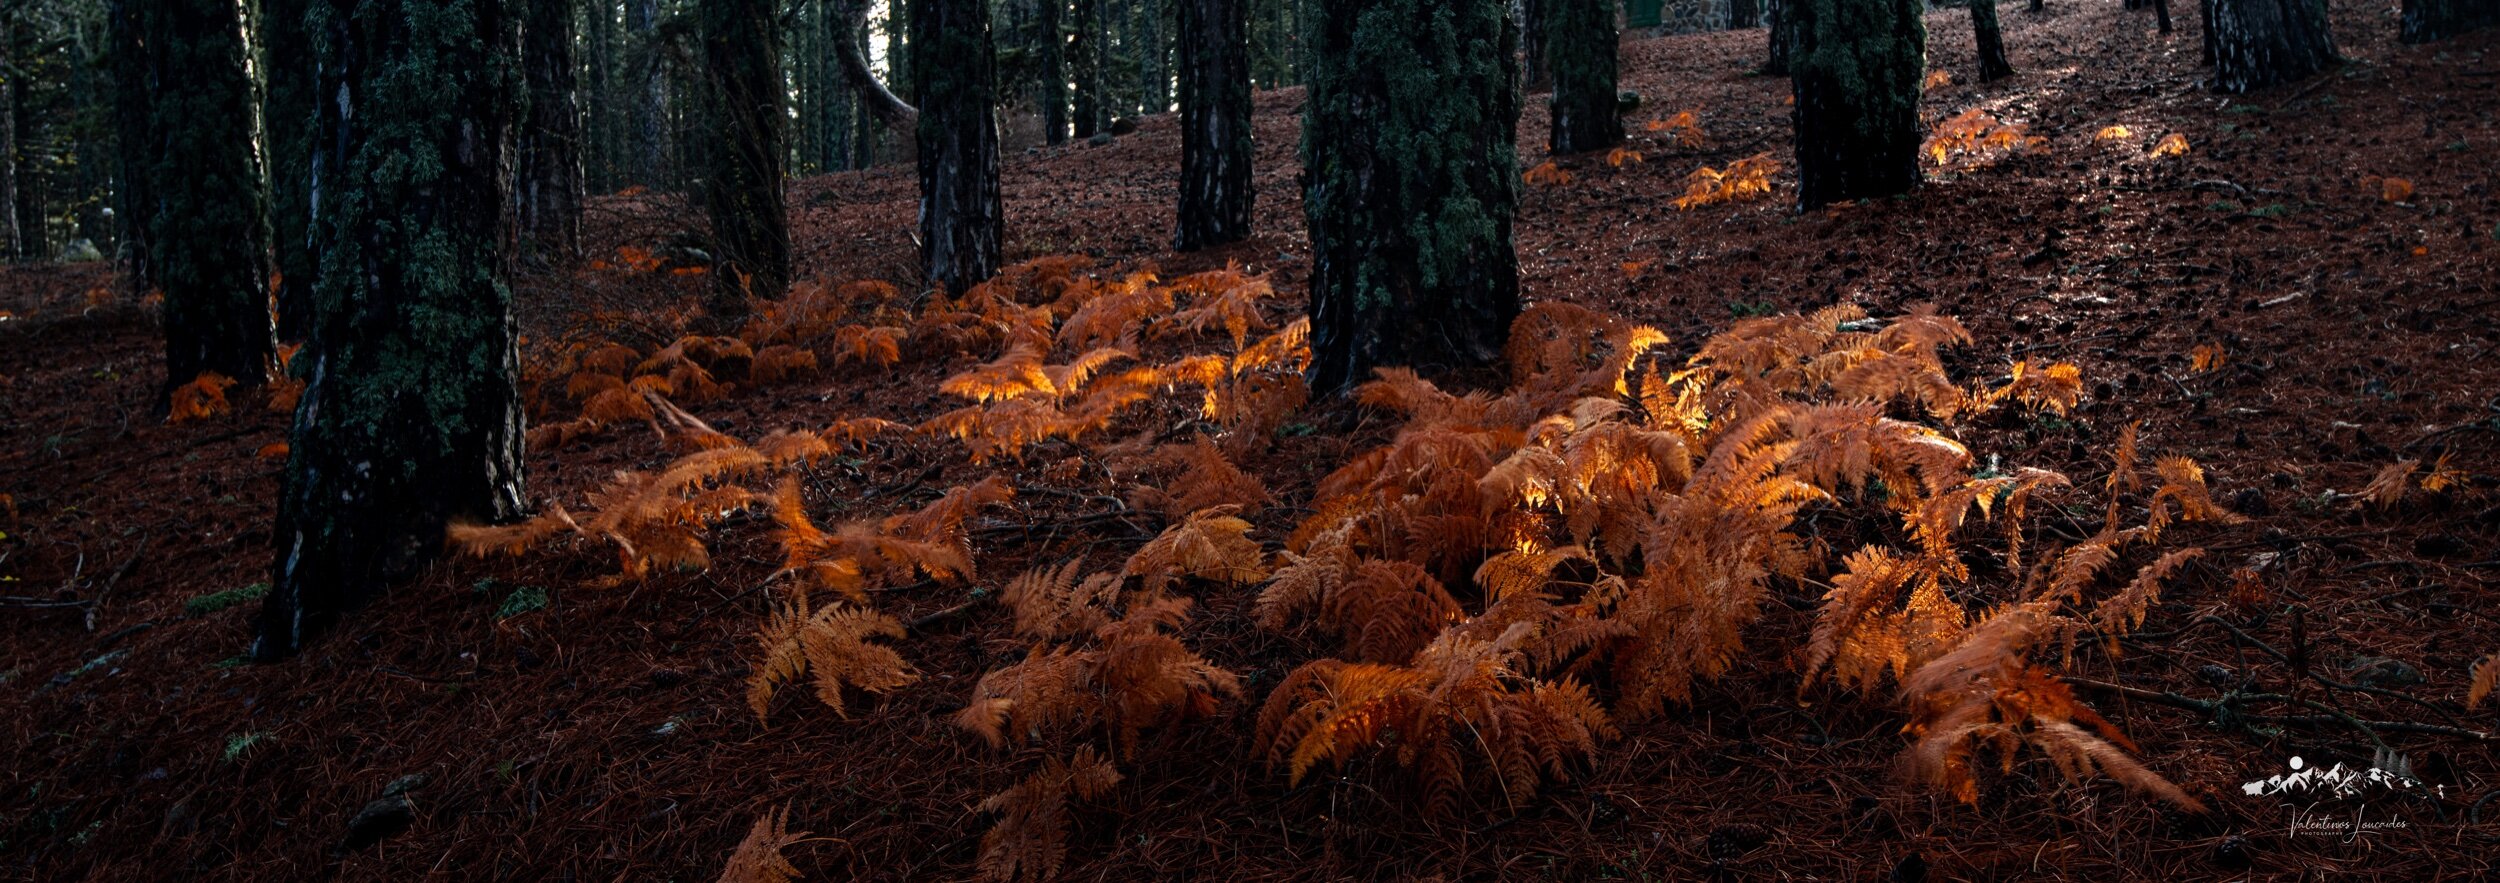
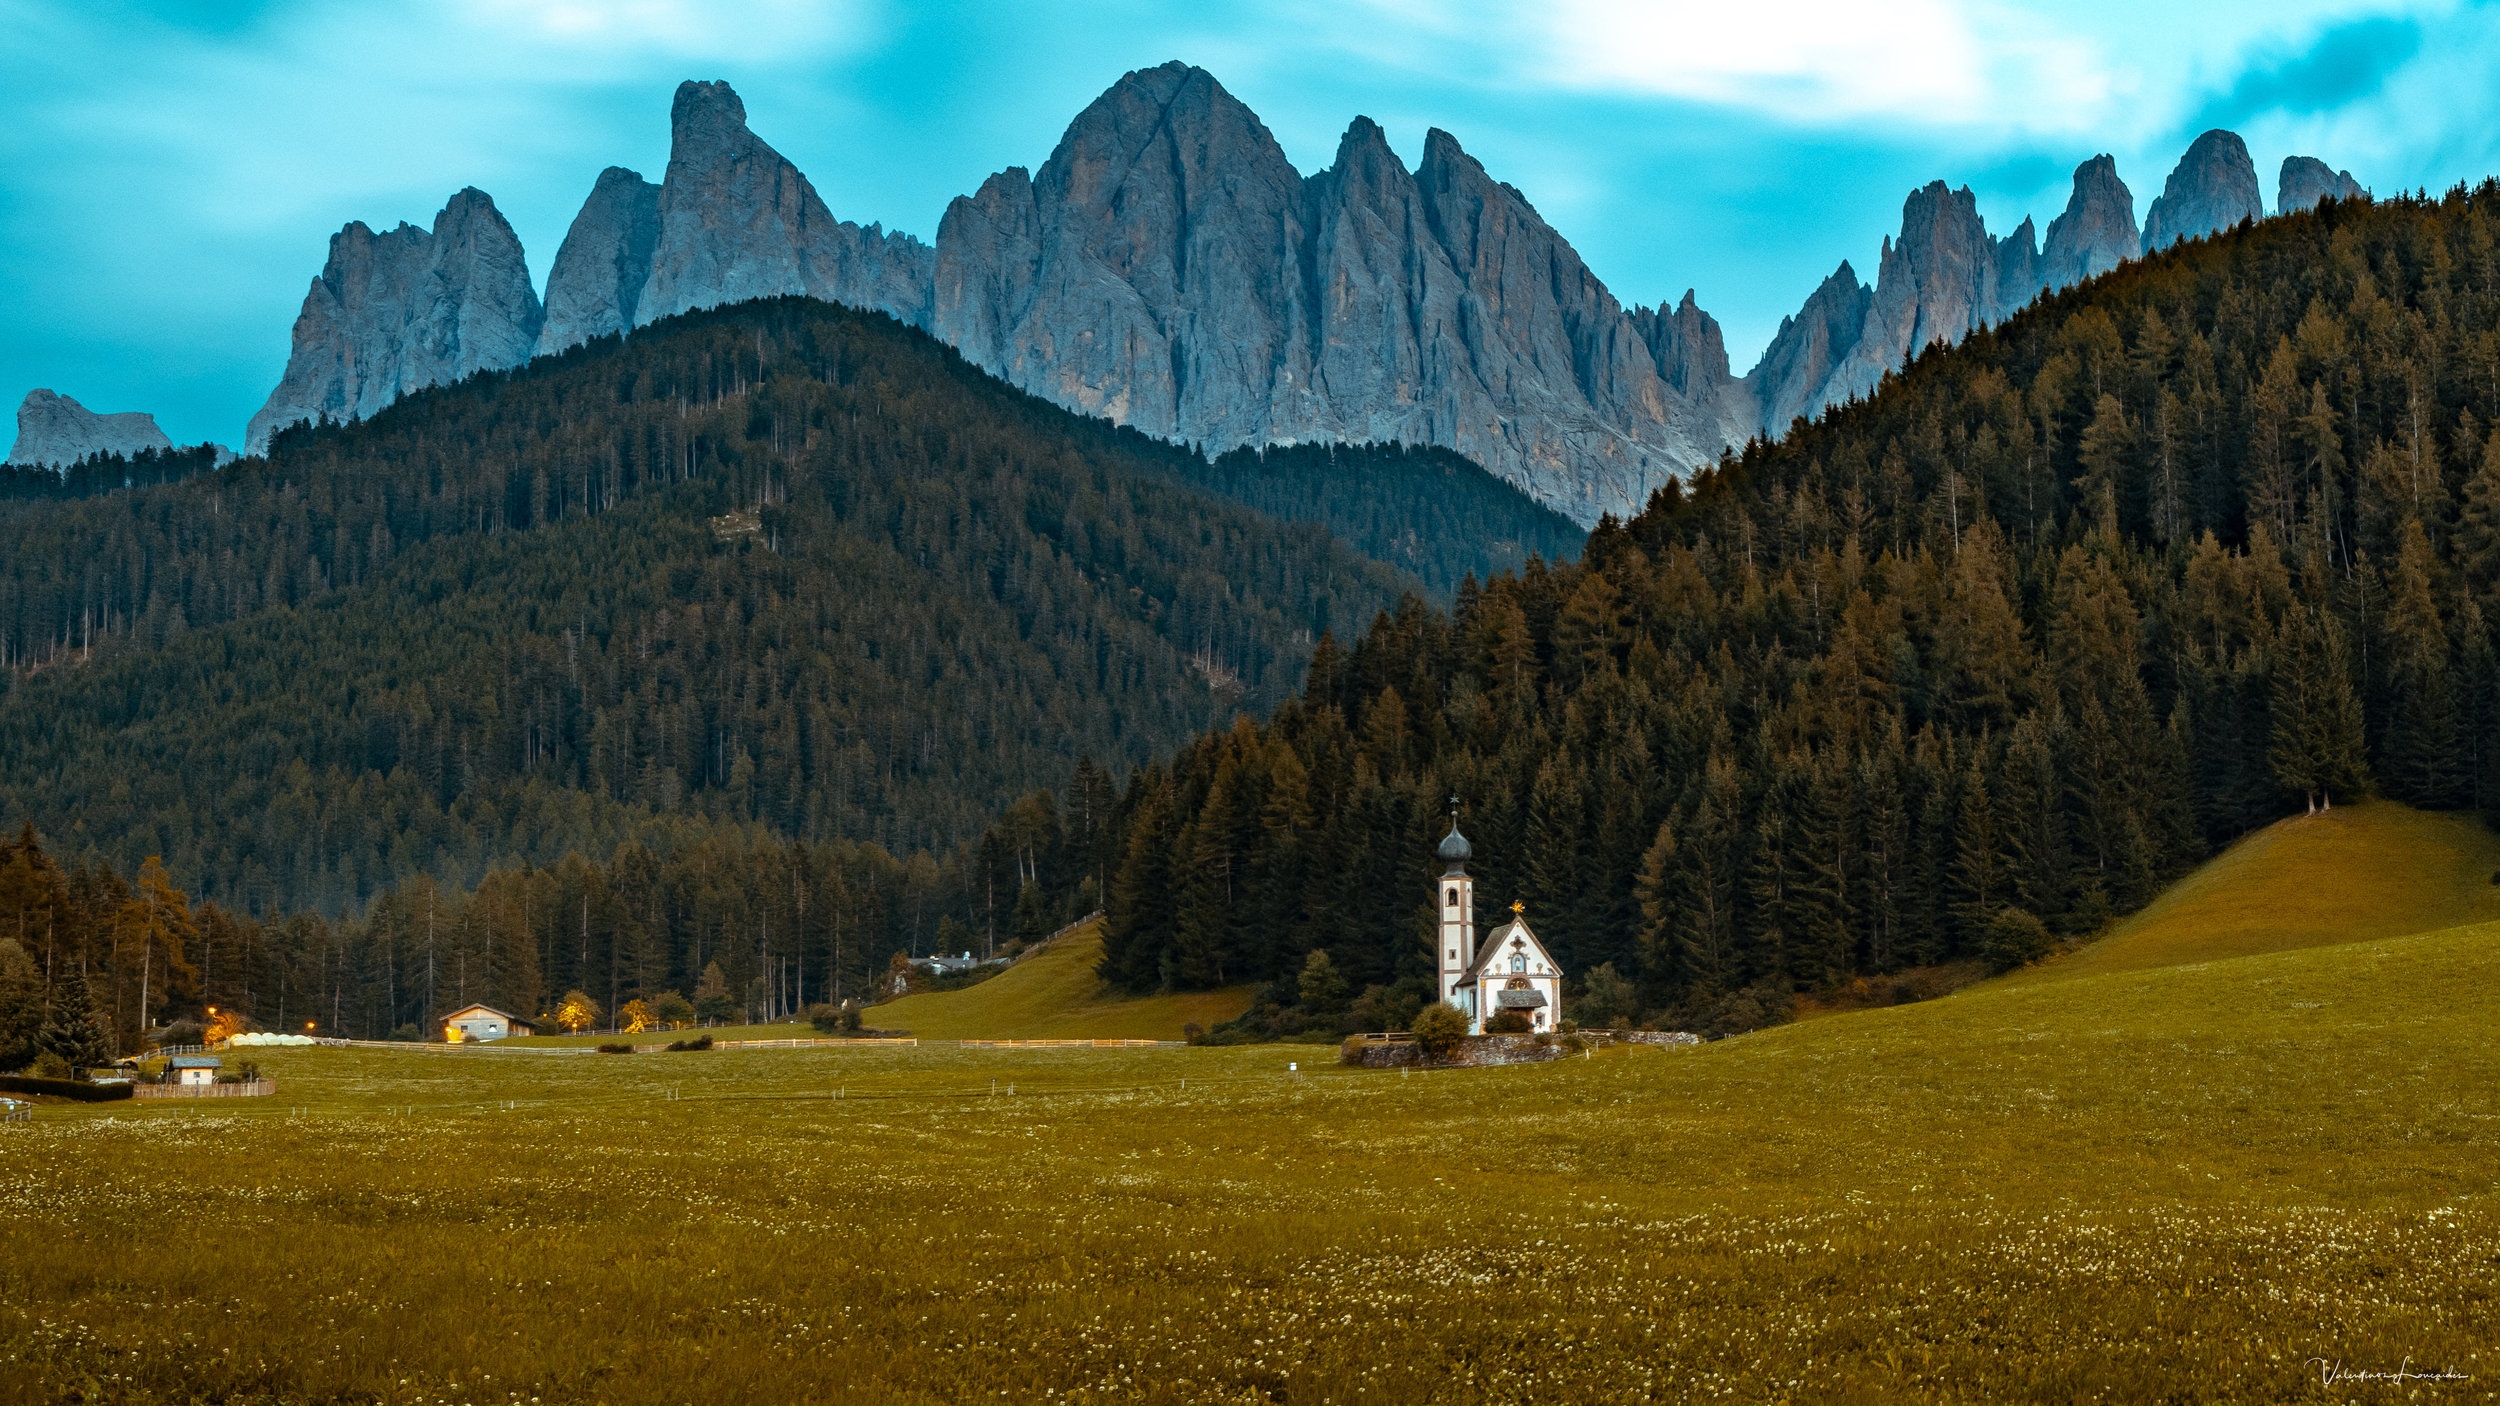
It was a rainy day and it was the perfect opportunity to capture the last of Fall colors in the mountains of Cyprus.
We drove up to Troodos mountains and explored the woodlands for a few hours.
It was late afternoon and the sun was about to set and what we tried to do was to shoot for the light.
I have to let you know that shooting in the woods during a rainy and foggy day is an amazing experience but photography wise is not so easy!
You have to hunt the light!
What i try to do is look for the light and not so much my surroundings.
The light will show up for a few moments, it will illuminate your scene and then is gone. If you are lucky this will repeat a few moments later and will give you the opportunity to wait it out and give you a chance to capture it as you saw it. But usually the light is gone and is never the same again.
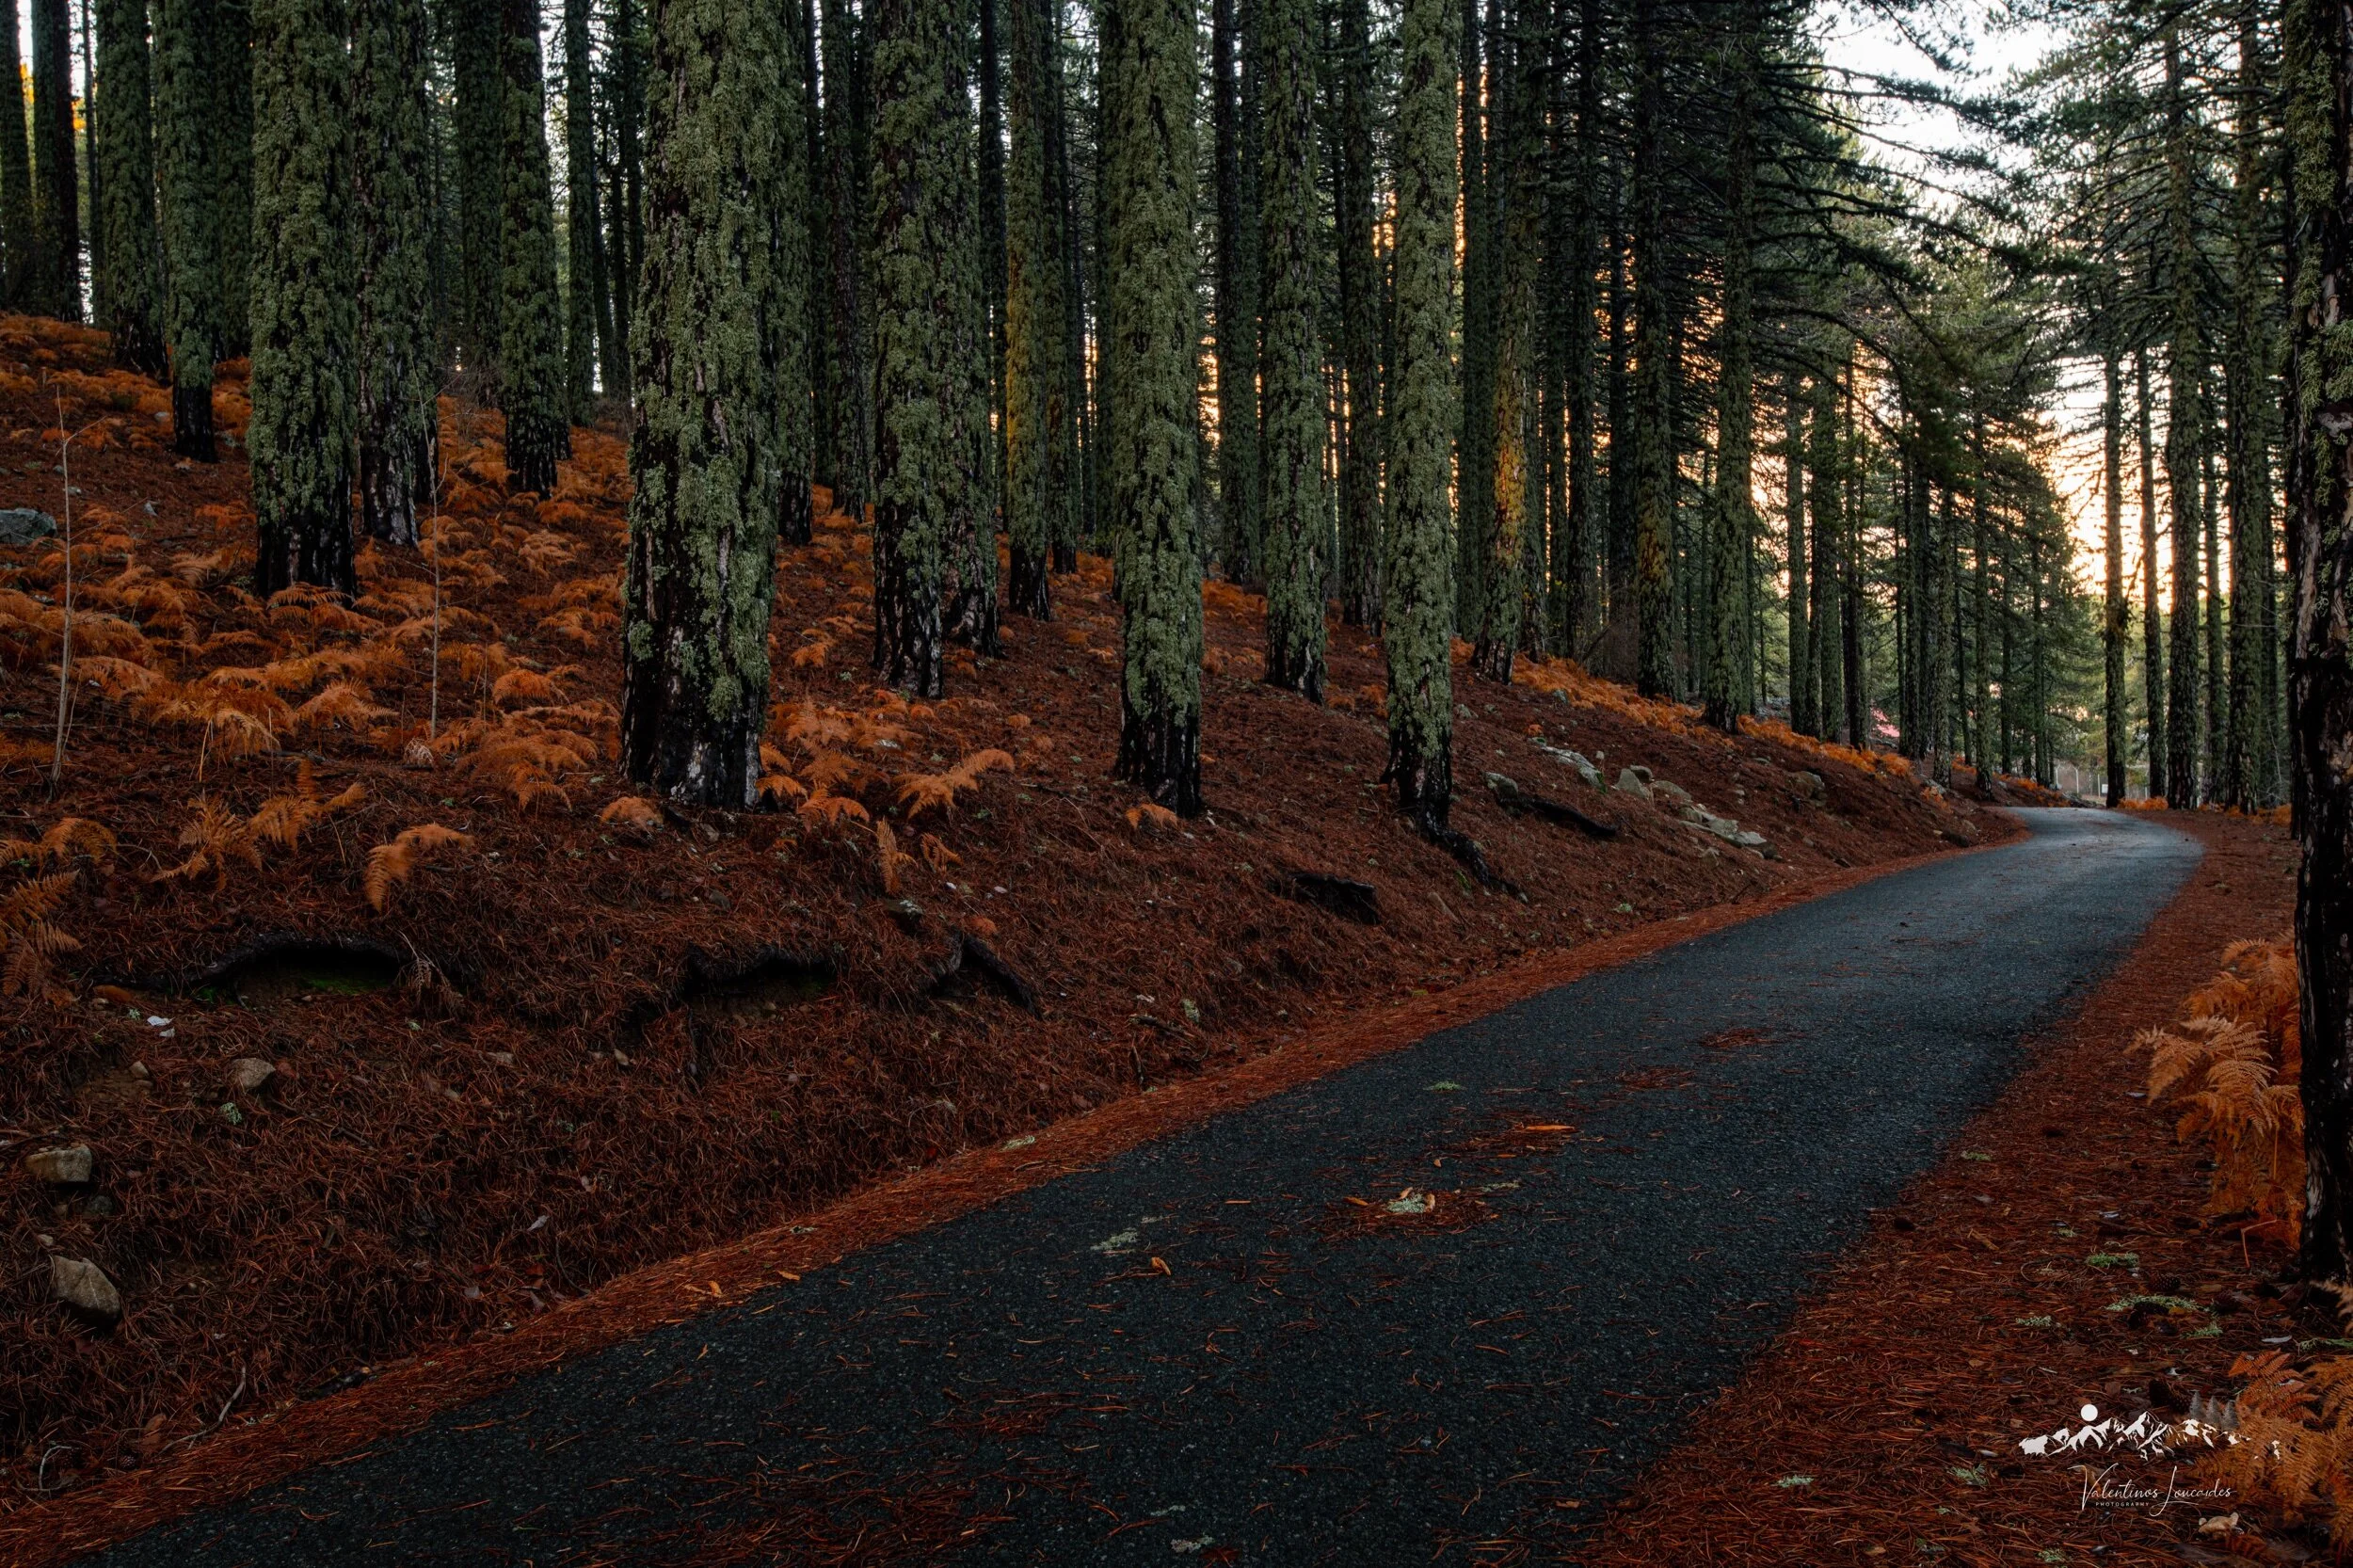
You need to be fast with your composition!
In most cases you have less than a minute to setup your shot. You need to find a composition, setup your tripod, dial in the settings and capture a couple of shots.
You need to know your camera really well!
My workflow in the woodland is like this: After i find a composition i try to imagine how my final shot will look like, i setup the tripod, i fine tune my composition, i check the edges of my frame, i adjust my polarizer and start the exposure sequence. I expose firstly for the highlights and then for the shadows and midtones to compile later on my final shot from 3 exposures.
Dodge and Burn!
Editing wise i import the images in Lightroom and leave them there for week or two or sometimes more before i edit. After selecting what i like most i merge the exposures in Lightroom and after making a few basic adjustments i move them over to photoshop to do some dodge and burn.
I use Lumenzia addon to make my luminosity masks and i brush my shadows and my highlights to get some structure and separation. Last but not least i implement a very slight (8-10%) Orton Effect and finishing up with some sharpening.
Tomorrow the first snow is expected up on the mountains and hopefully will be there to capture the light in the snowy forest which is a bit different procedure.
Do you know what to do differently when shooting is freezing conditions?
Is you camera Safe? What happens to the batteries?
Lets talk about it next time!
Hey guys, here are some thoughts i wanted to share.
I used to edit my images in Lightroom alone and don’t get me wrong, Lightroom is a very powerful tool, but lately i couldn’t do the finishing touches on my images so i got my self into using Photoshop more and more.
Photoshop offers some extremely powerful tools for photographers but needs a-lot of practice to get to a point you can use it seamlessly on your work flow.
The most used tool i get to use is Layer Masks and Luminosity selections.
Having the ability to make selective edits to your images is something you cannot do in Lightroom even with the latest addition of Range Masks.
The Dodge and Burn is a technique that you have to use to make your image pop and lead the viewer’s eye to where you want to!
There are several was you Dodge and Burn and i’ll share them over time with you.
For now here is what editing in Lightroom and finishing in Photoshop can look like.
Editing in Lightroom
Finishing in Photoshop
If you are interested in a video tutorial about the techniques I used in photoshop, let me know in the comments below!
Lago di Braies, Shapes, GPU Gold Medal Award at Greek Photographic Circuit 2019
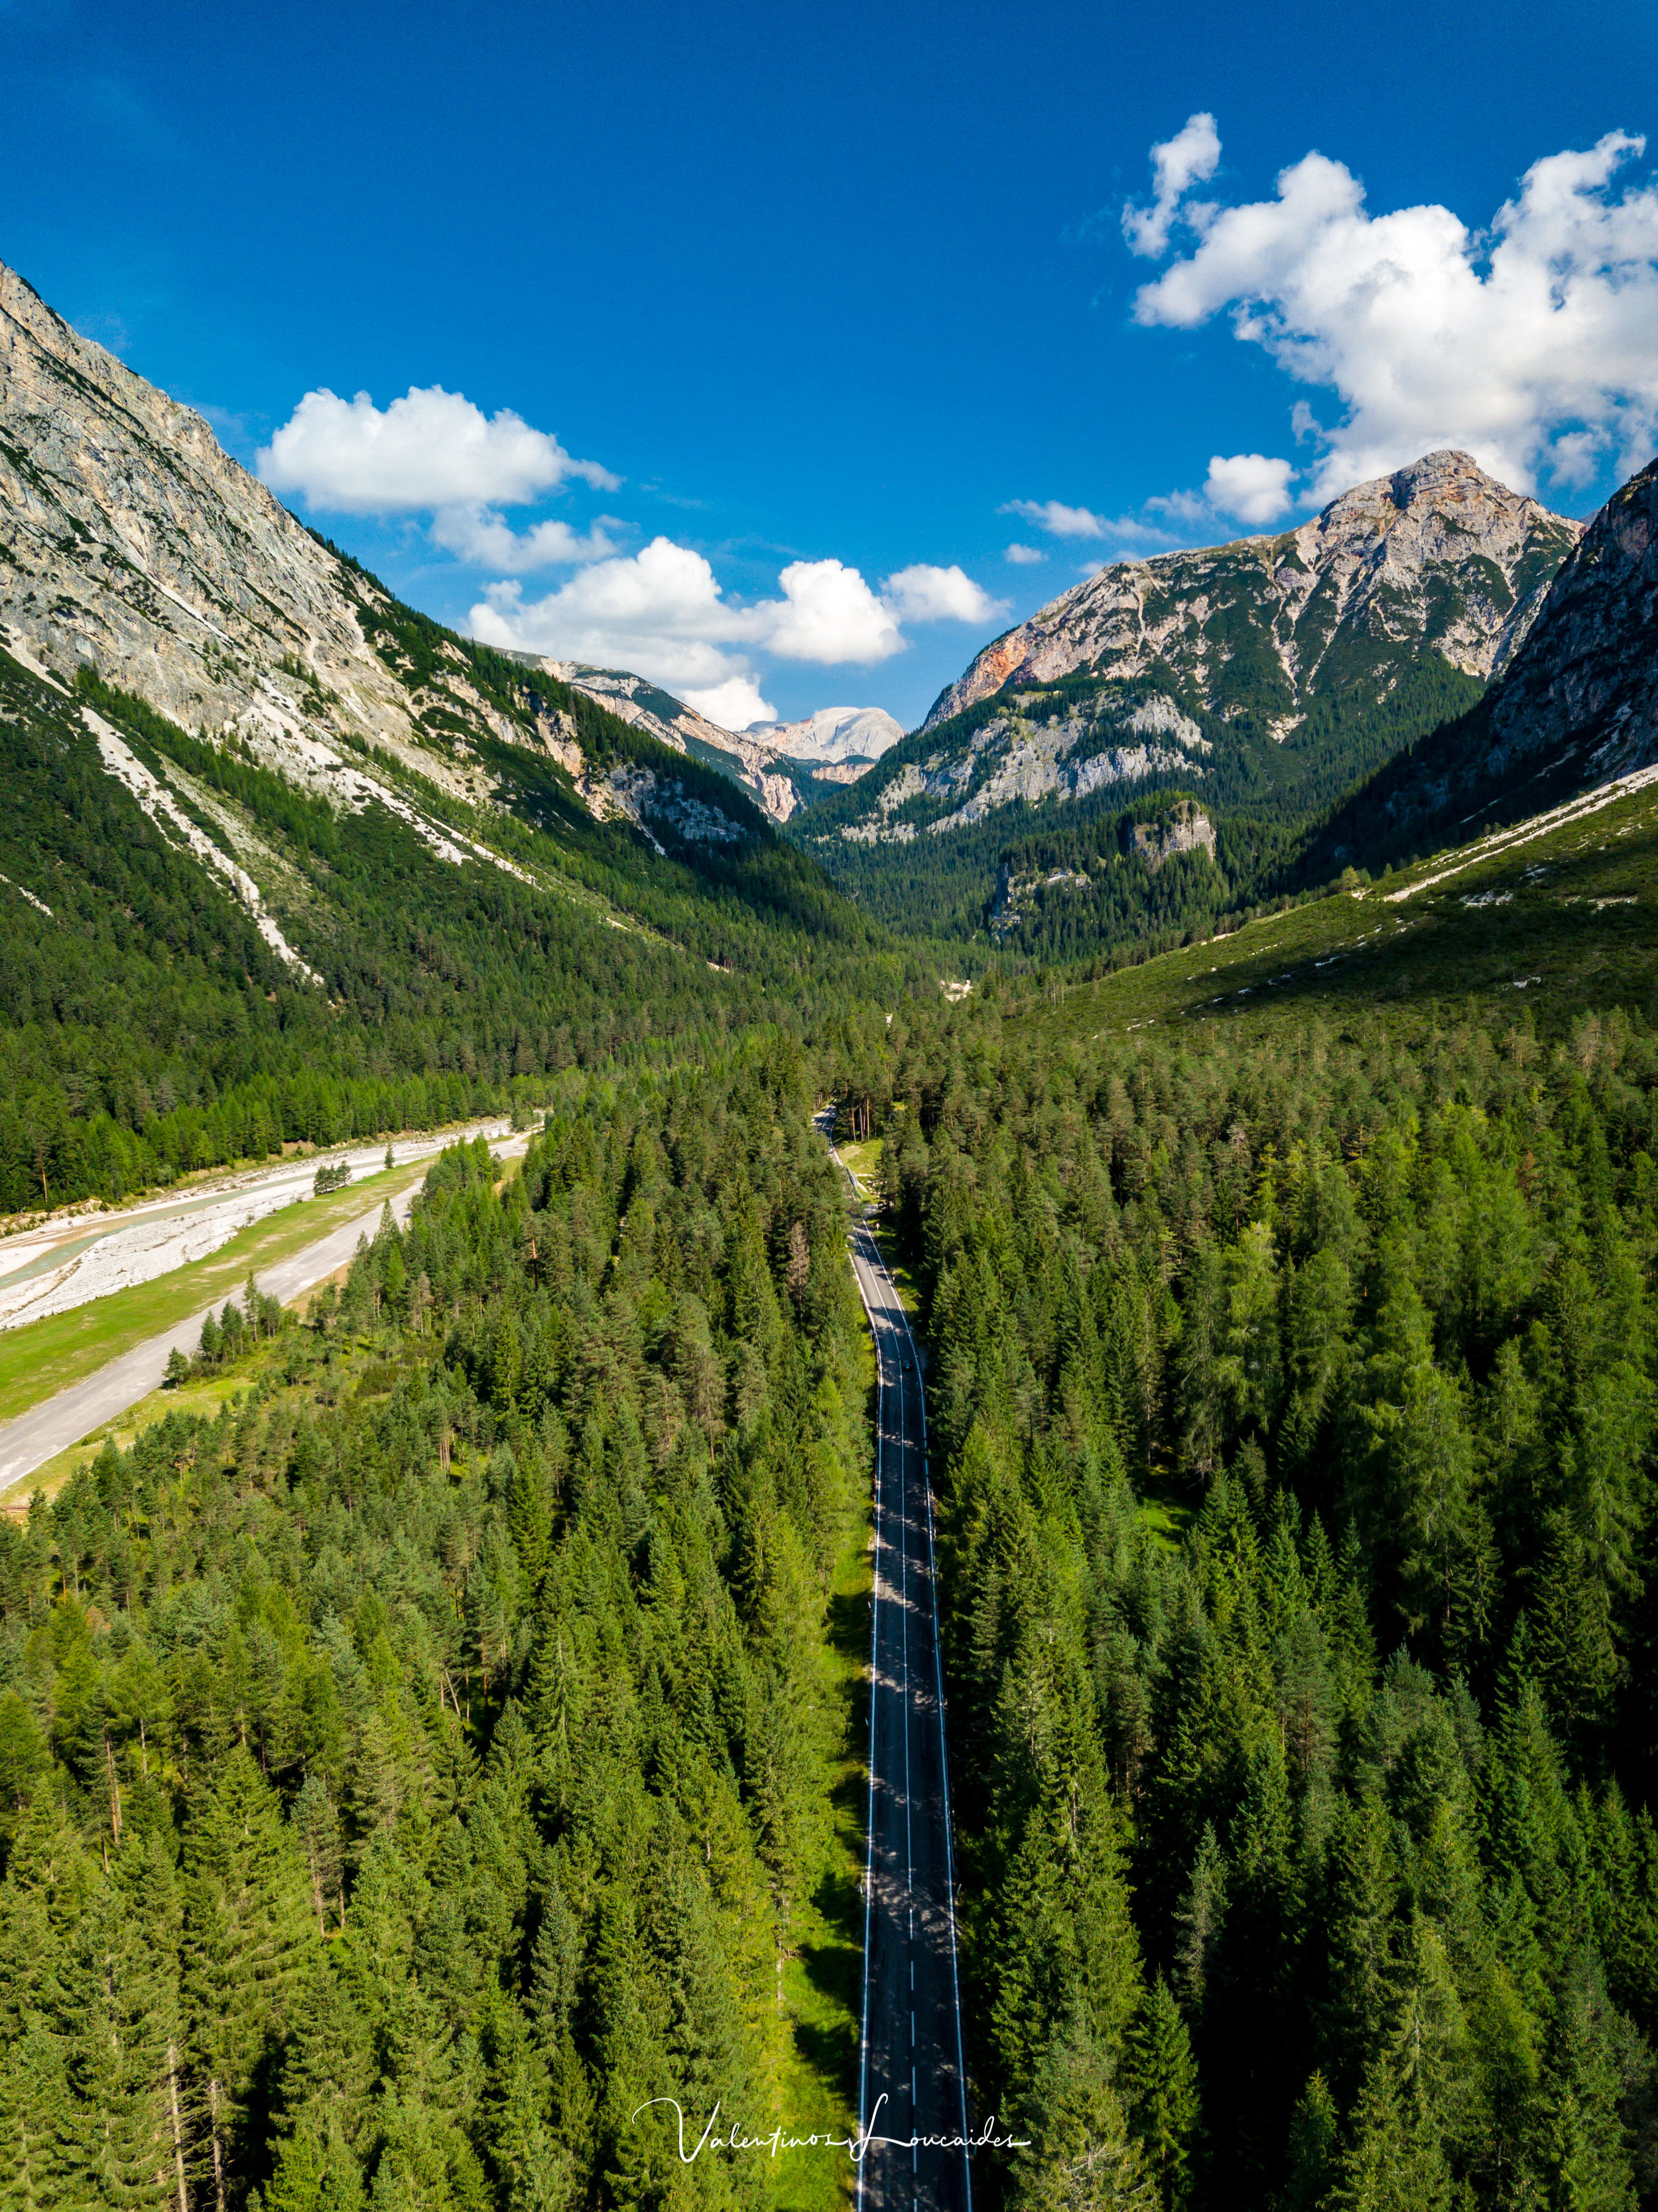
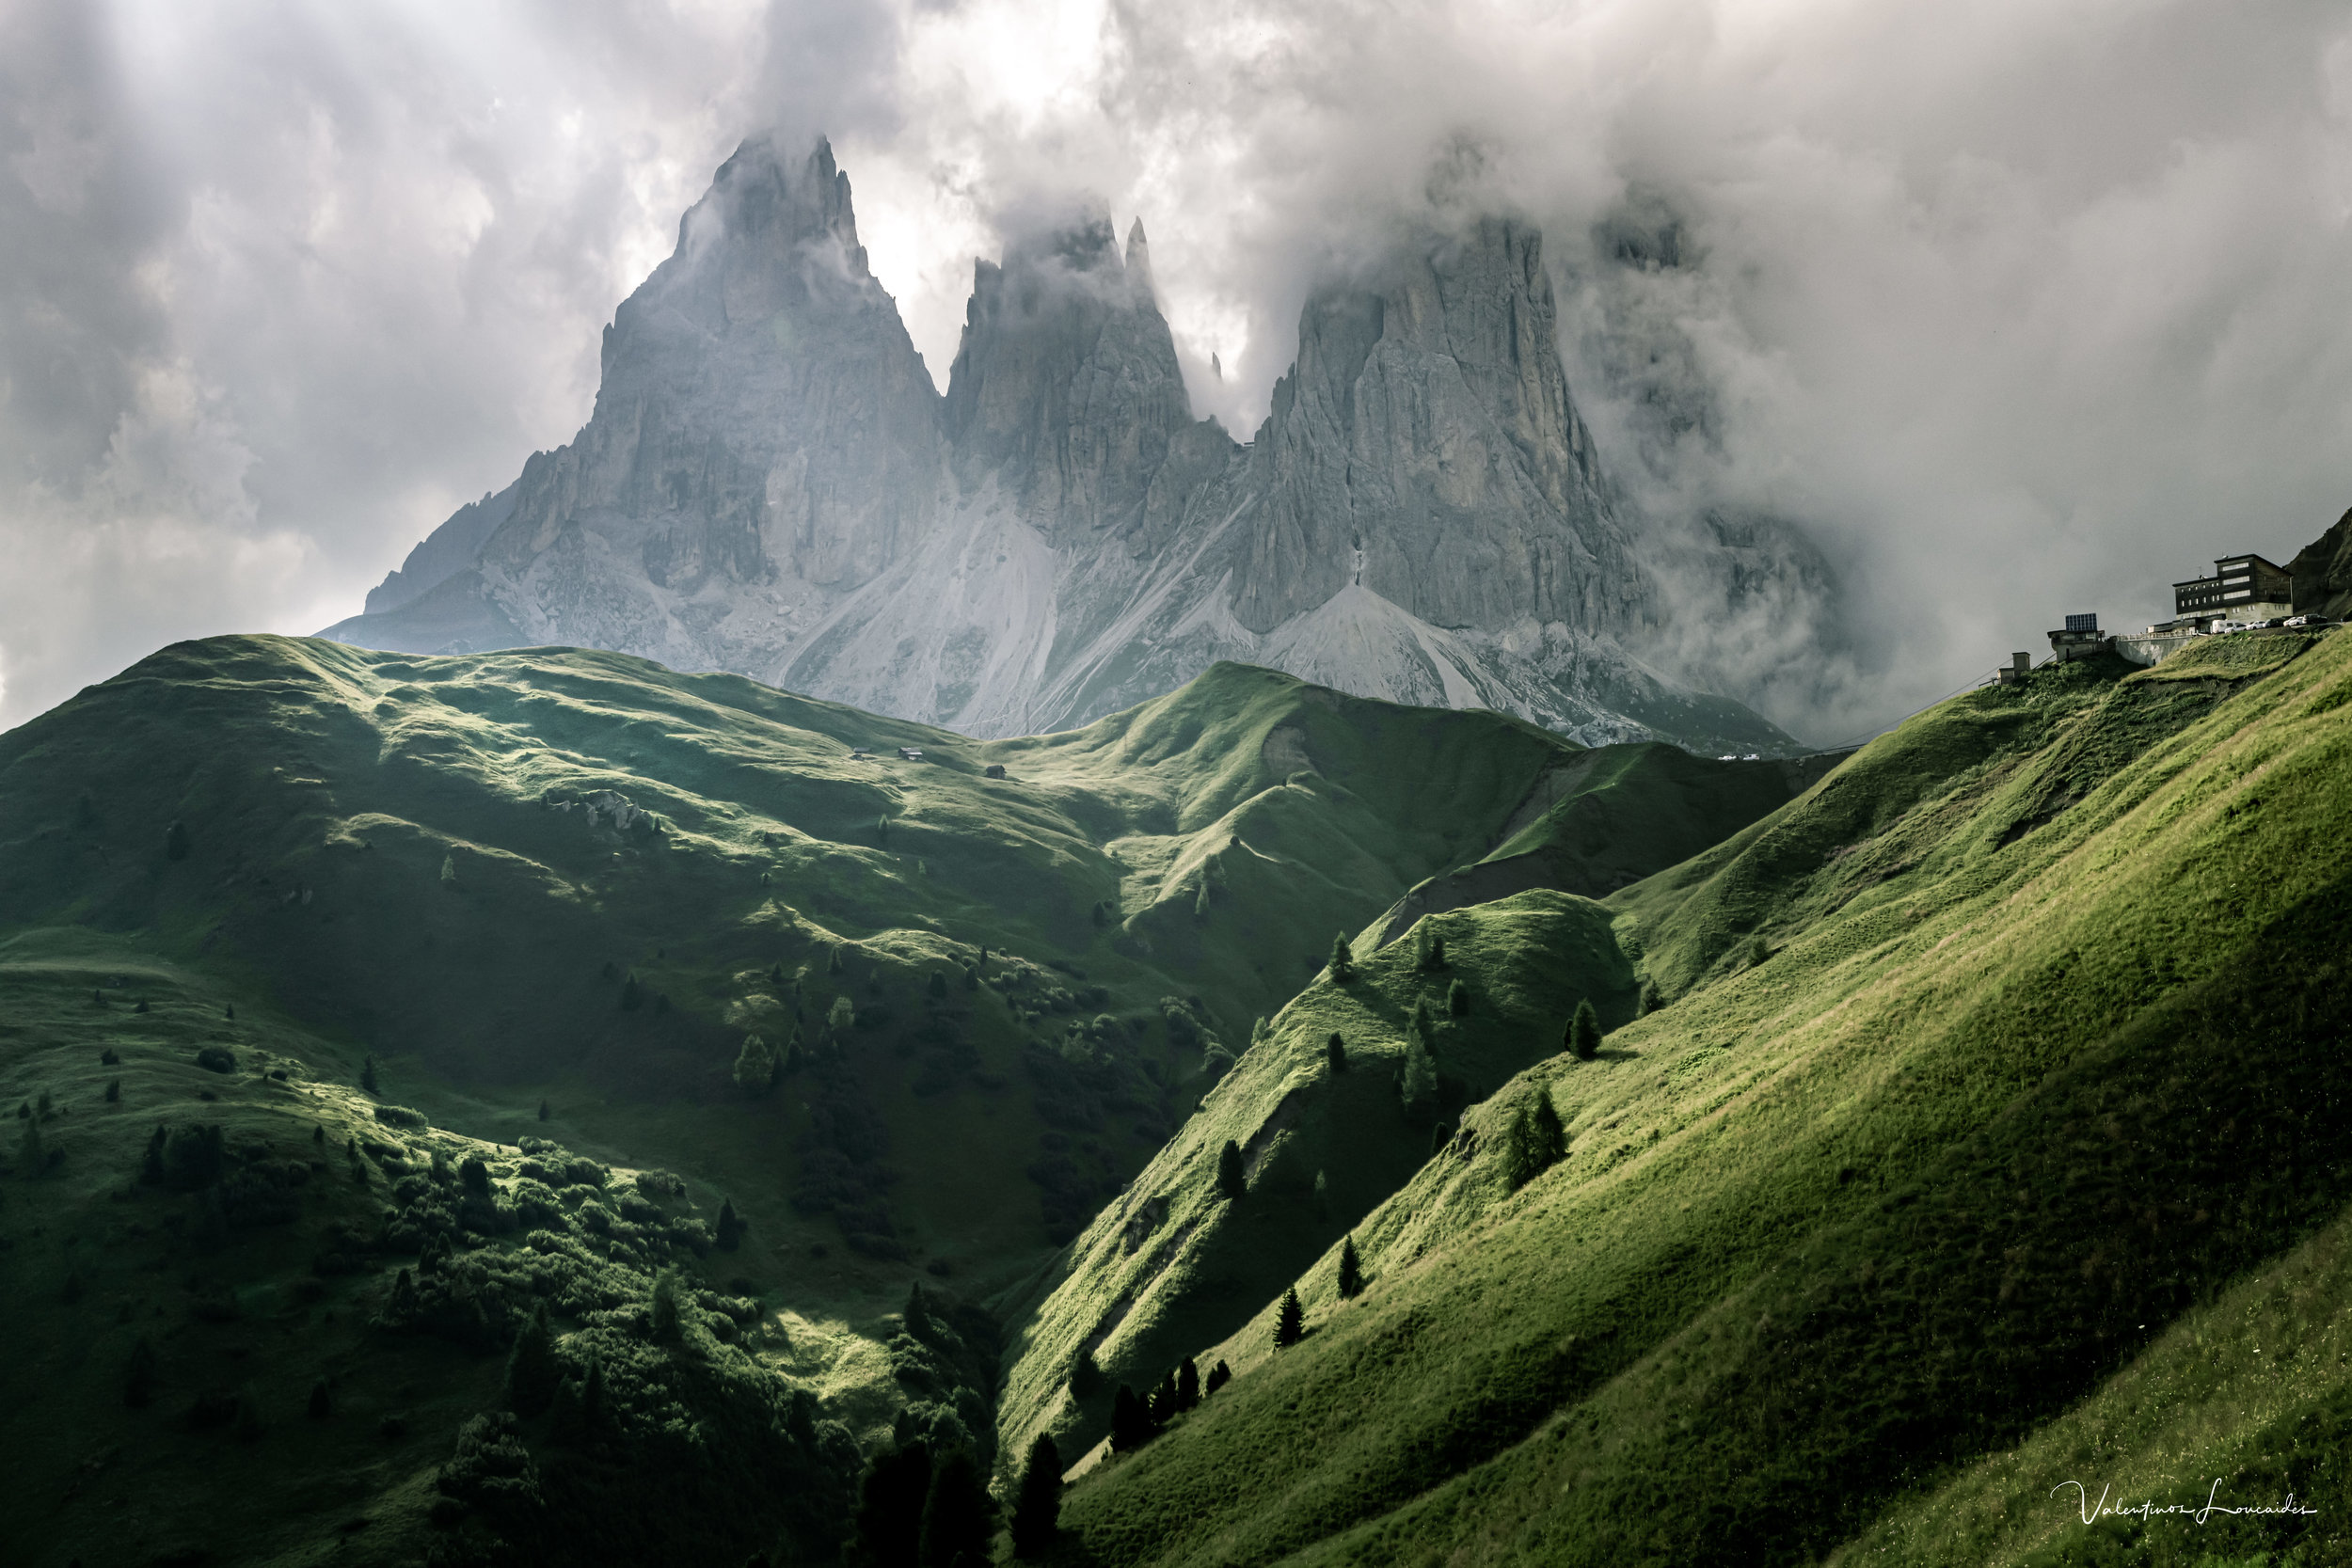
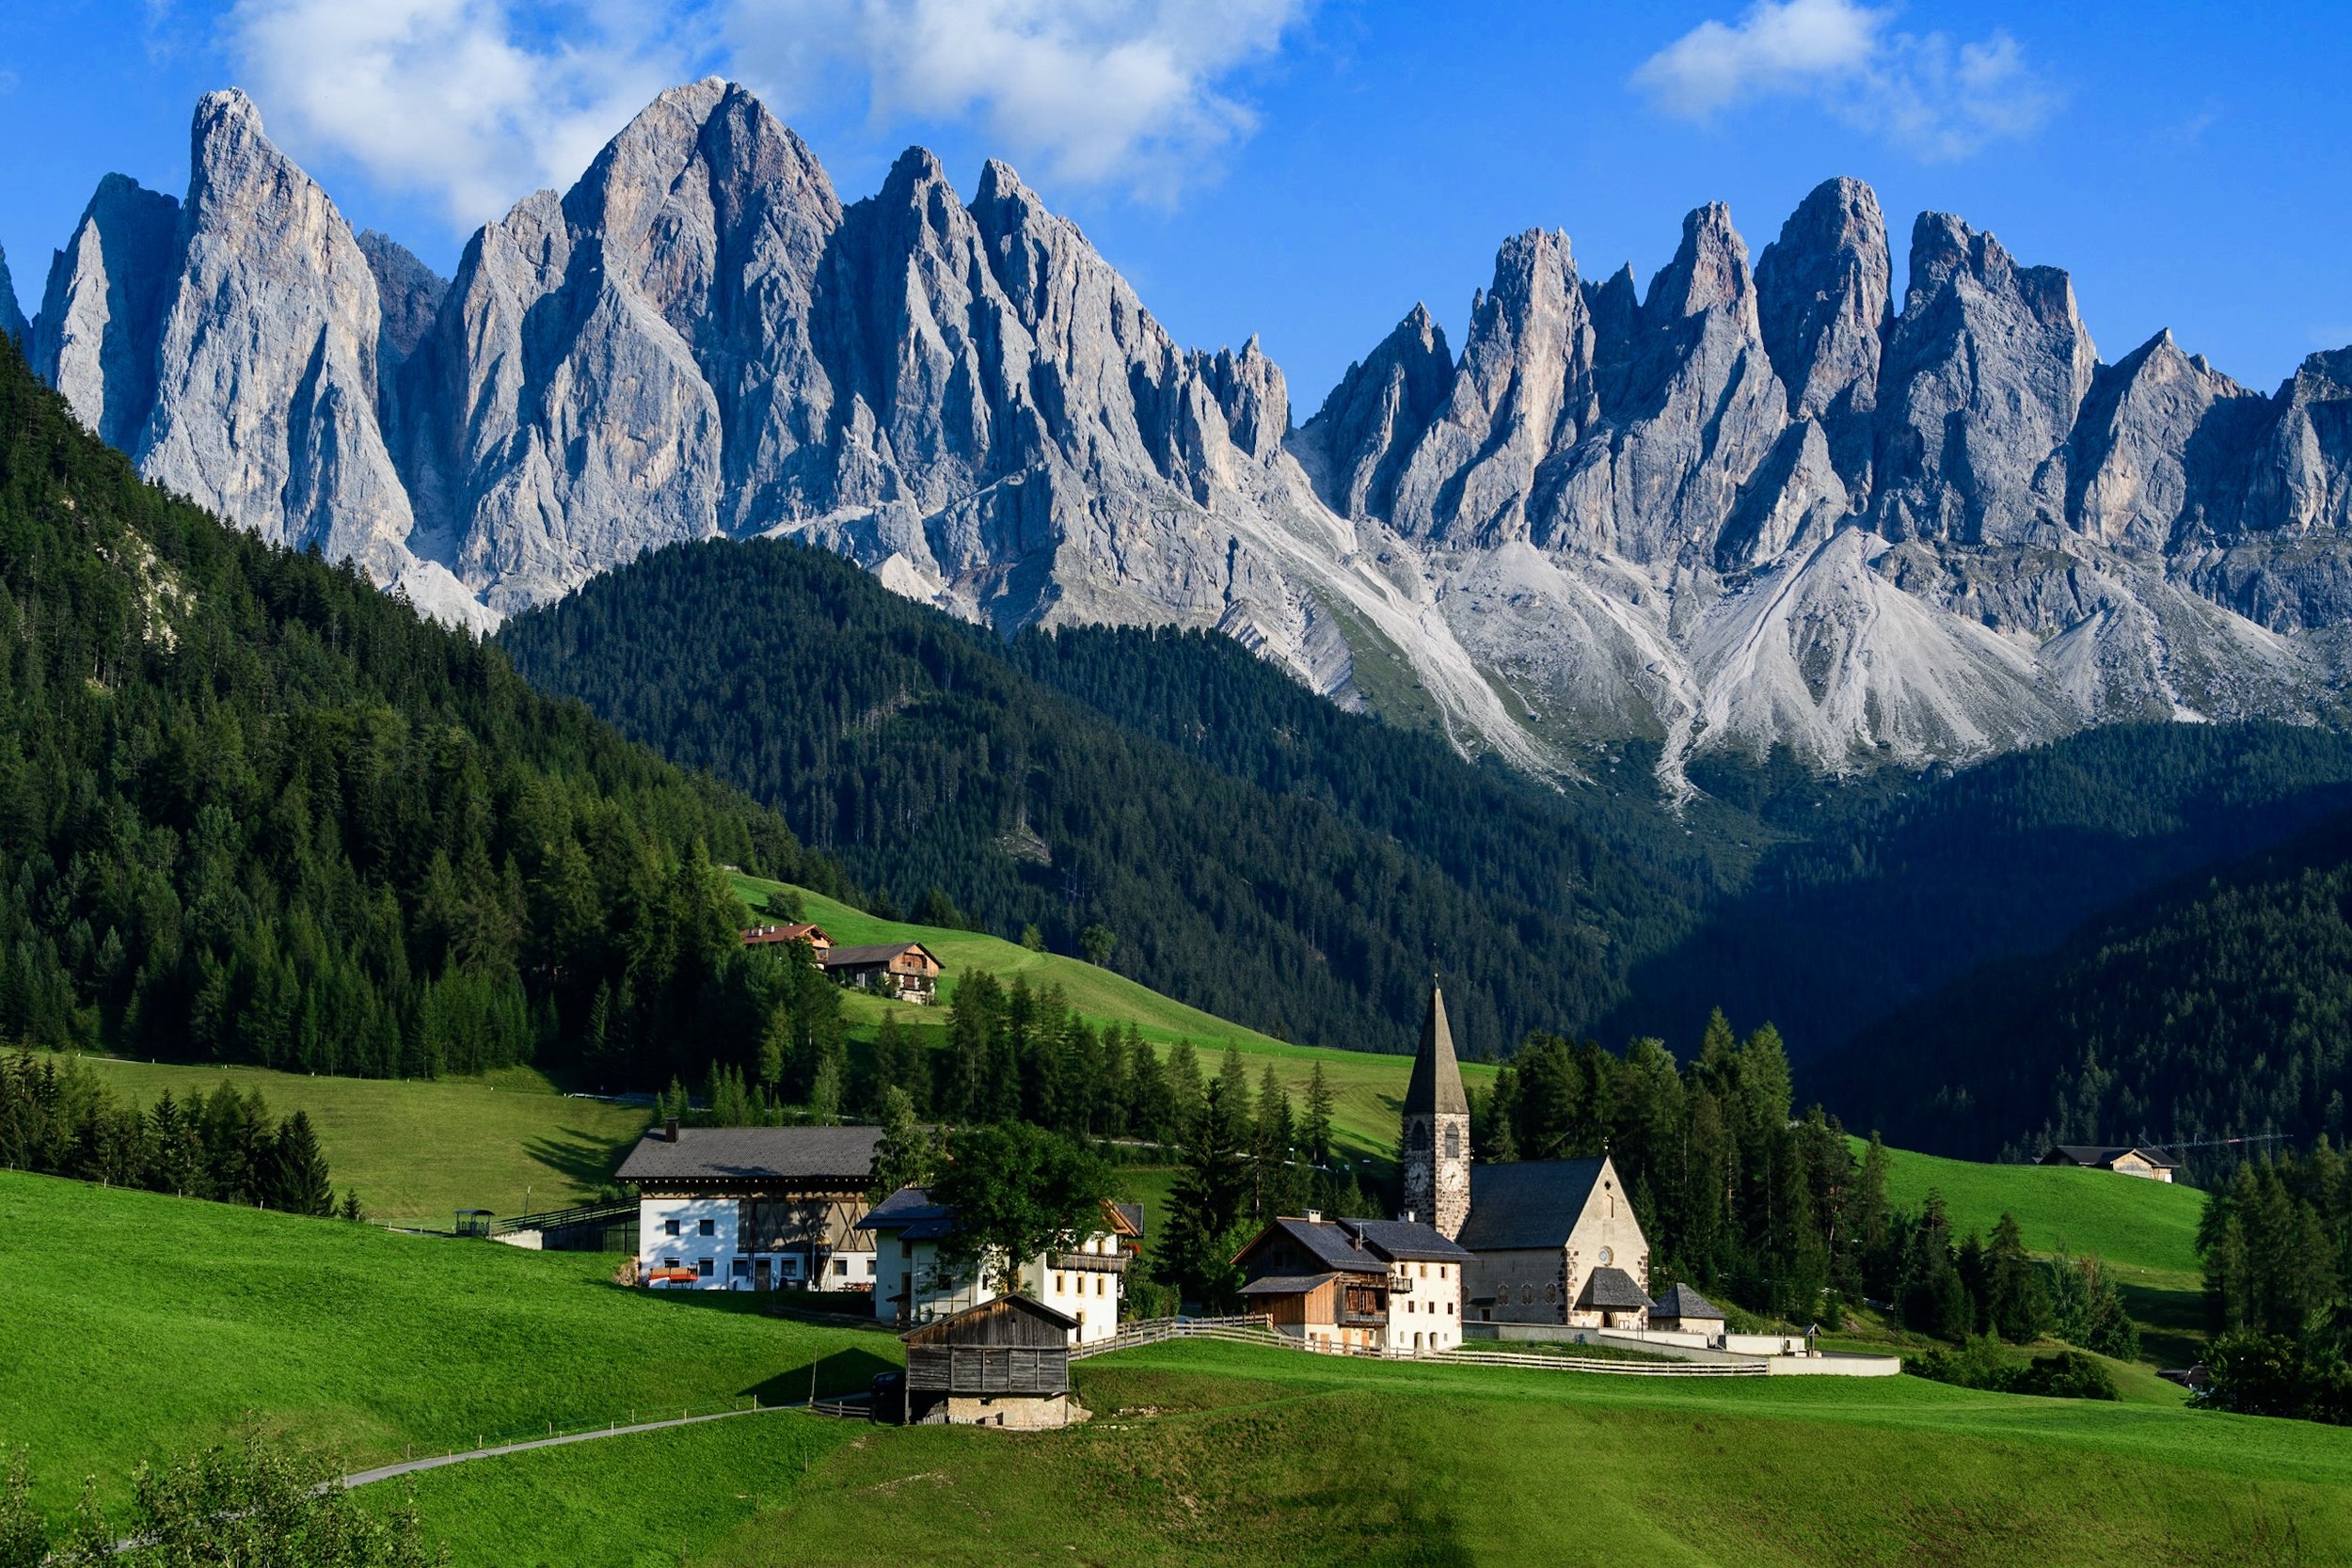
Το καλοκαίρι του 2018, κάναμε με τη σύζυγό μου ένα οδικό ταξίδι στις Ιταλικές Άλπεις, ή αλλιώς Δολομίτες. Ήταν τέλος σχεδόν Αυγούστου και η περίοδος αυτή είναι συνήθως βροχερή στην όλη περιοχή. Η μέρα από το πρωί έδειχνε αρκετά καλή αν και όλες οι εφαρμογές πρόγνωσης καιρού μας έδειχναν βροχή. Προετοιμαστήκαμε λοιπόν κατάλληλα για βροχή. Το πρόγραμμά μας άρχισε από νωρίς το πρωί με στόχο να καταλήξουμε στην περιοχή, Lago di Braies, το απόγευμα για το ηλιοβασίλεμα.
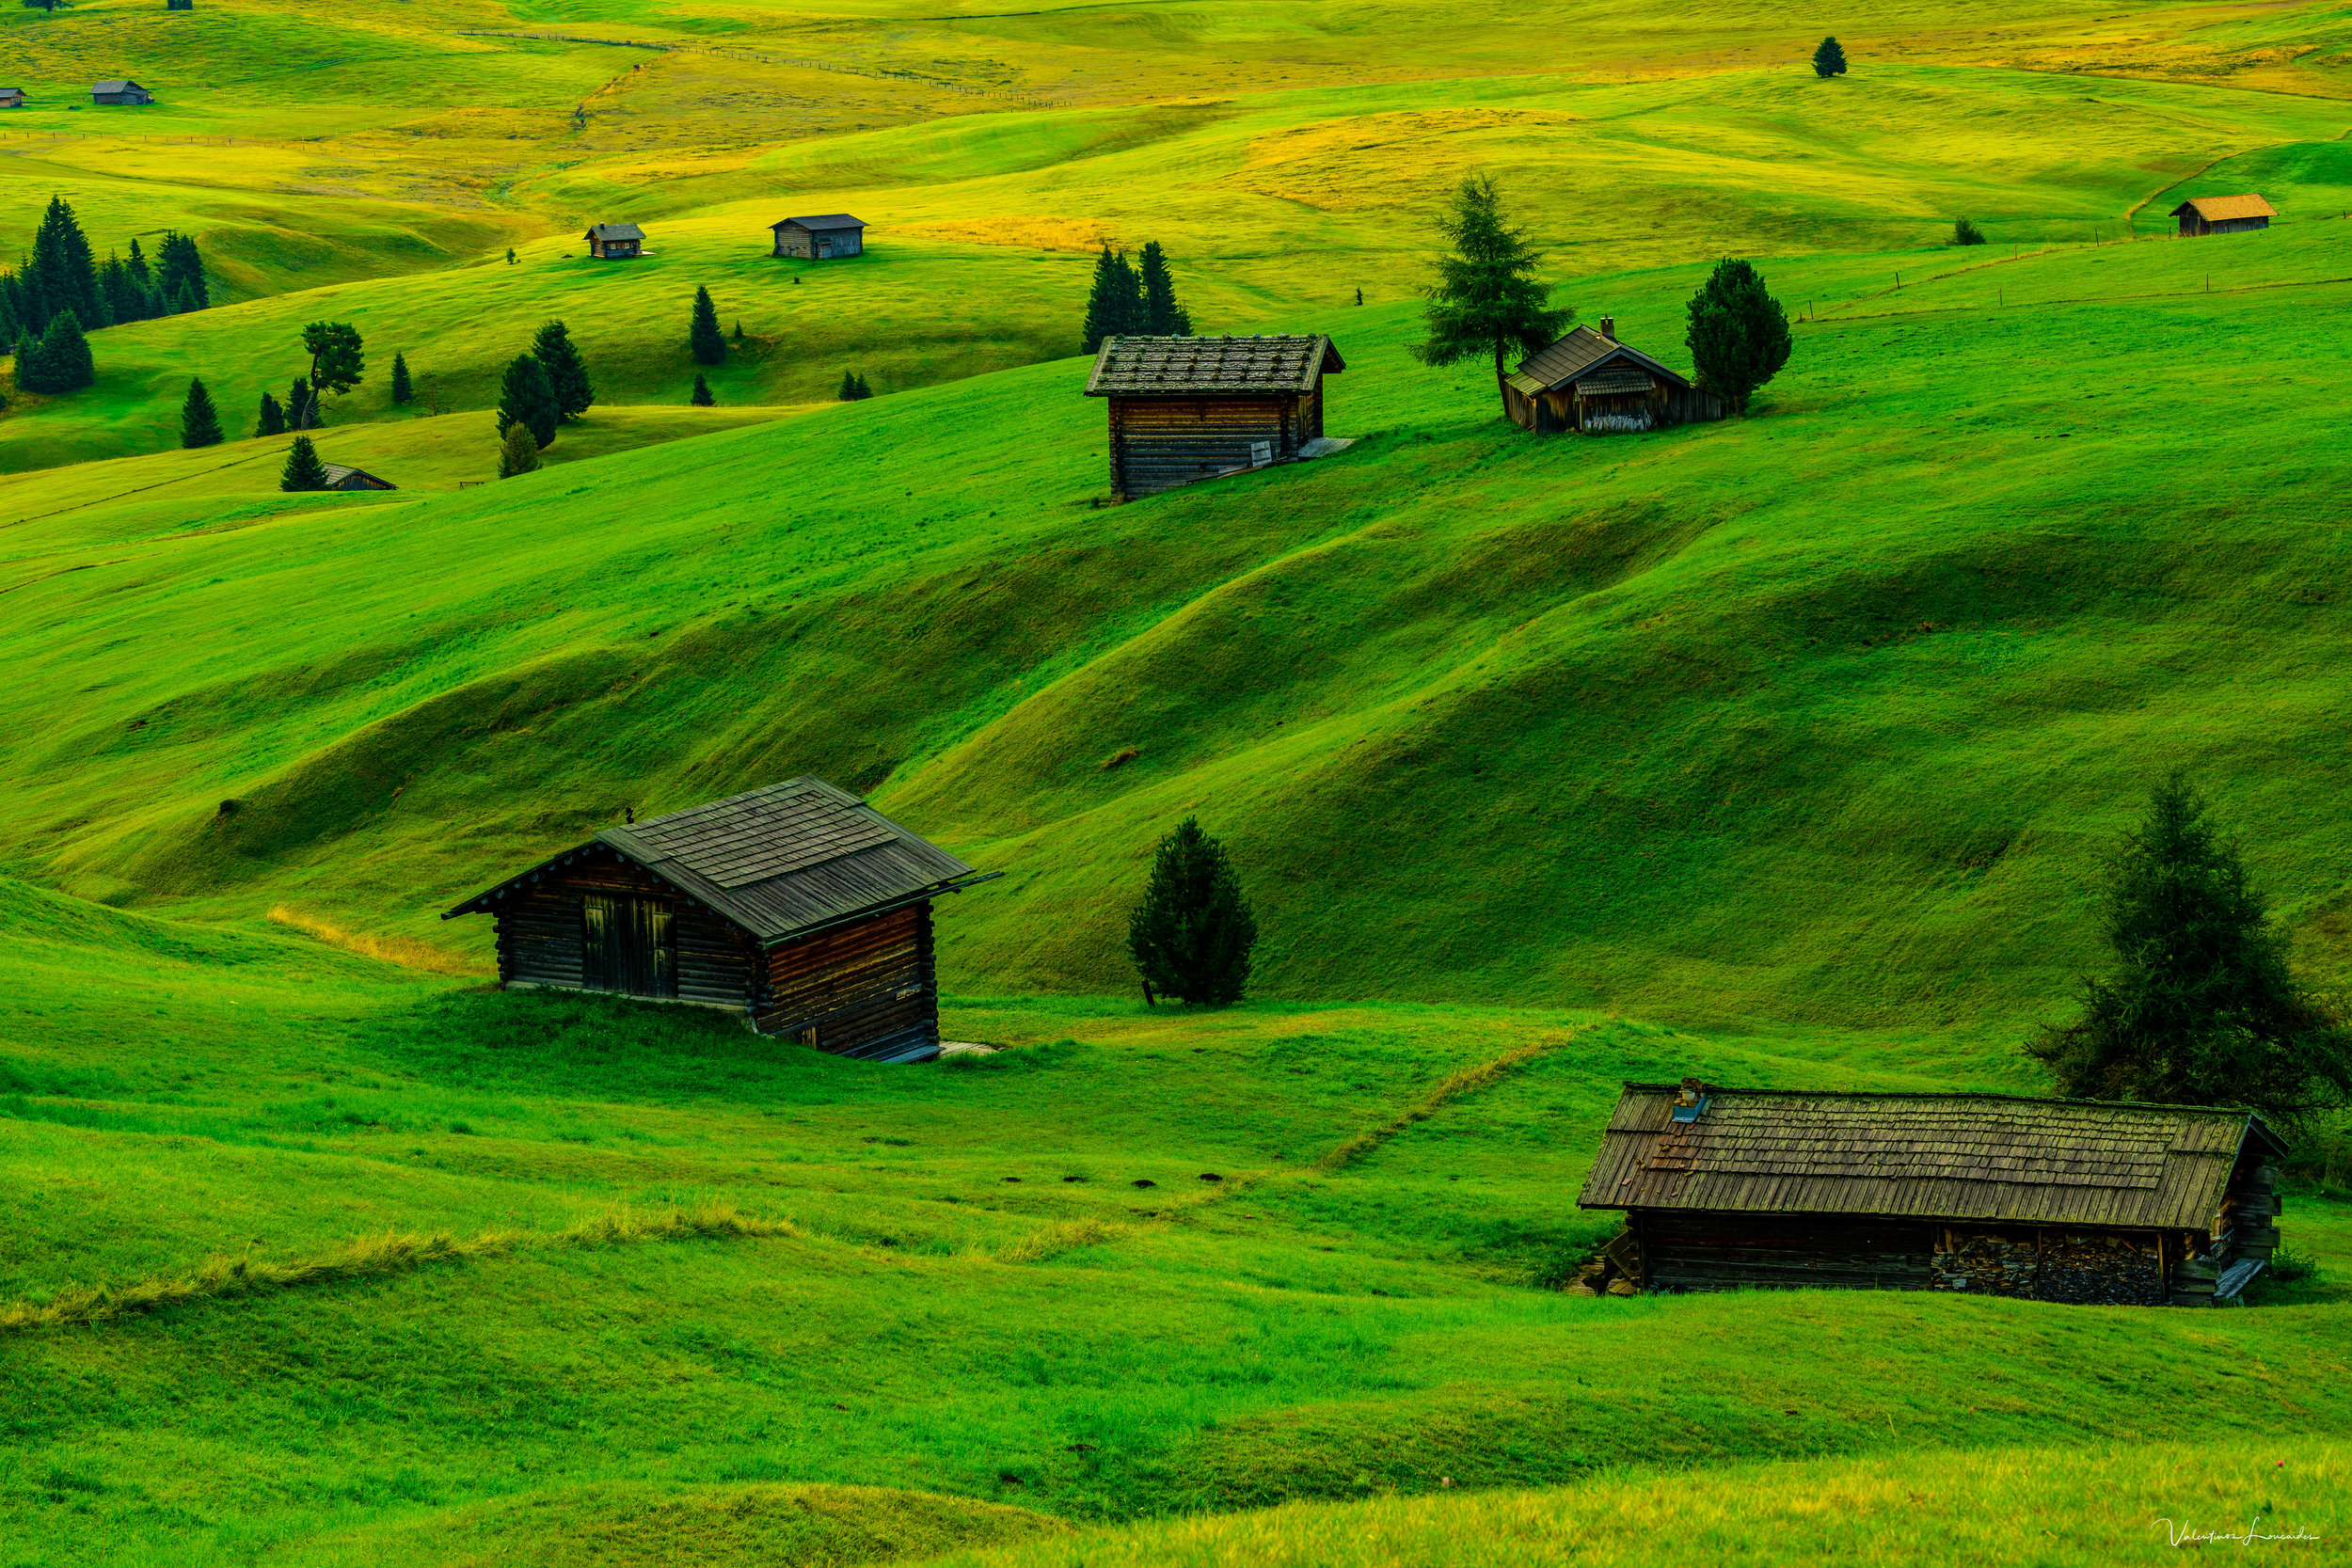
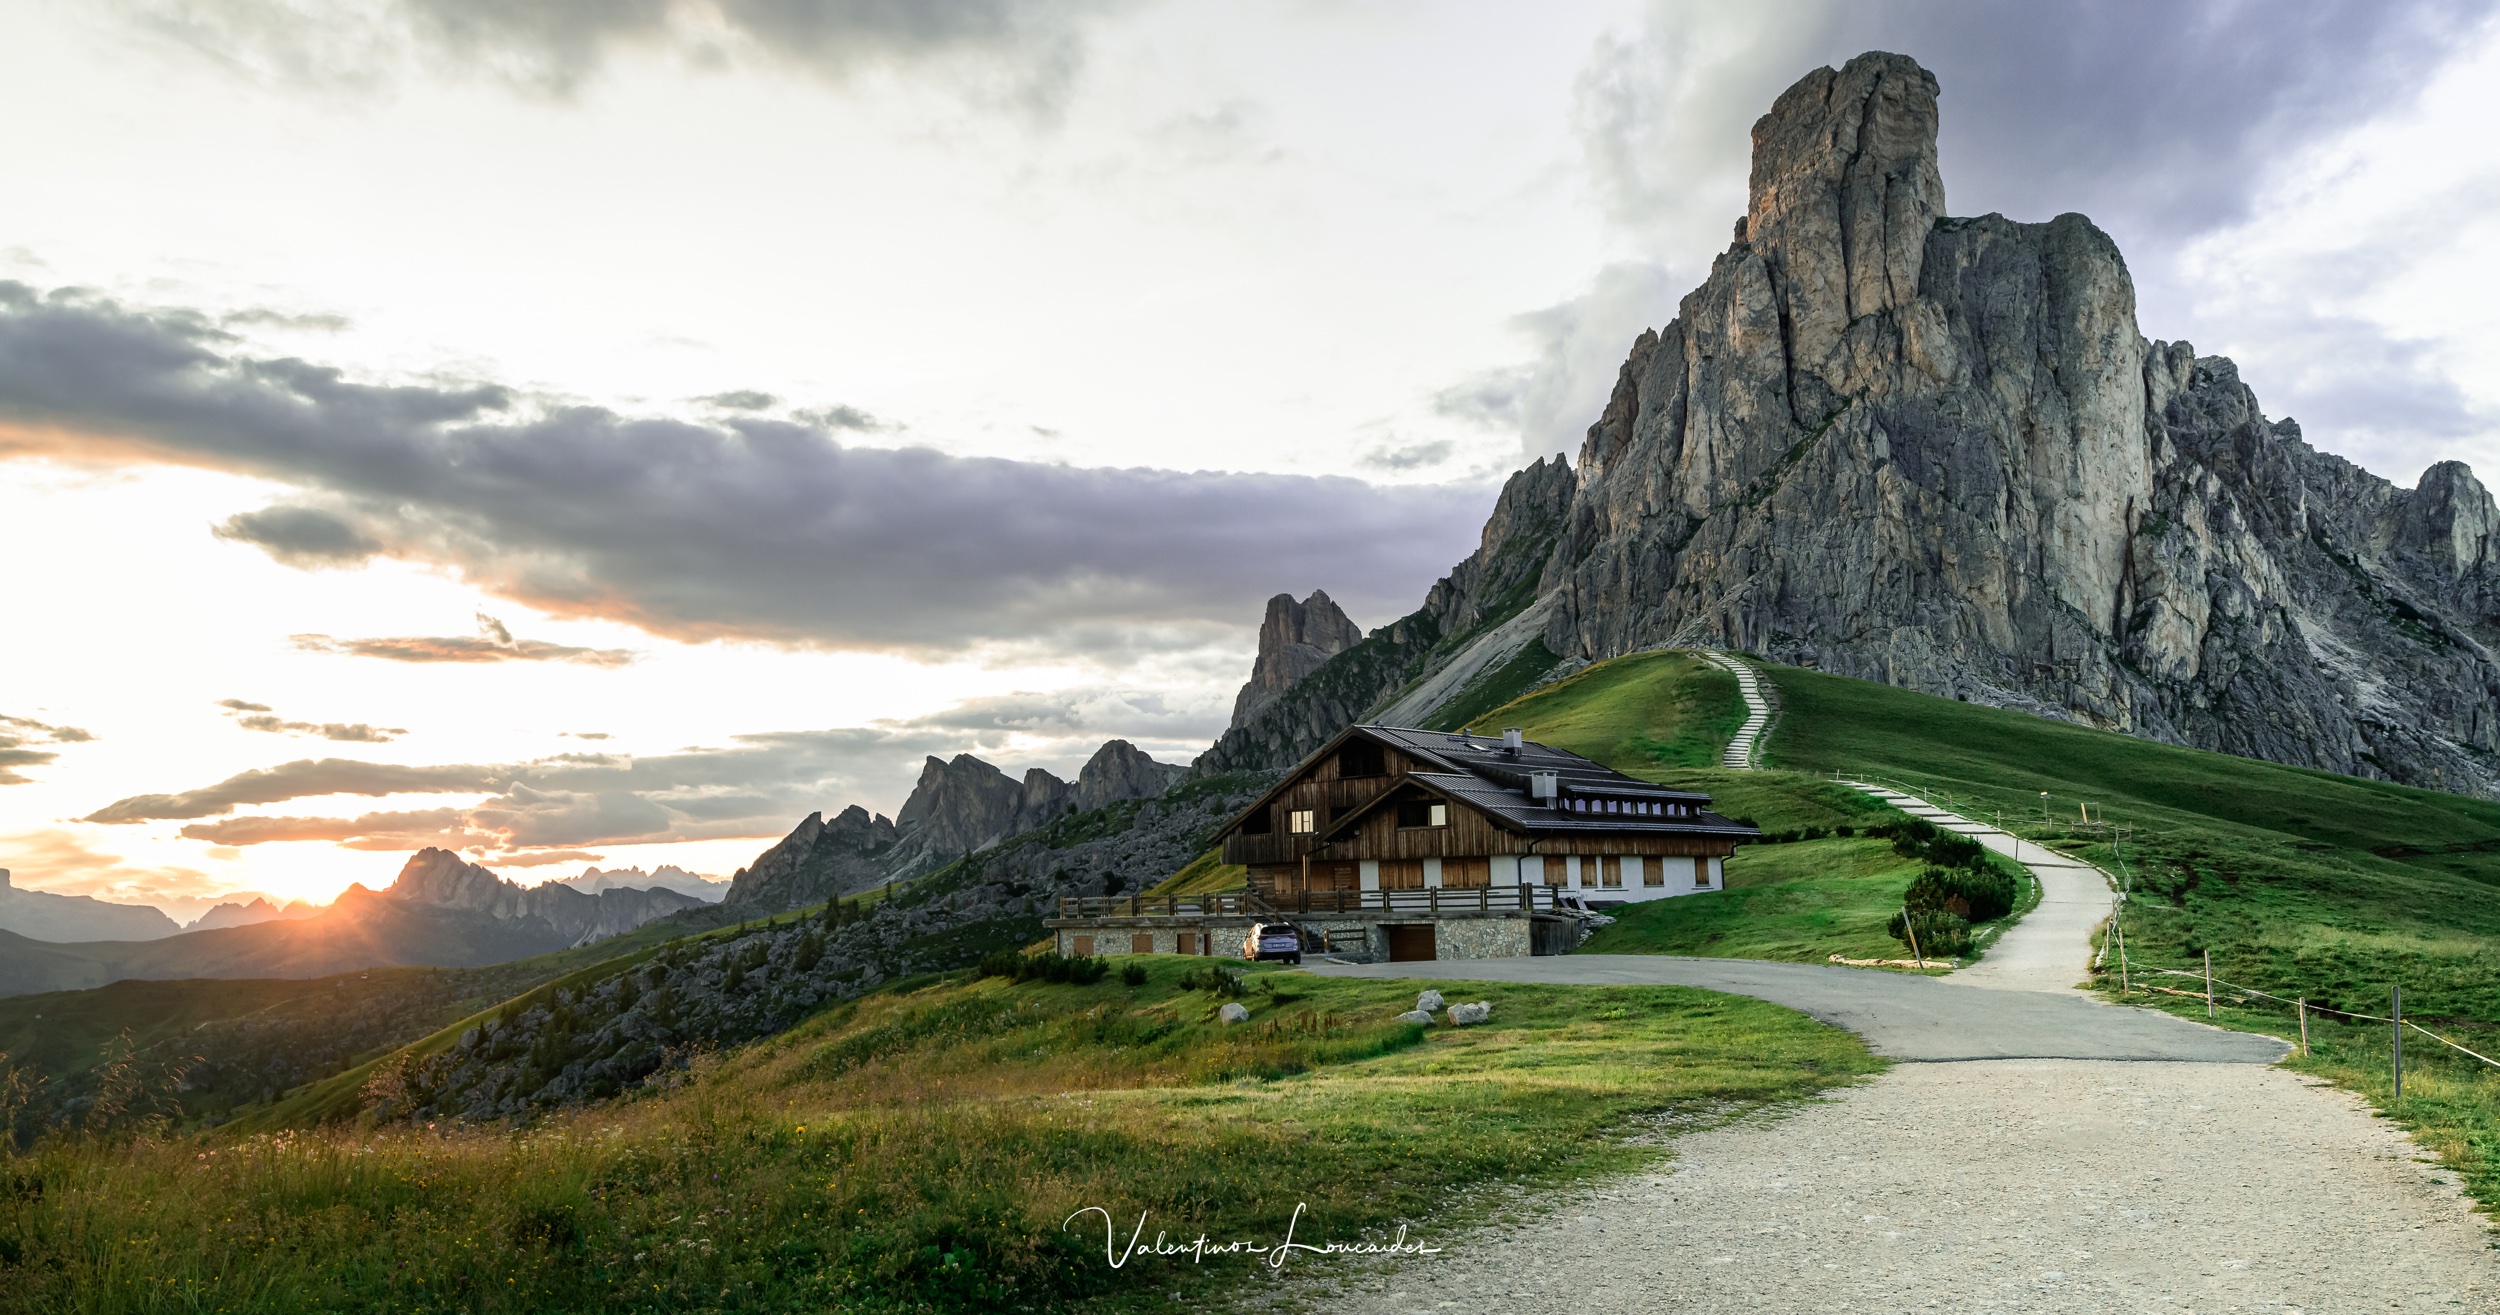
Περάσαμε λοιπόν από κάτι μαγικά δάση με έλατα όπου και ήταν αδύνατο να μην σταματήσουμε, ώντας Κύπριοι και διψασμένοι για φυσικά τοπία.
Περπατήσαμε για λίγο στο δάσος και χαζέψαμε τη φυσική ομορφιά του τοπίου.
Ο καιρός φαινόταν καταπληκτικός και η στάση διαρκούσε όλο και περισσότερο. Το τοπίο ήταν μαγικό, όπου και να κοιτούσες.
Φωτογραφίσαμε από ψηλά αλλά και από πολύ κοντά!
Συνεχίσαμε λοιπόν τη διαδρομή και κάναμε τη δεύτερη μας στάση σε μια λίμνη, που ήταν κυριολεκτικά στην άκρη του δρόμου. Γαλάζια νερά και υδρόβια πουλιά να δίνουν την παρουσία τους και να ταράζουν τα νερά με τις υπέροχες ανακλάσεις του αλπικού δάσους που περιέβαλλε τη λίμνη.
Δεν μπορούσαμε φυσικά να μην φωτογραφίσουμε και πάλι το σημείο αυτό.
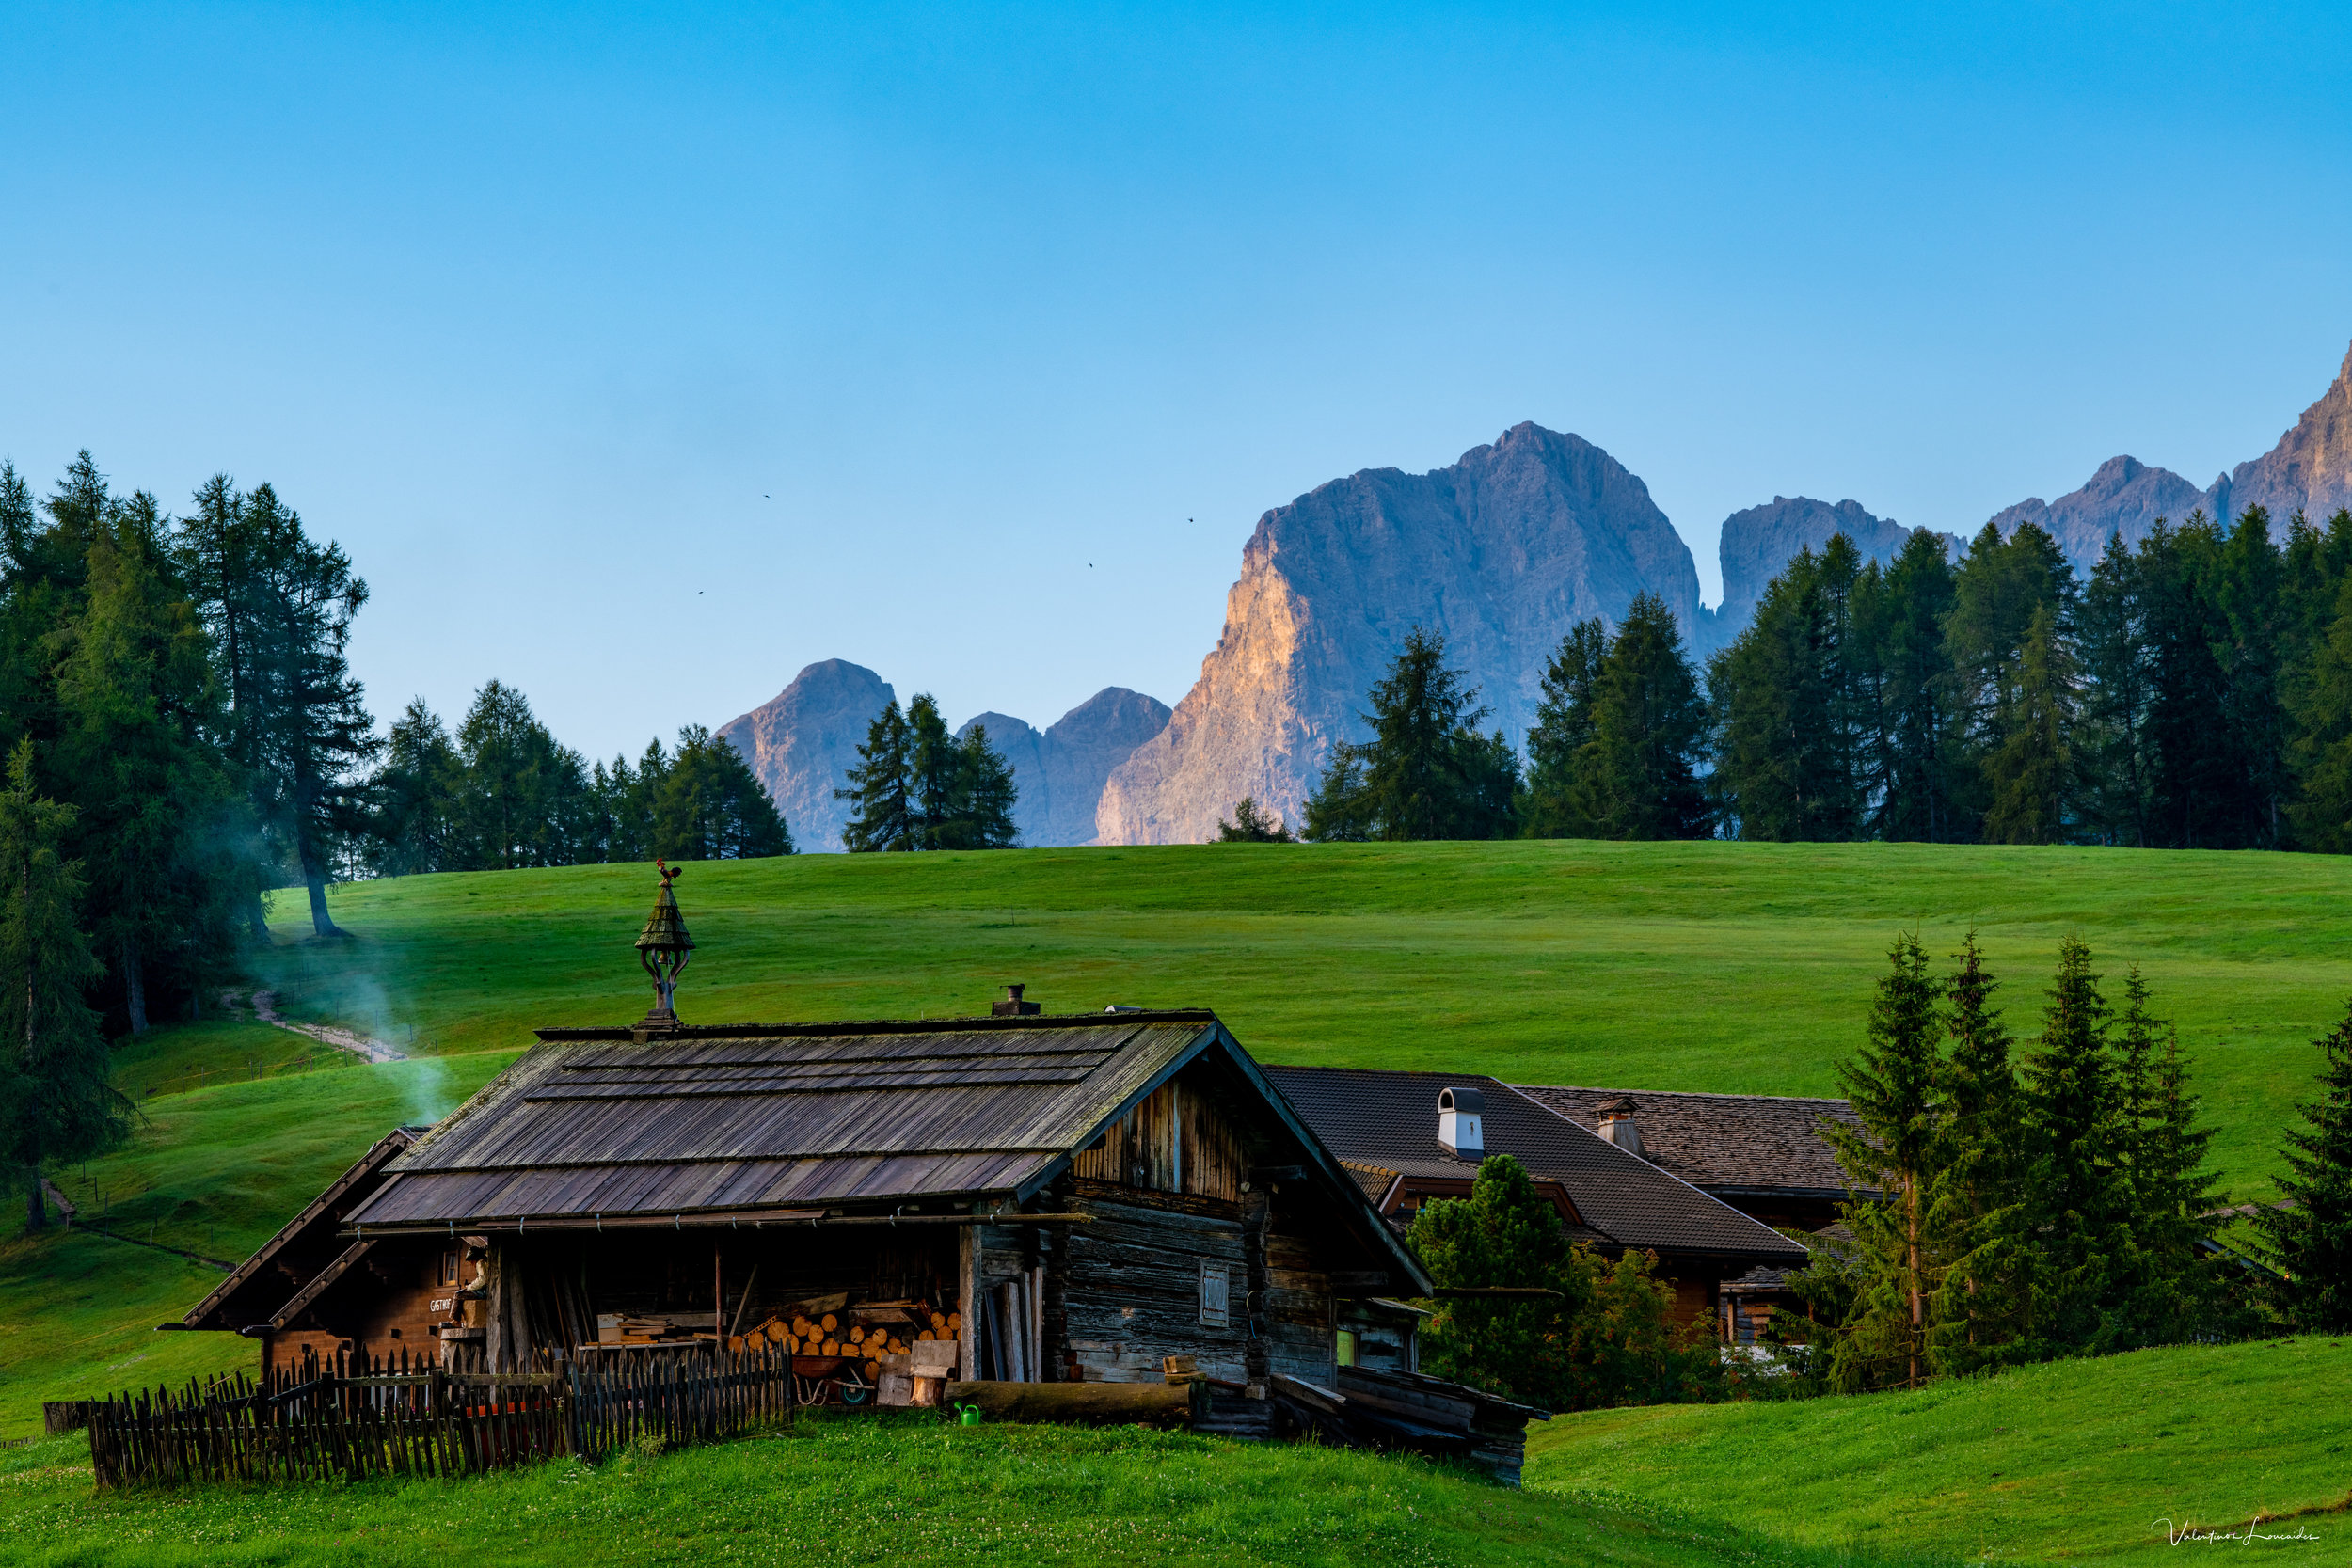
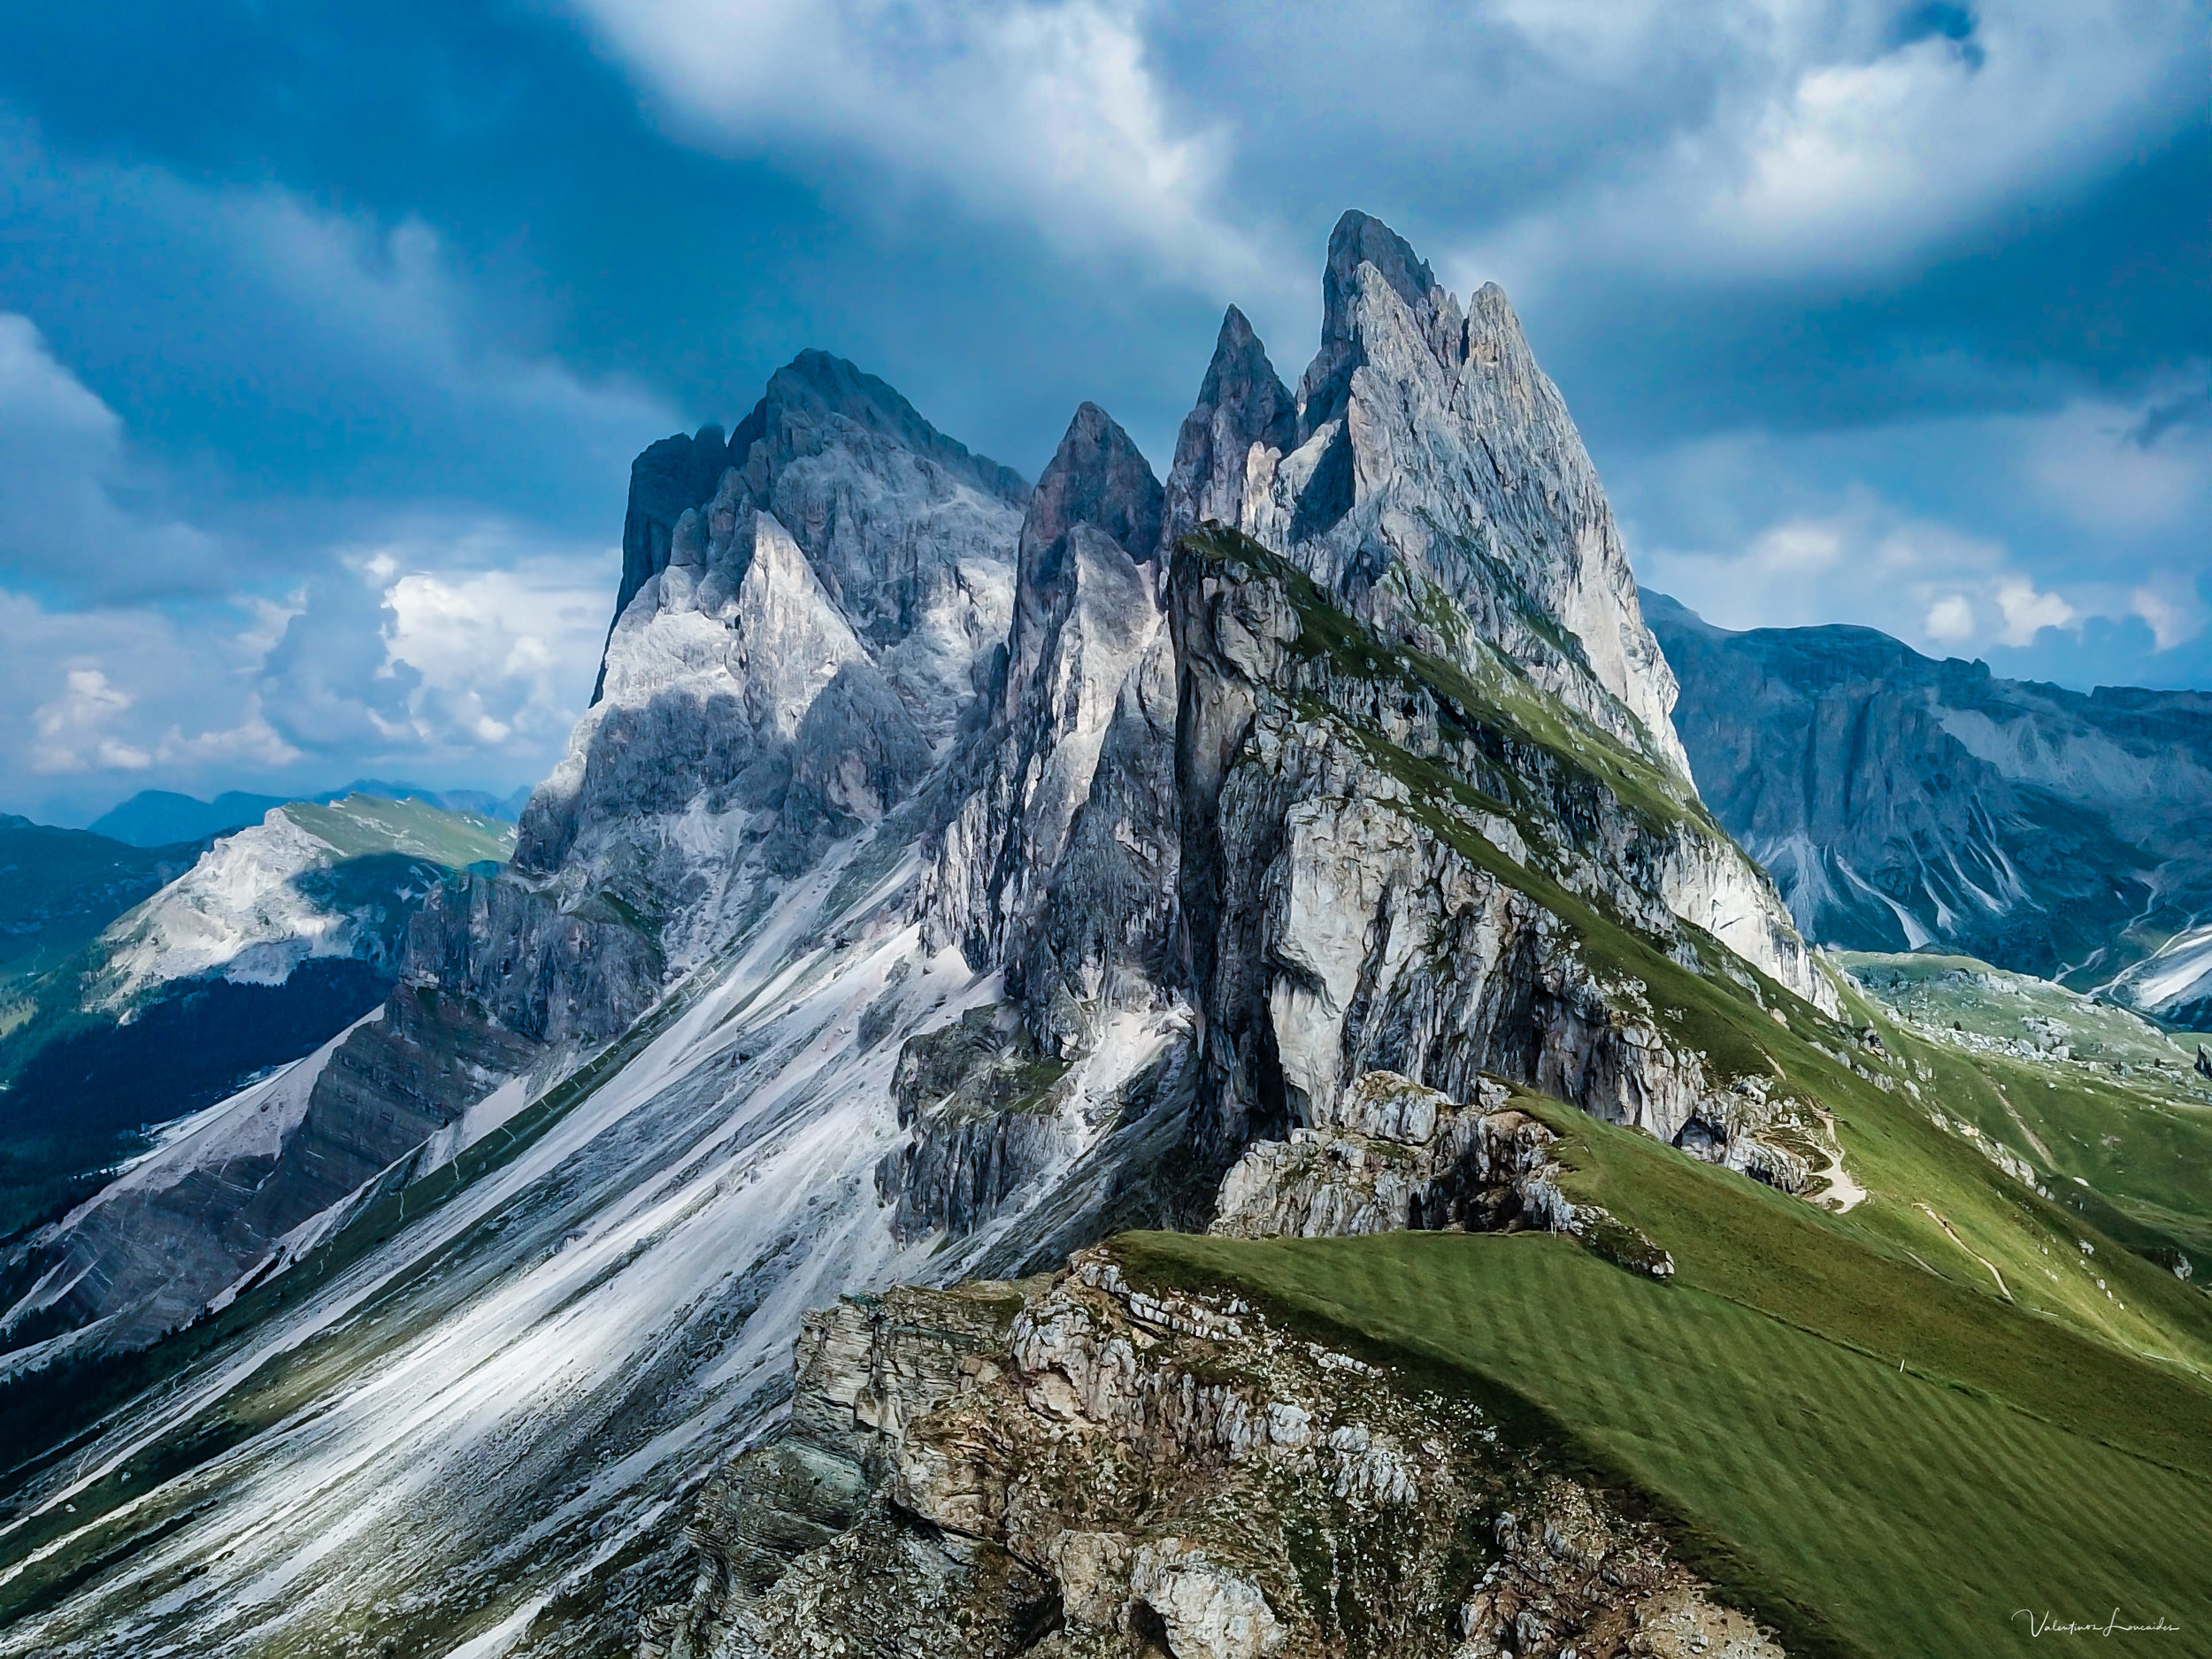
Από εδώ συνεχίσαμε τη διαδρομή μας στο μαγευτικό τοπίο. Έμοιαζε σαν σκηνικό βγαλμένο από παραμύθι. Το αλπικό δάσος να σε περιβάλλει και οι επιβλητικές κορυφές των βουνών να ξεπροβάλλουν από κάθε γωνία!
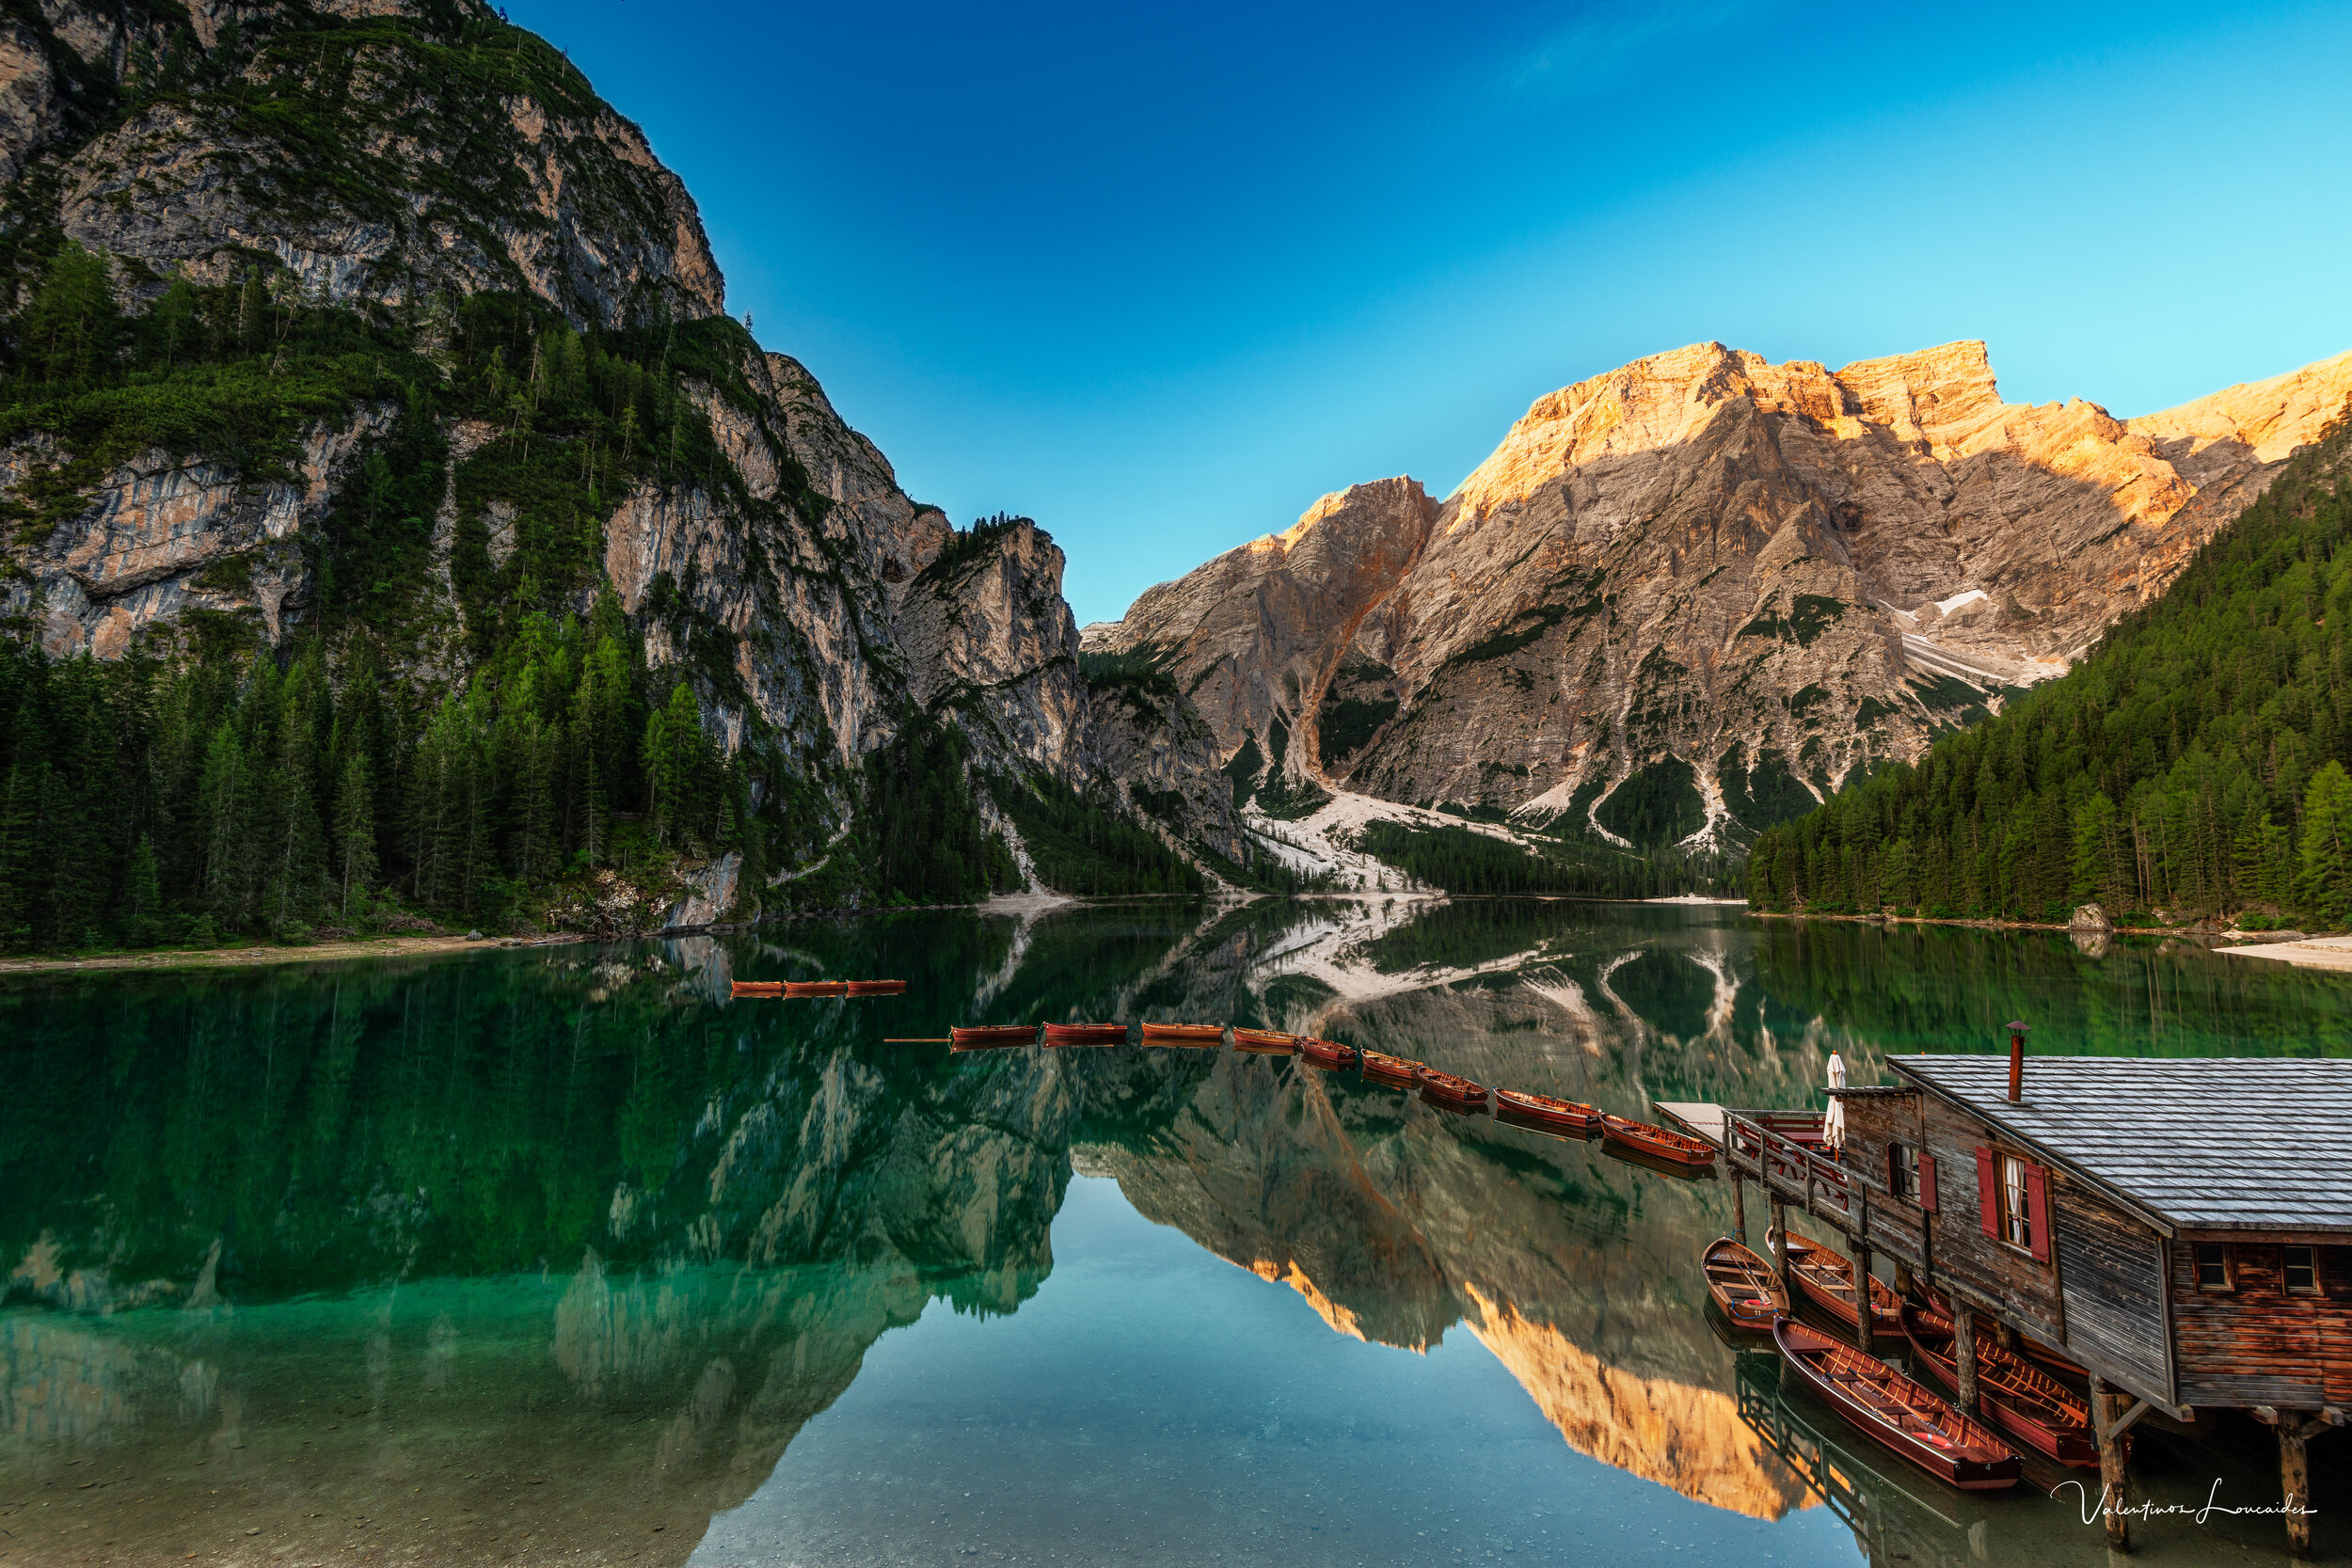
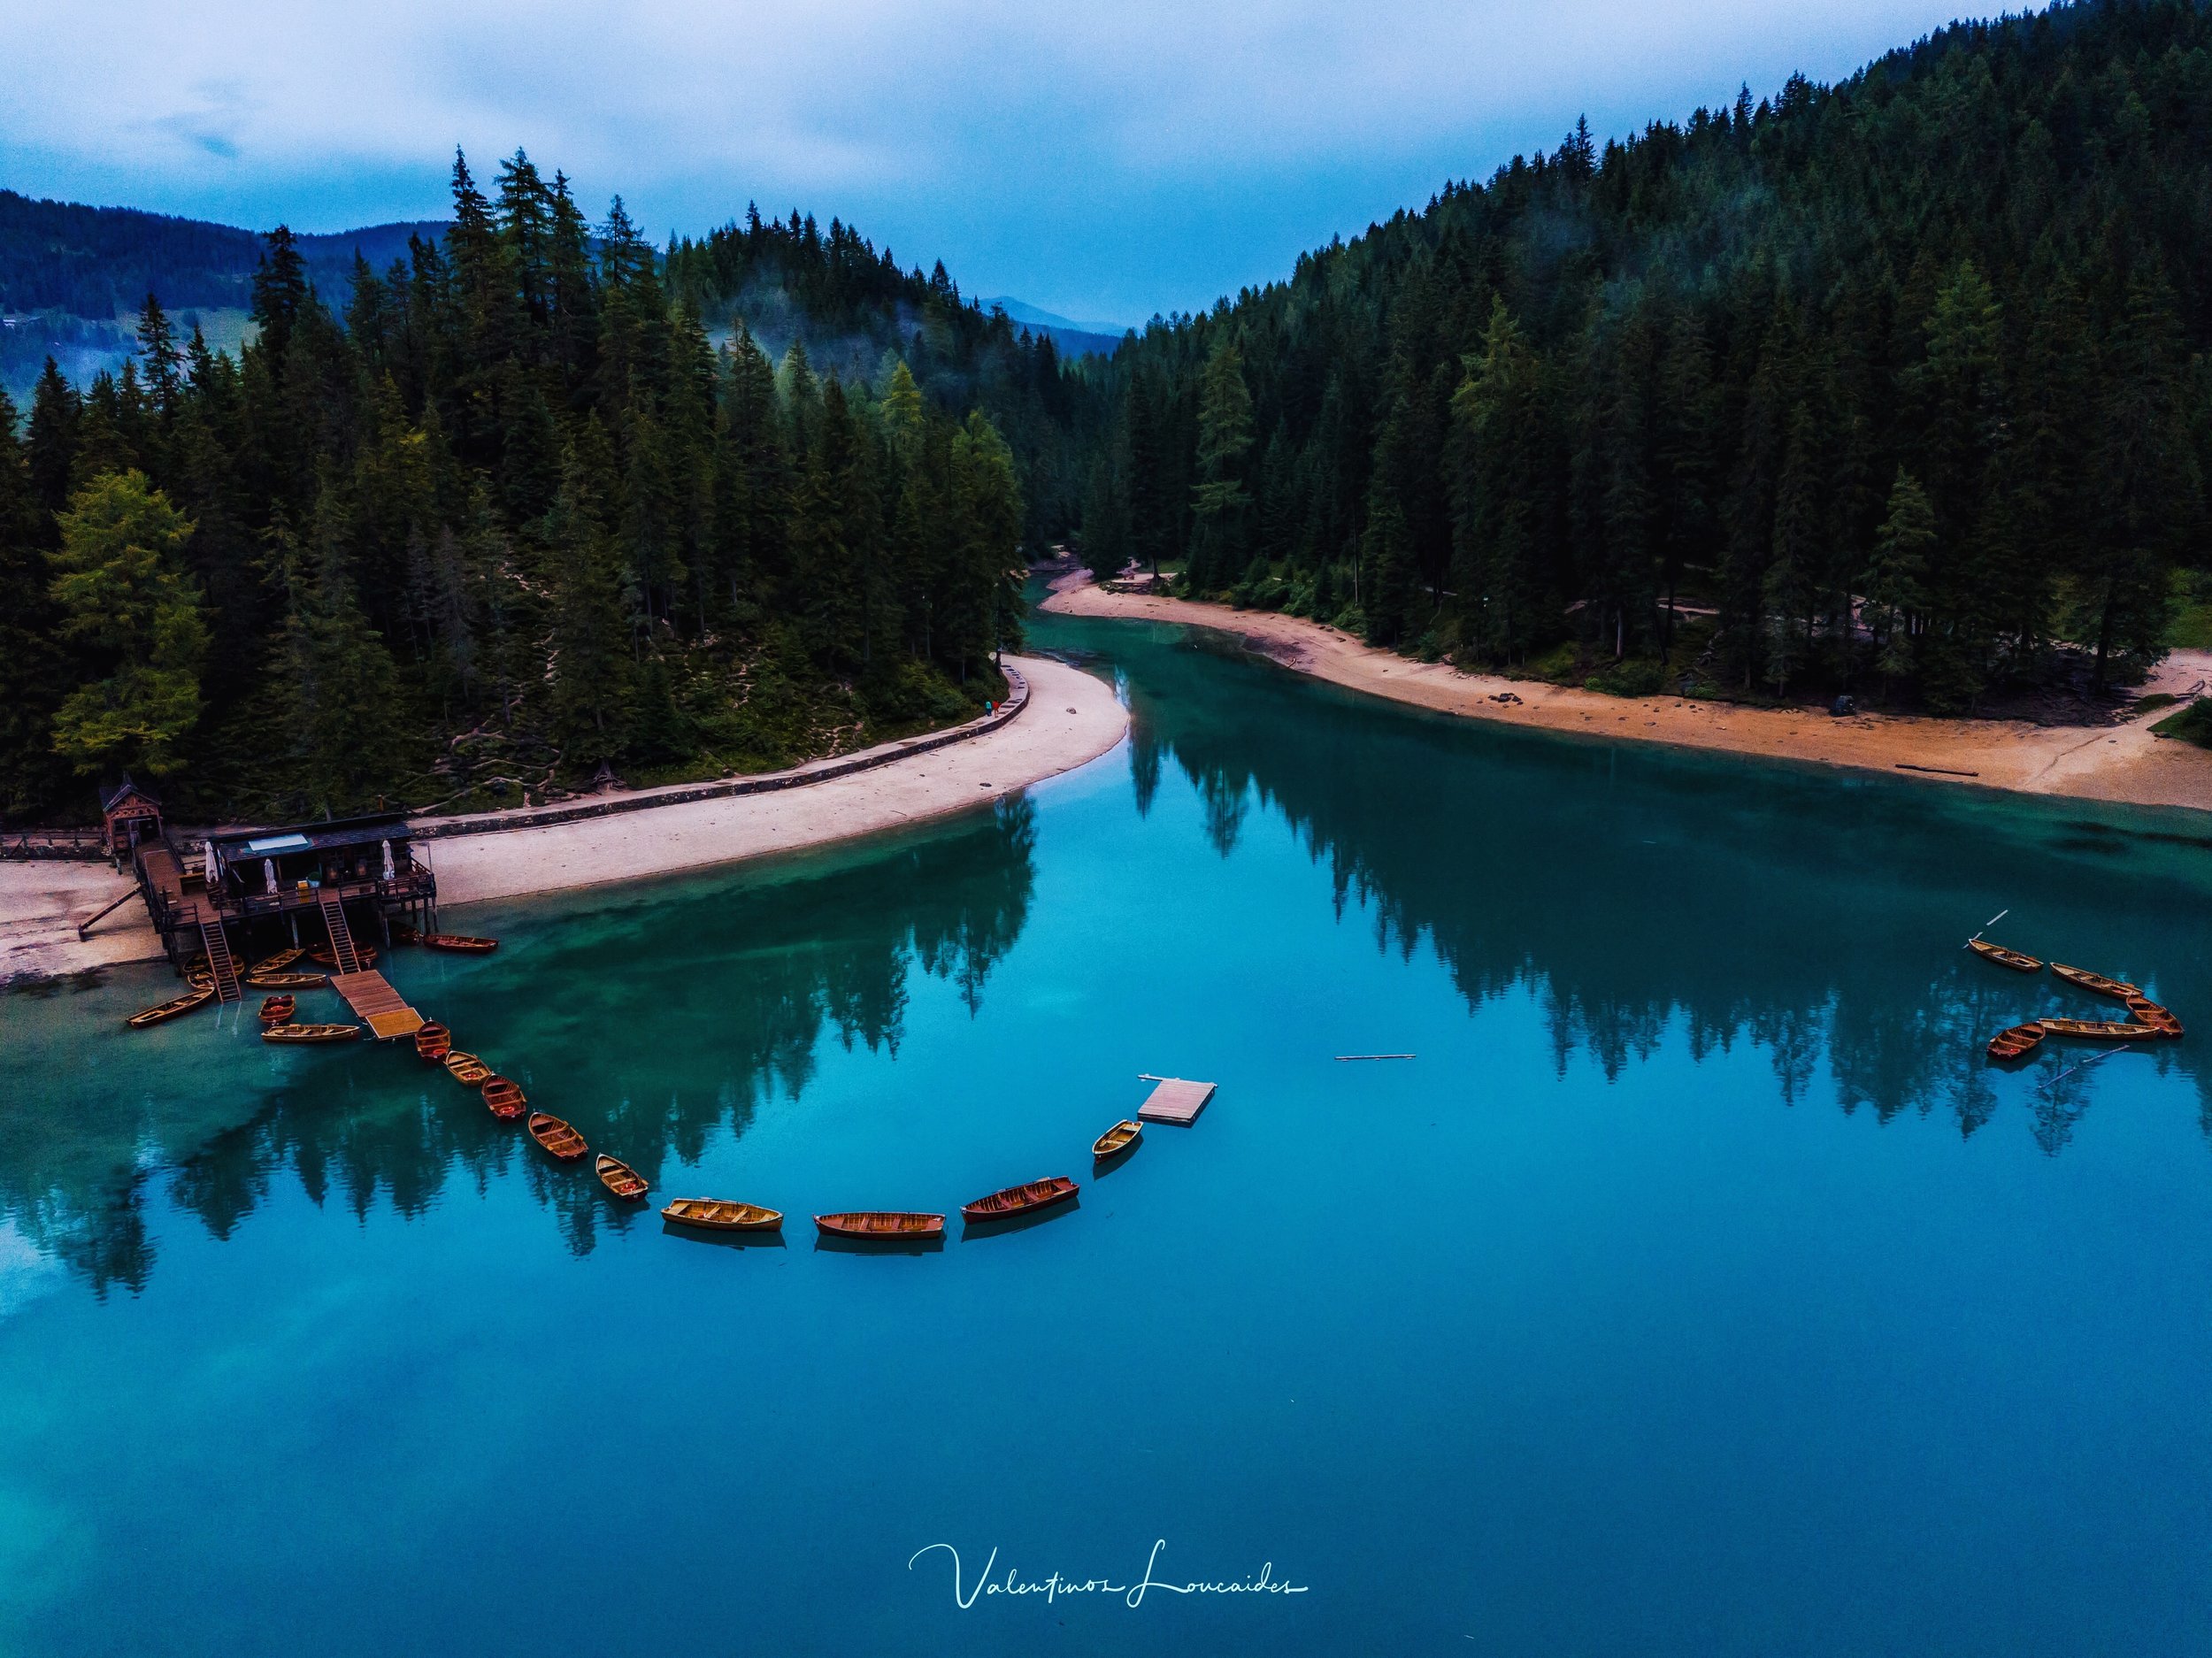
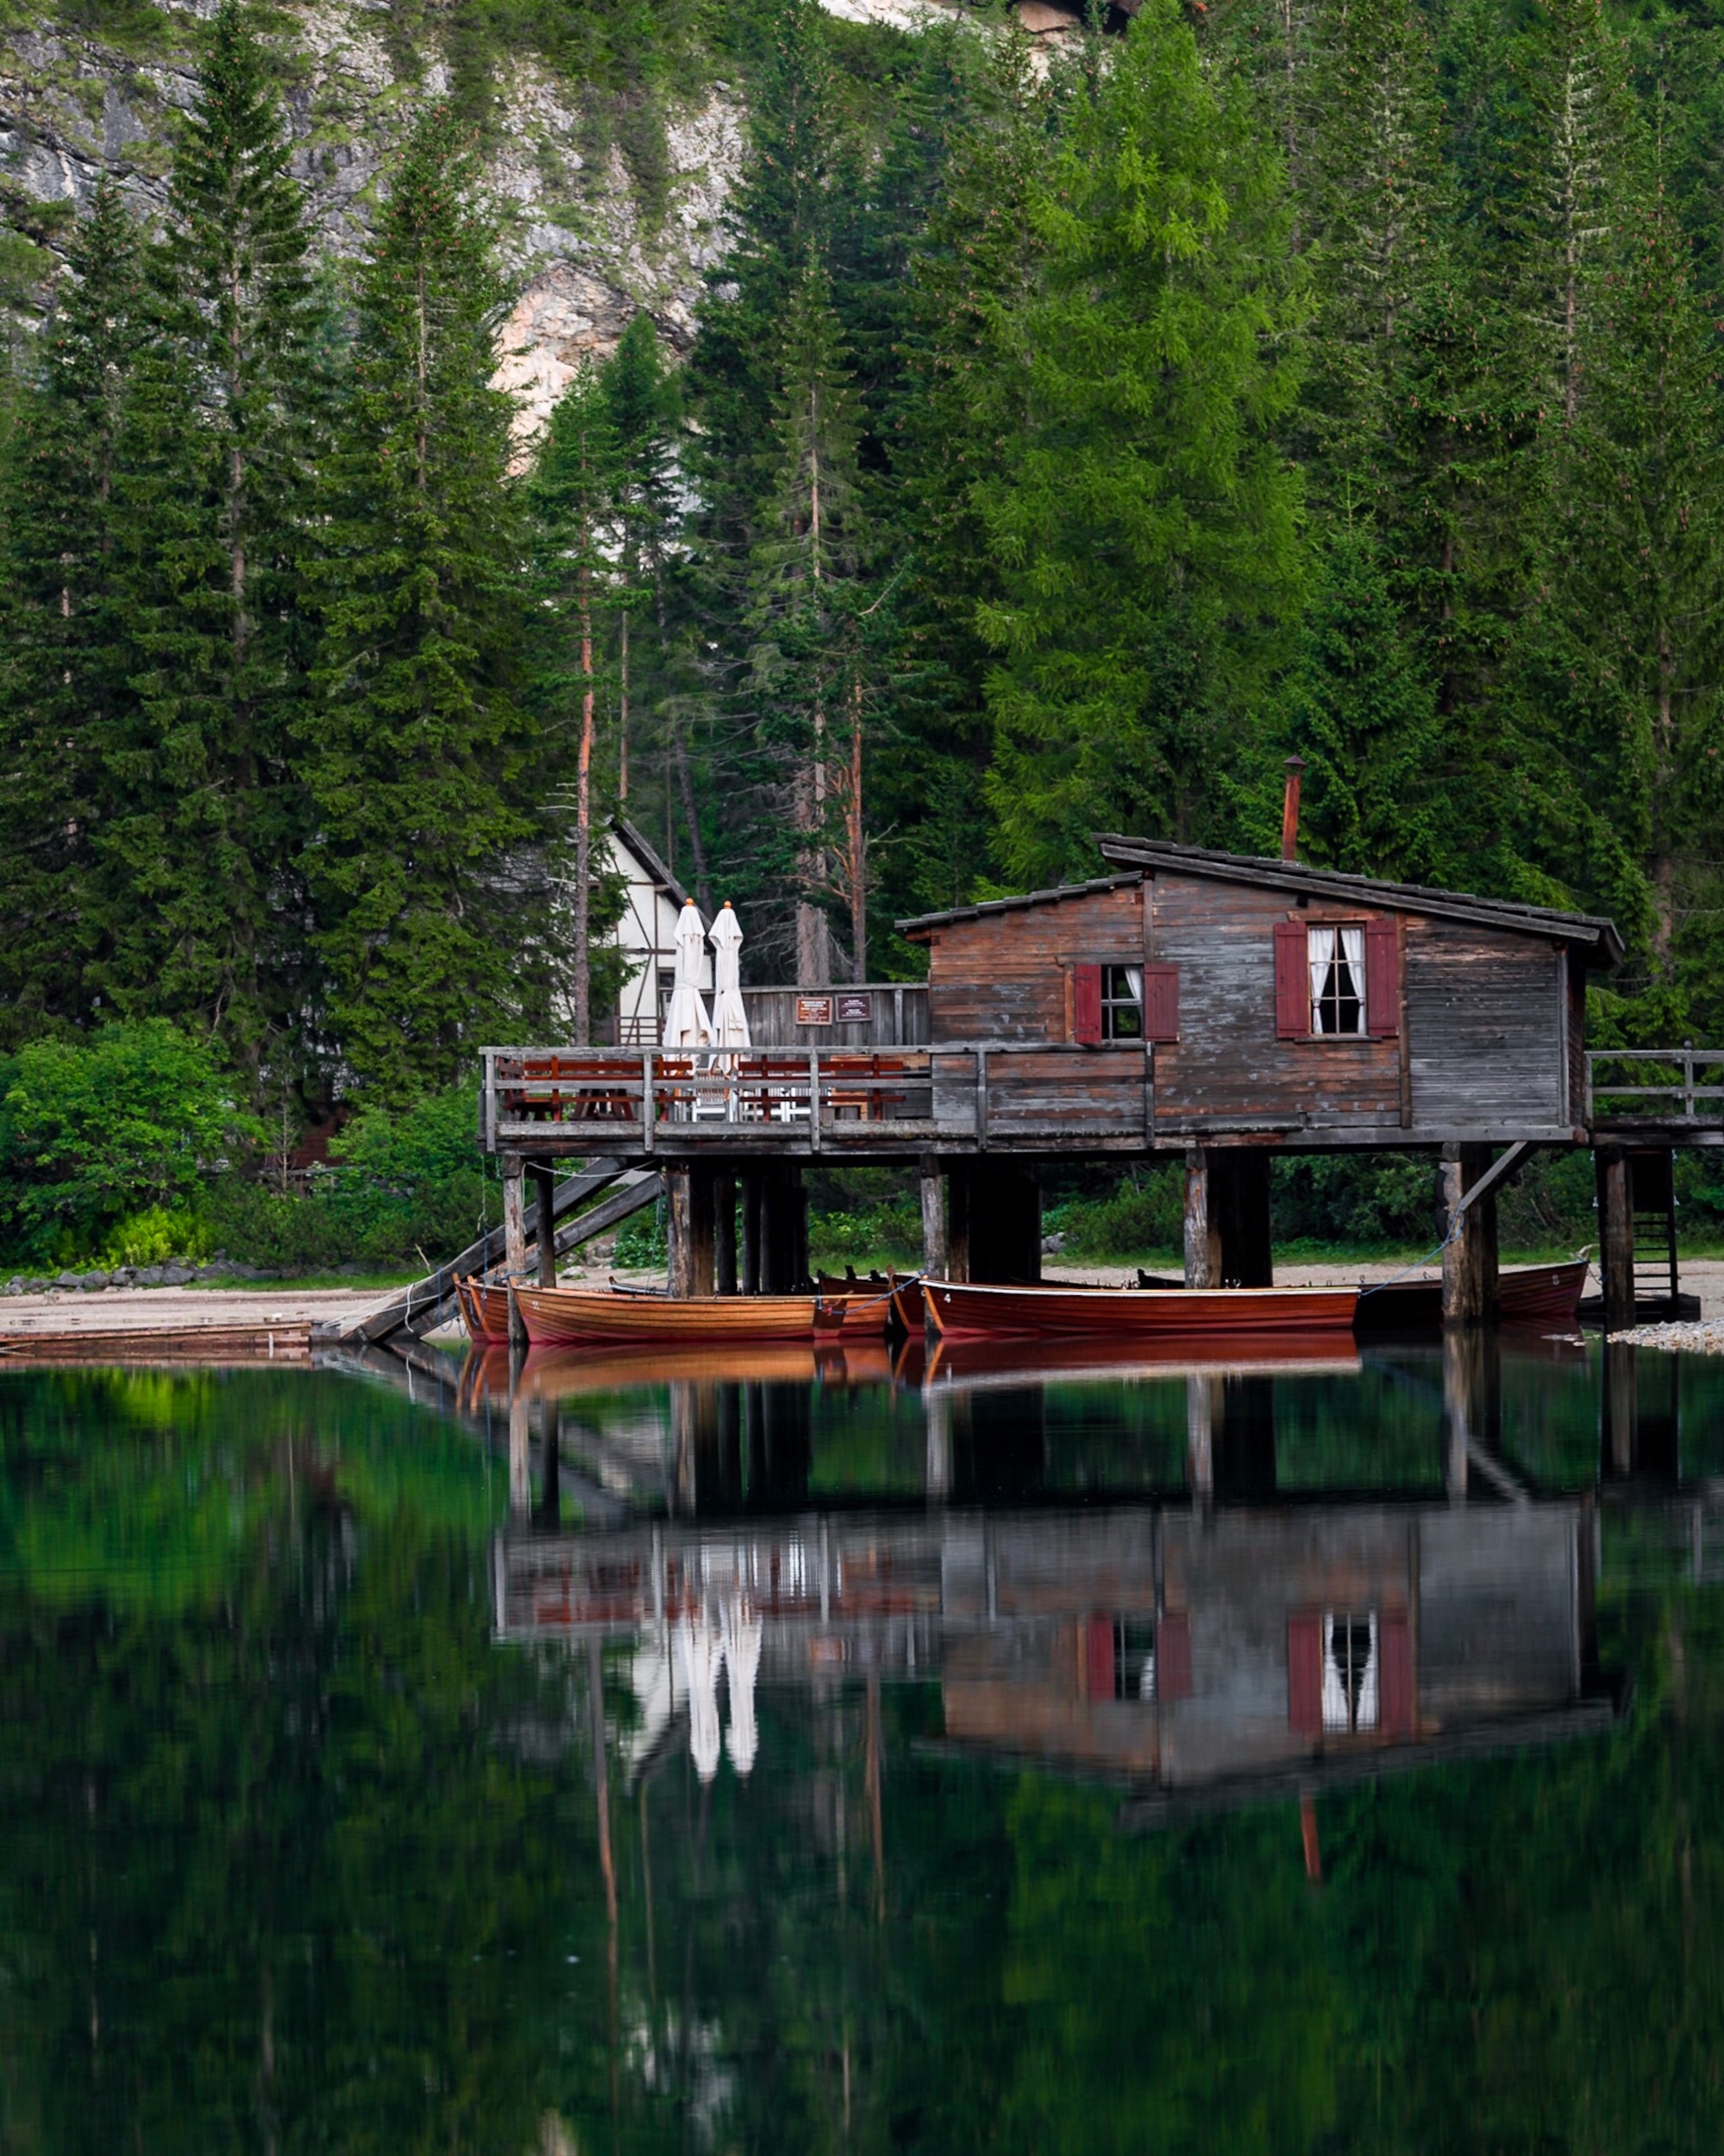
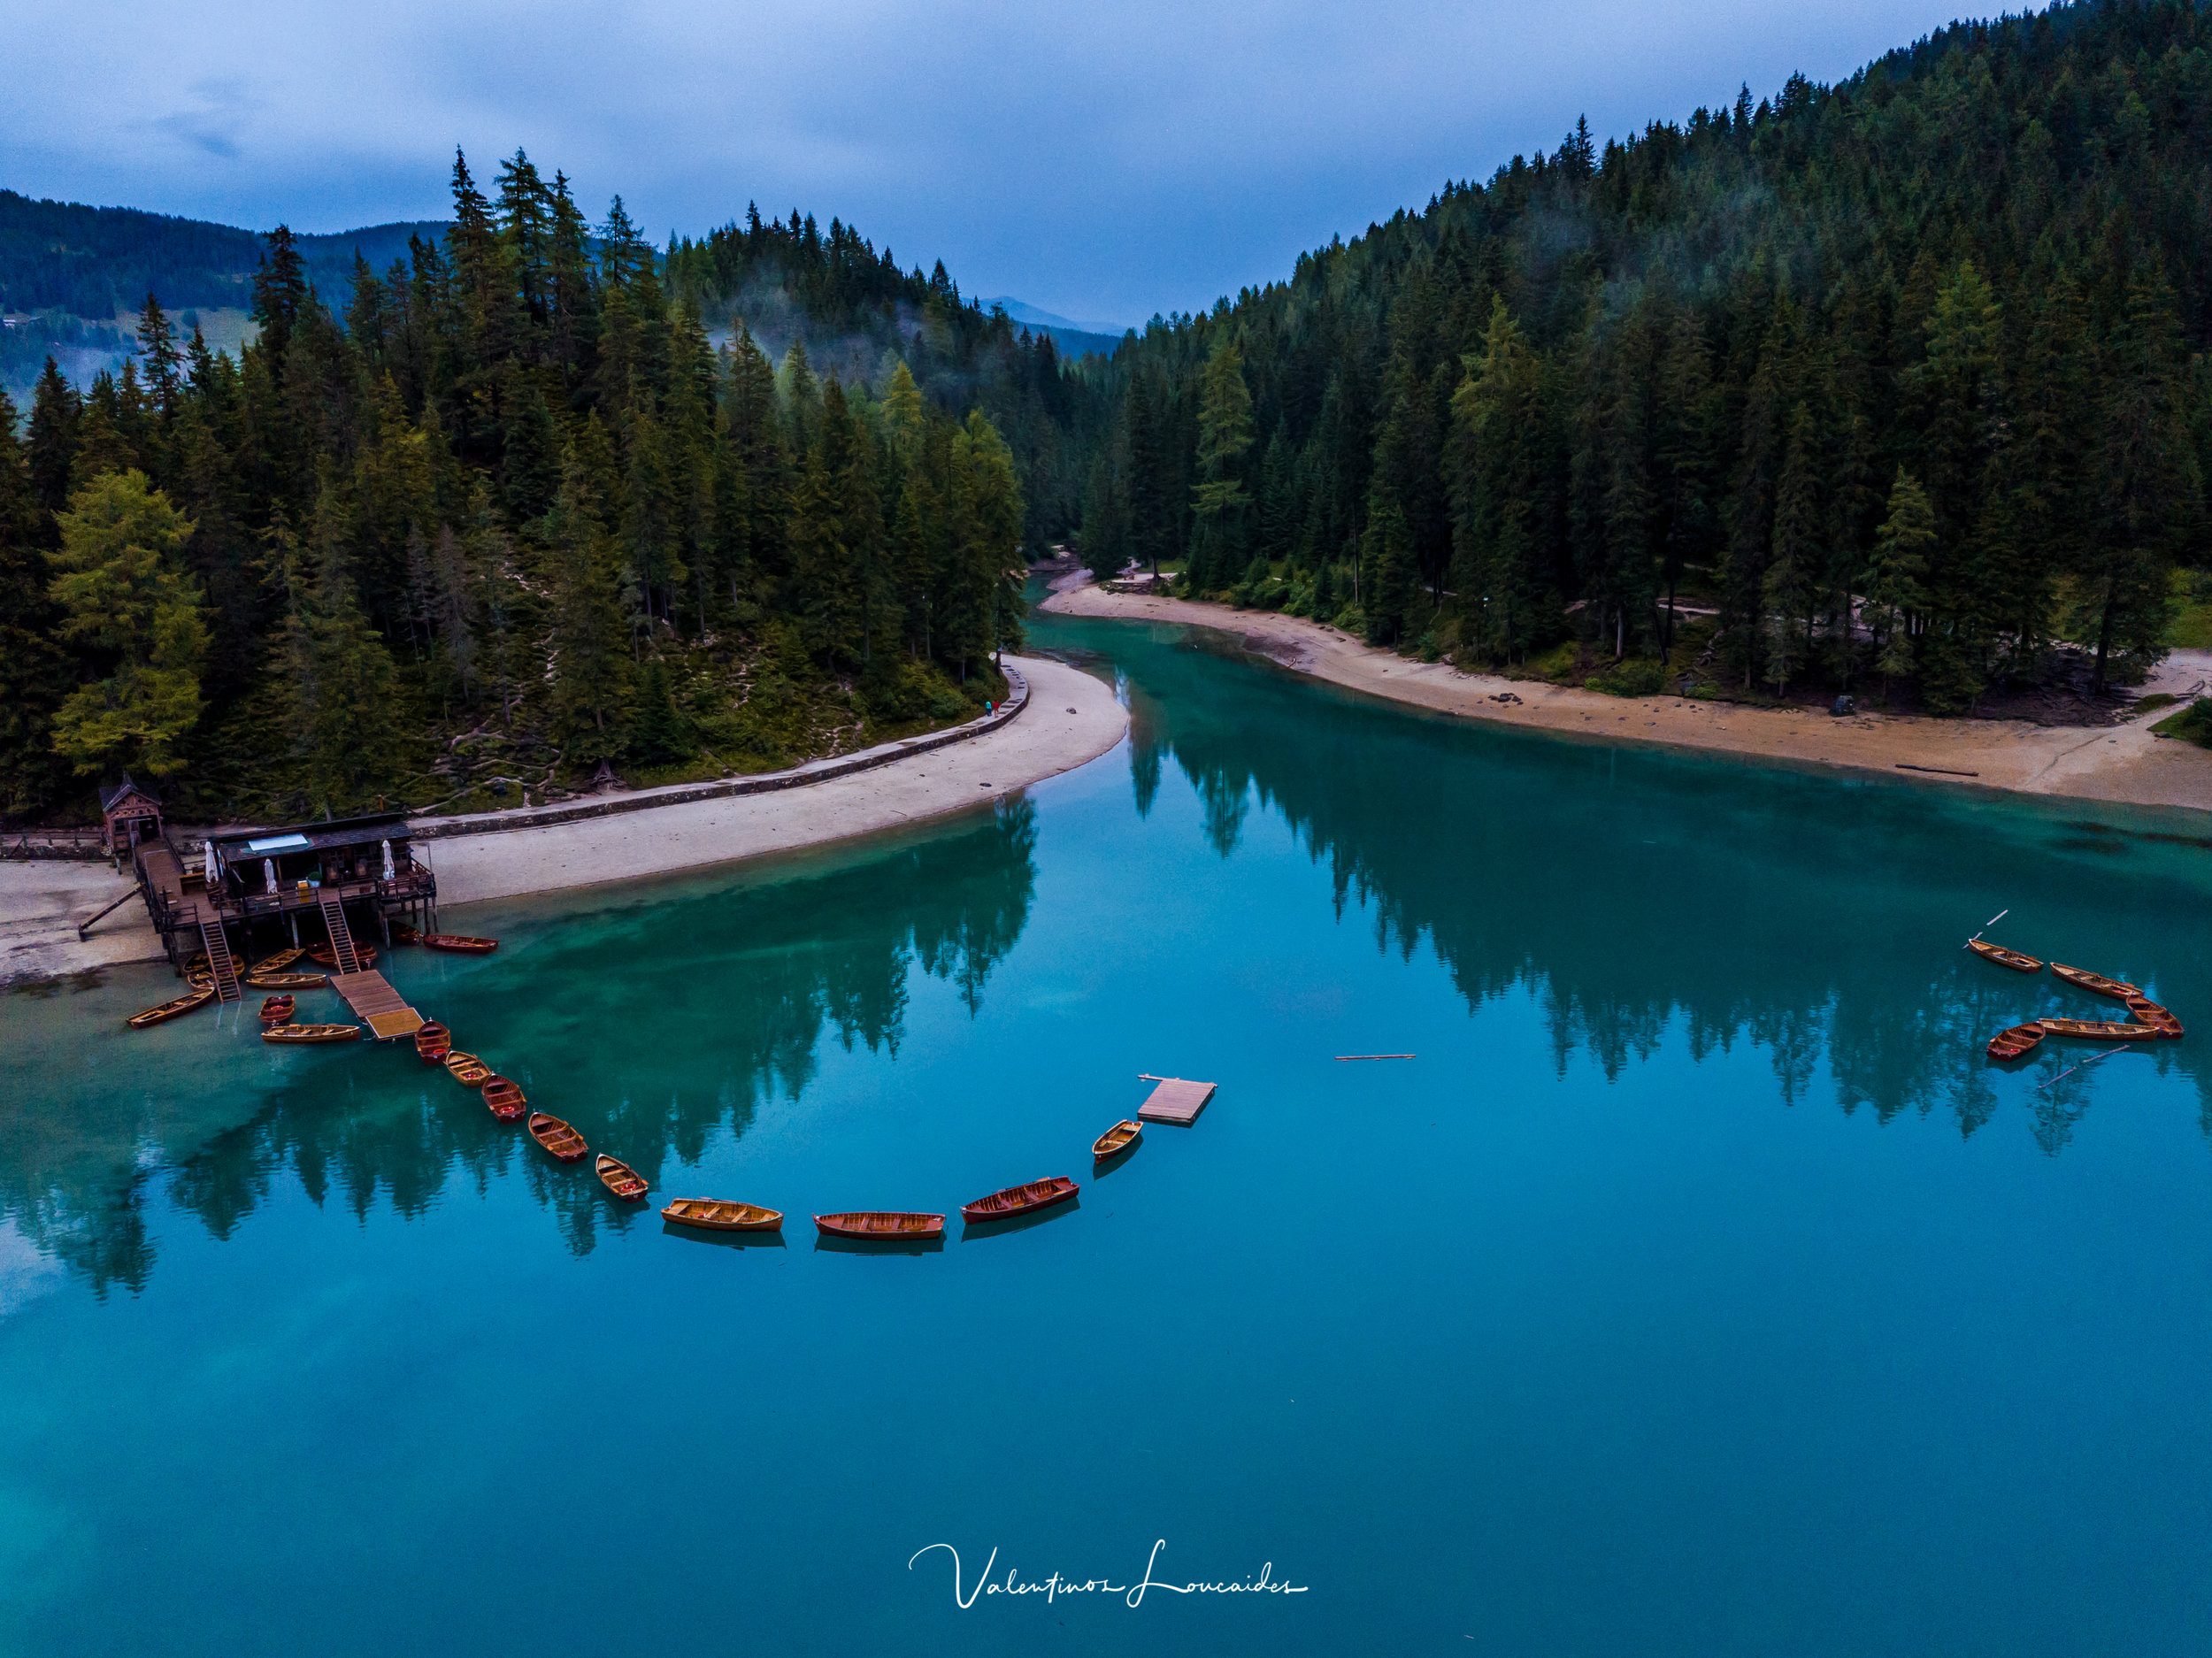
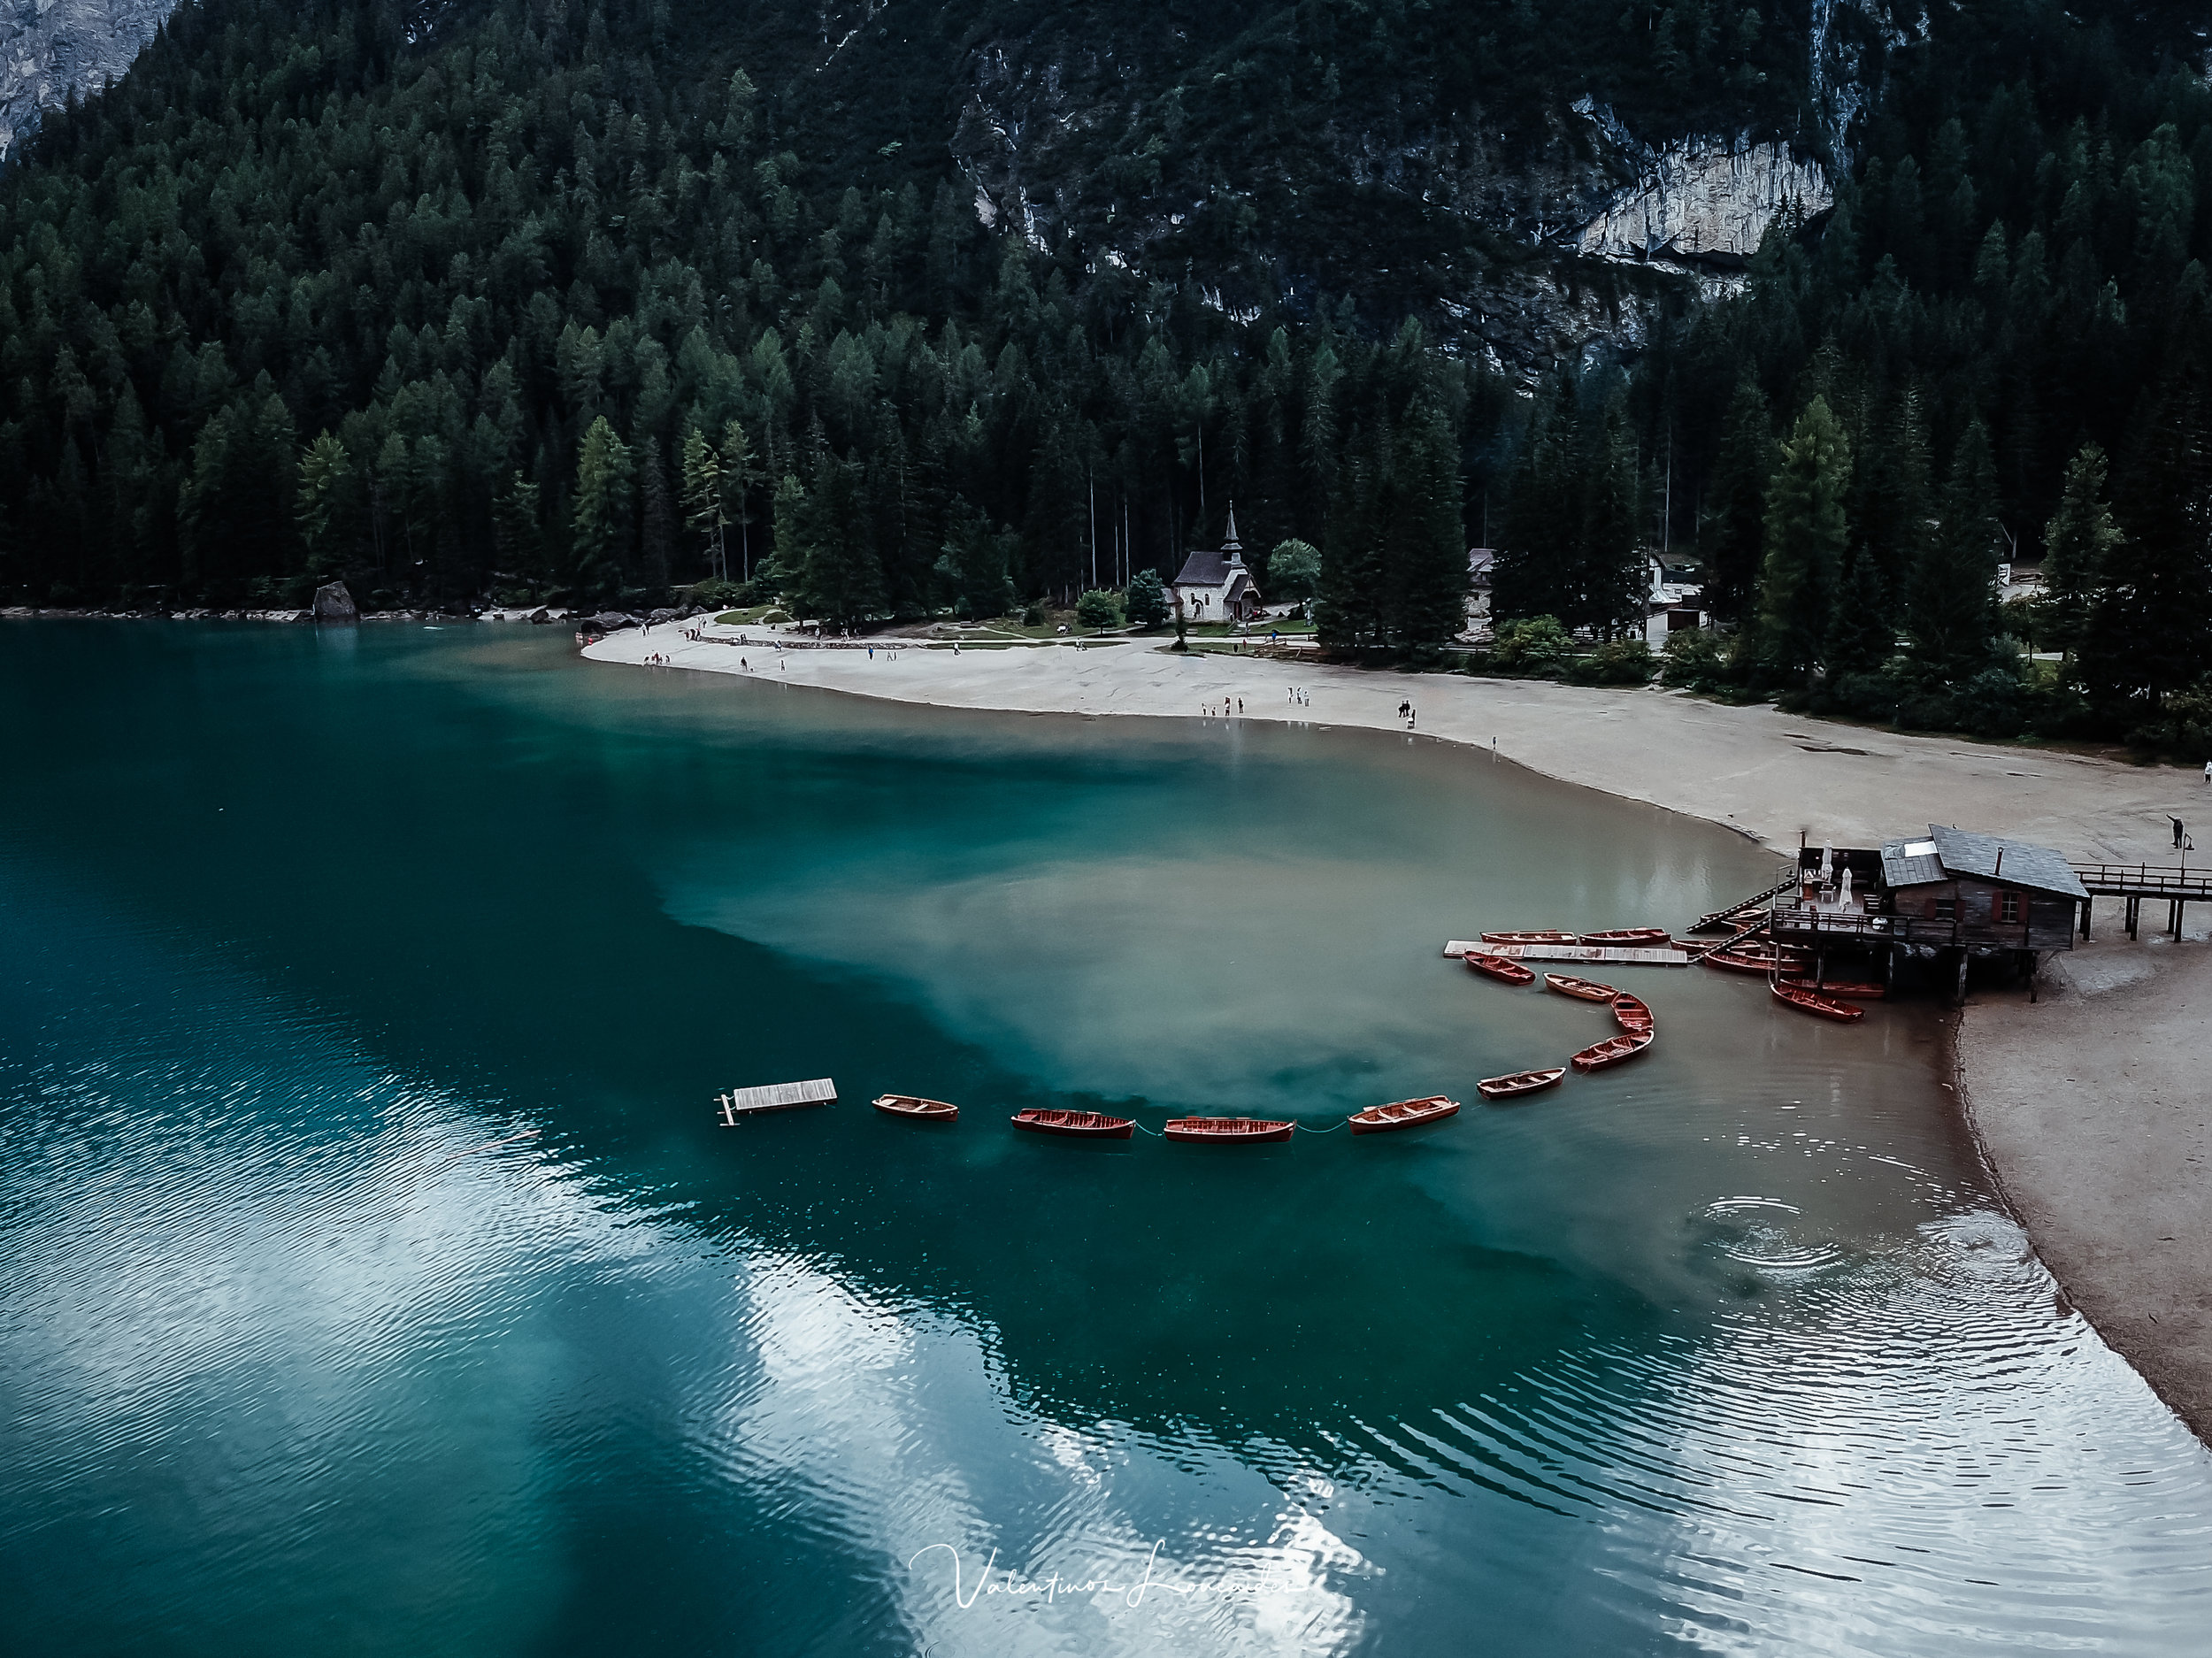
Φτάσαμε λοιπόν στην 3η μας στάση γύρω στο μεσημέρι. Ήταν άλλη μια τιρκουάζ λίμνη μέσα στο δάσος με κάποια μικρά εστιατόρια που ήταν κυριολεκτικά μέσα στο νερό, καθώς επίσης και χώρους για δραστηριότητες στην λίμνη αλλά και κάποιους μικρούς ξενώνες.
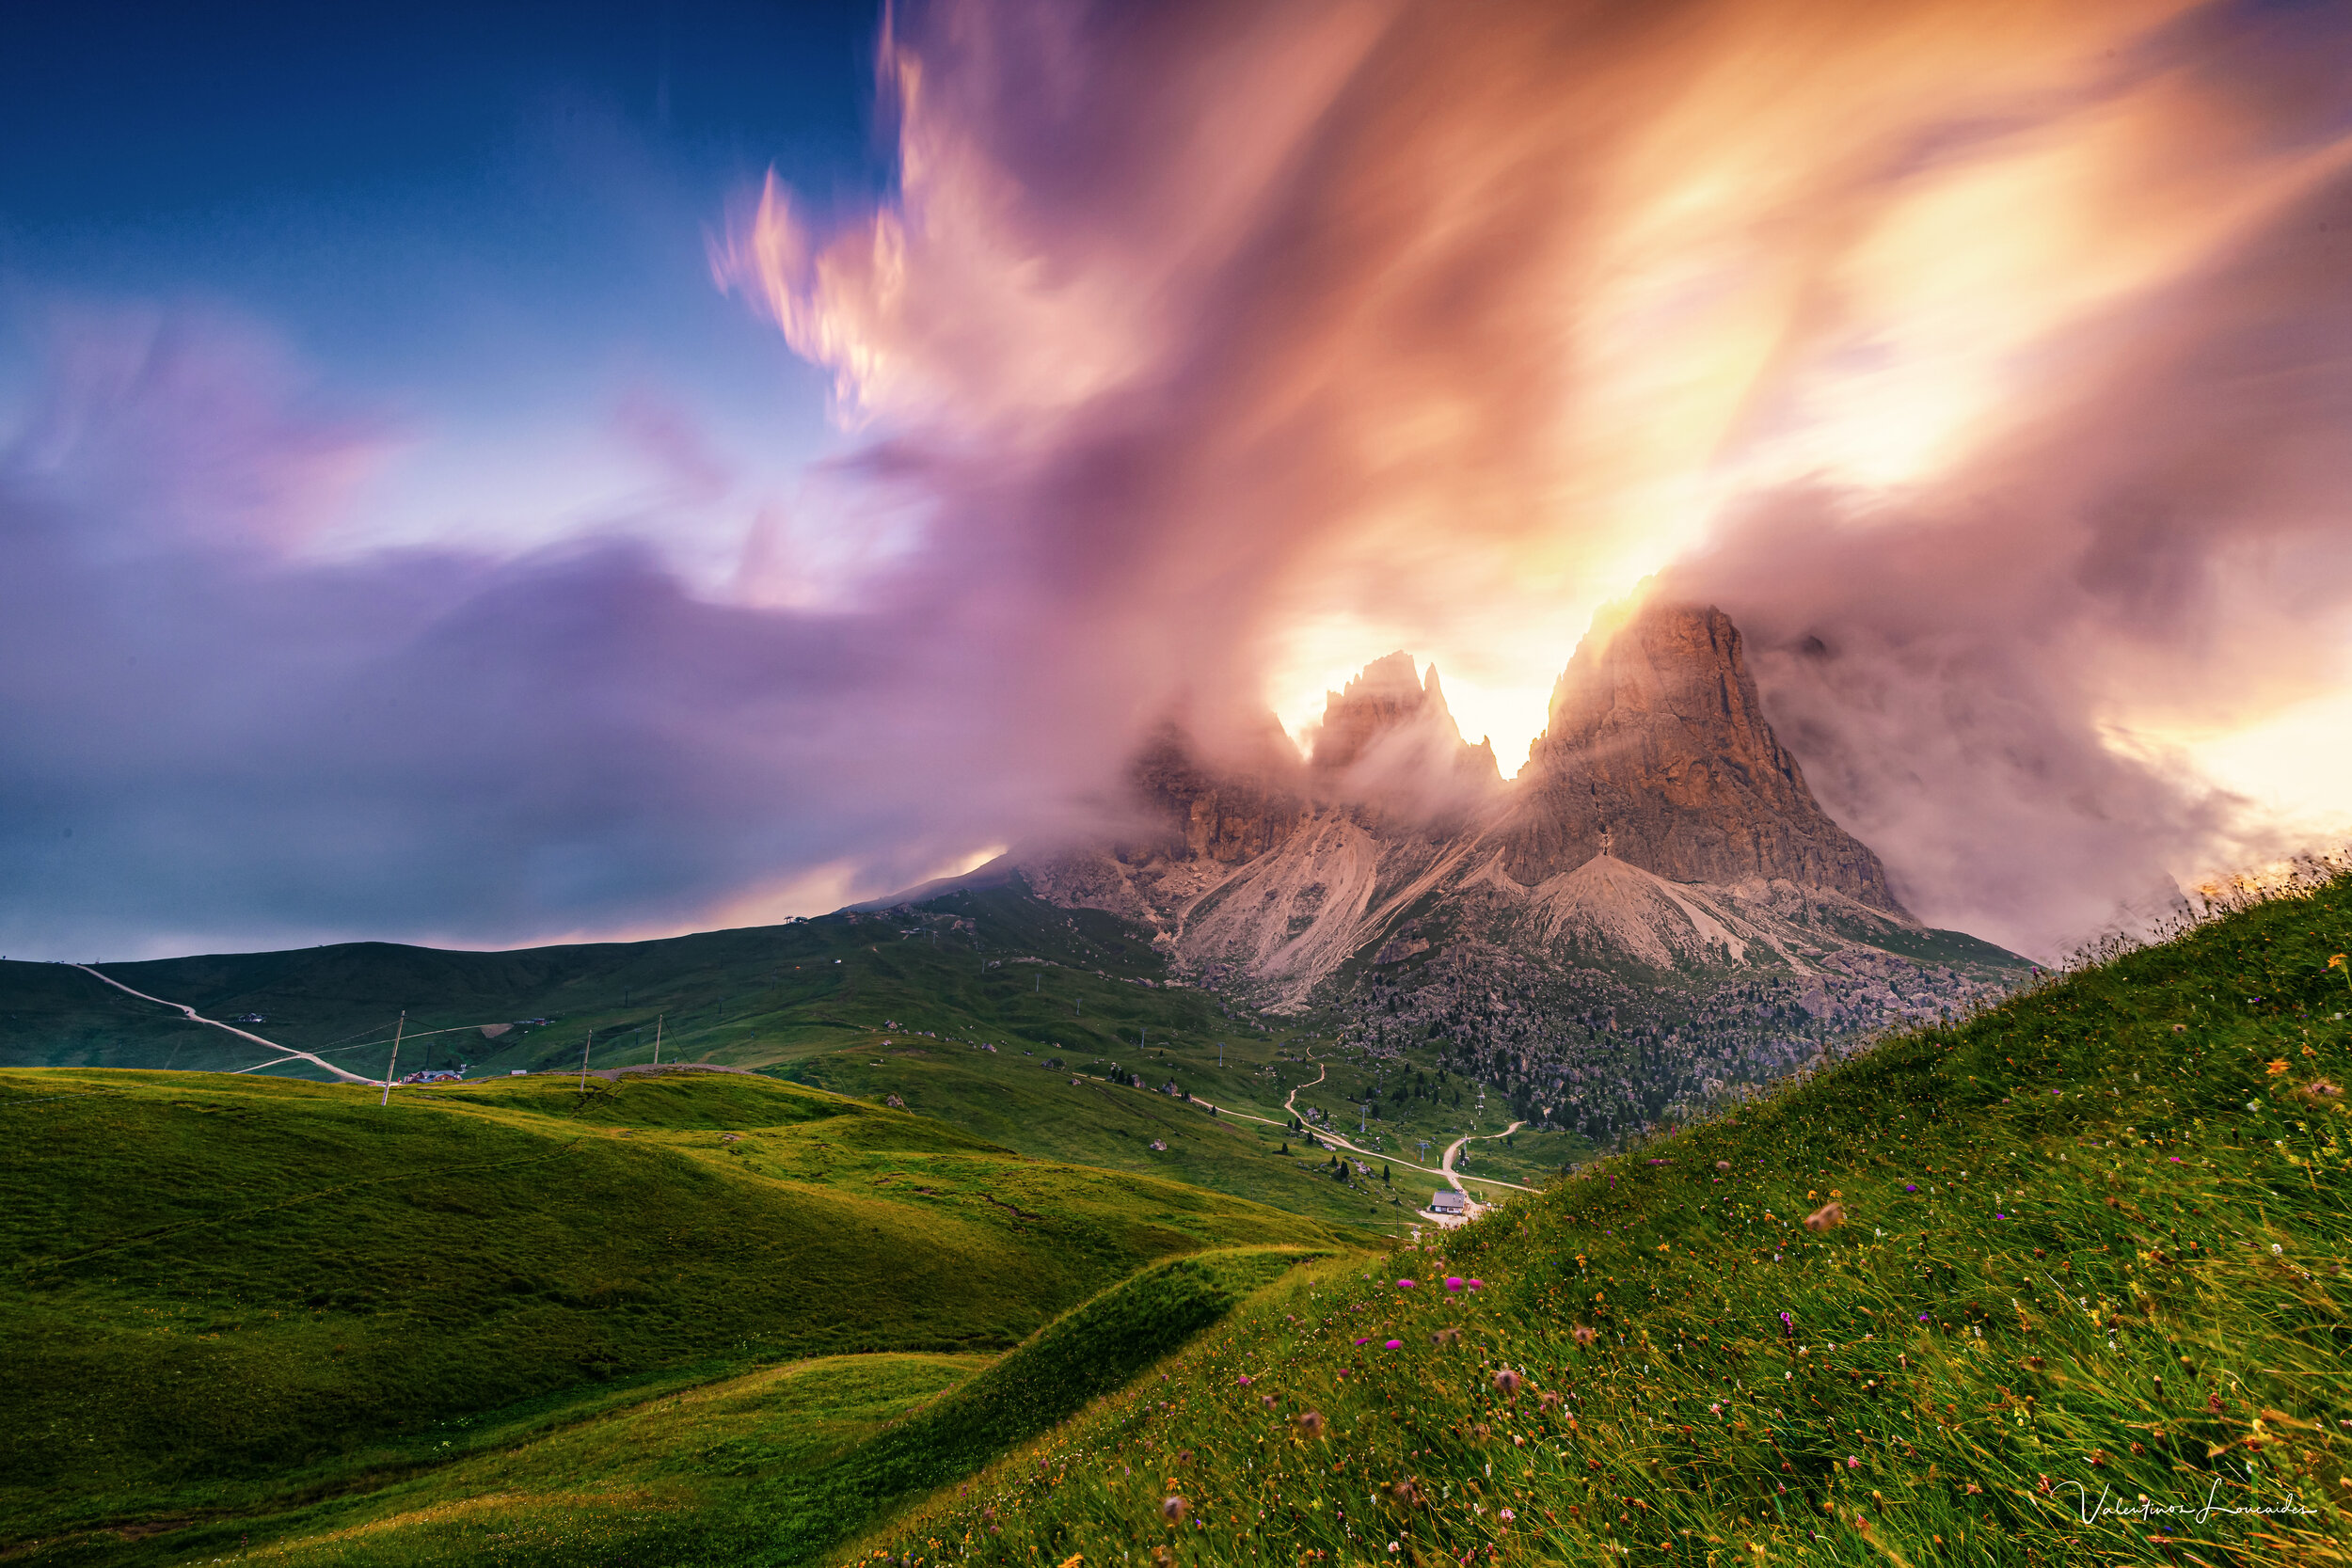
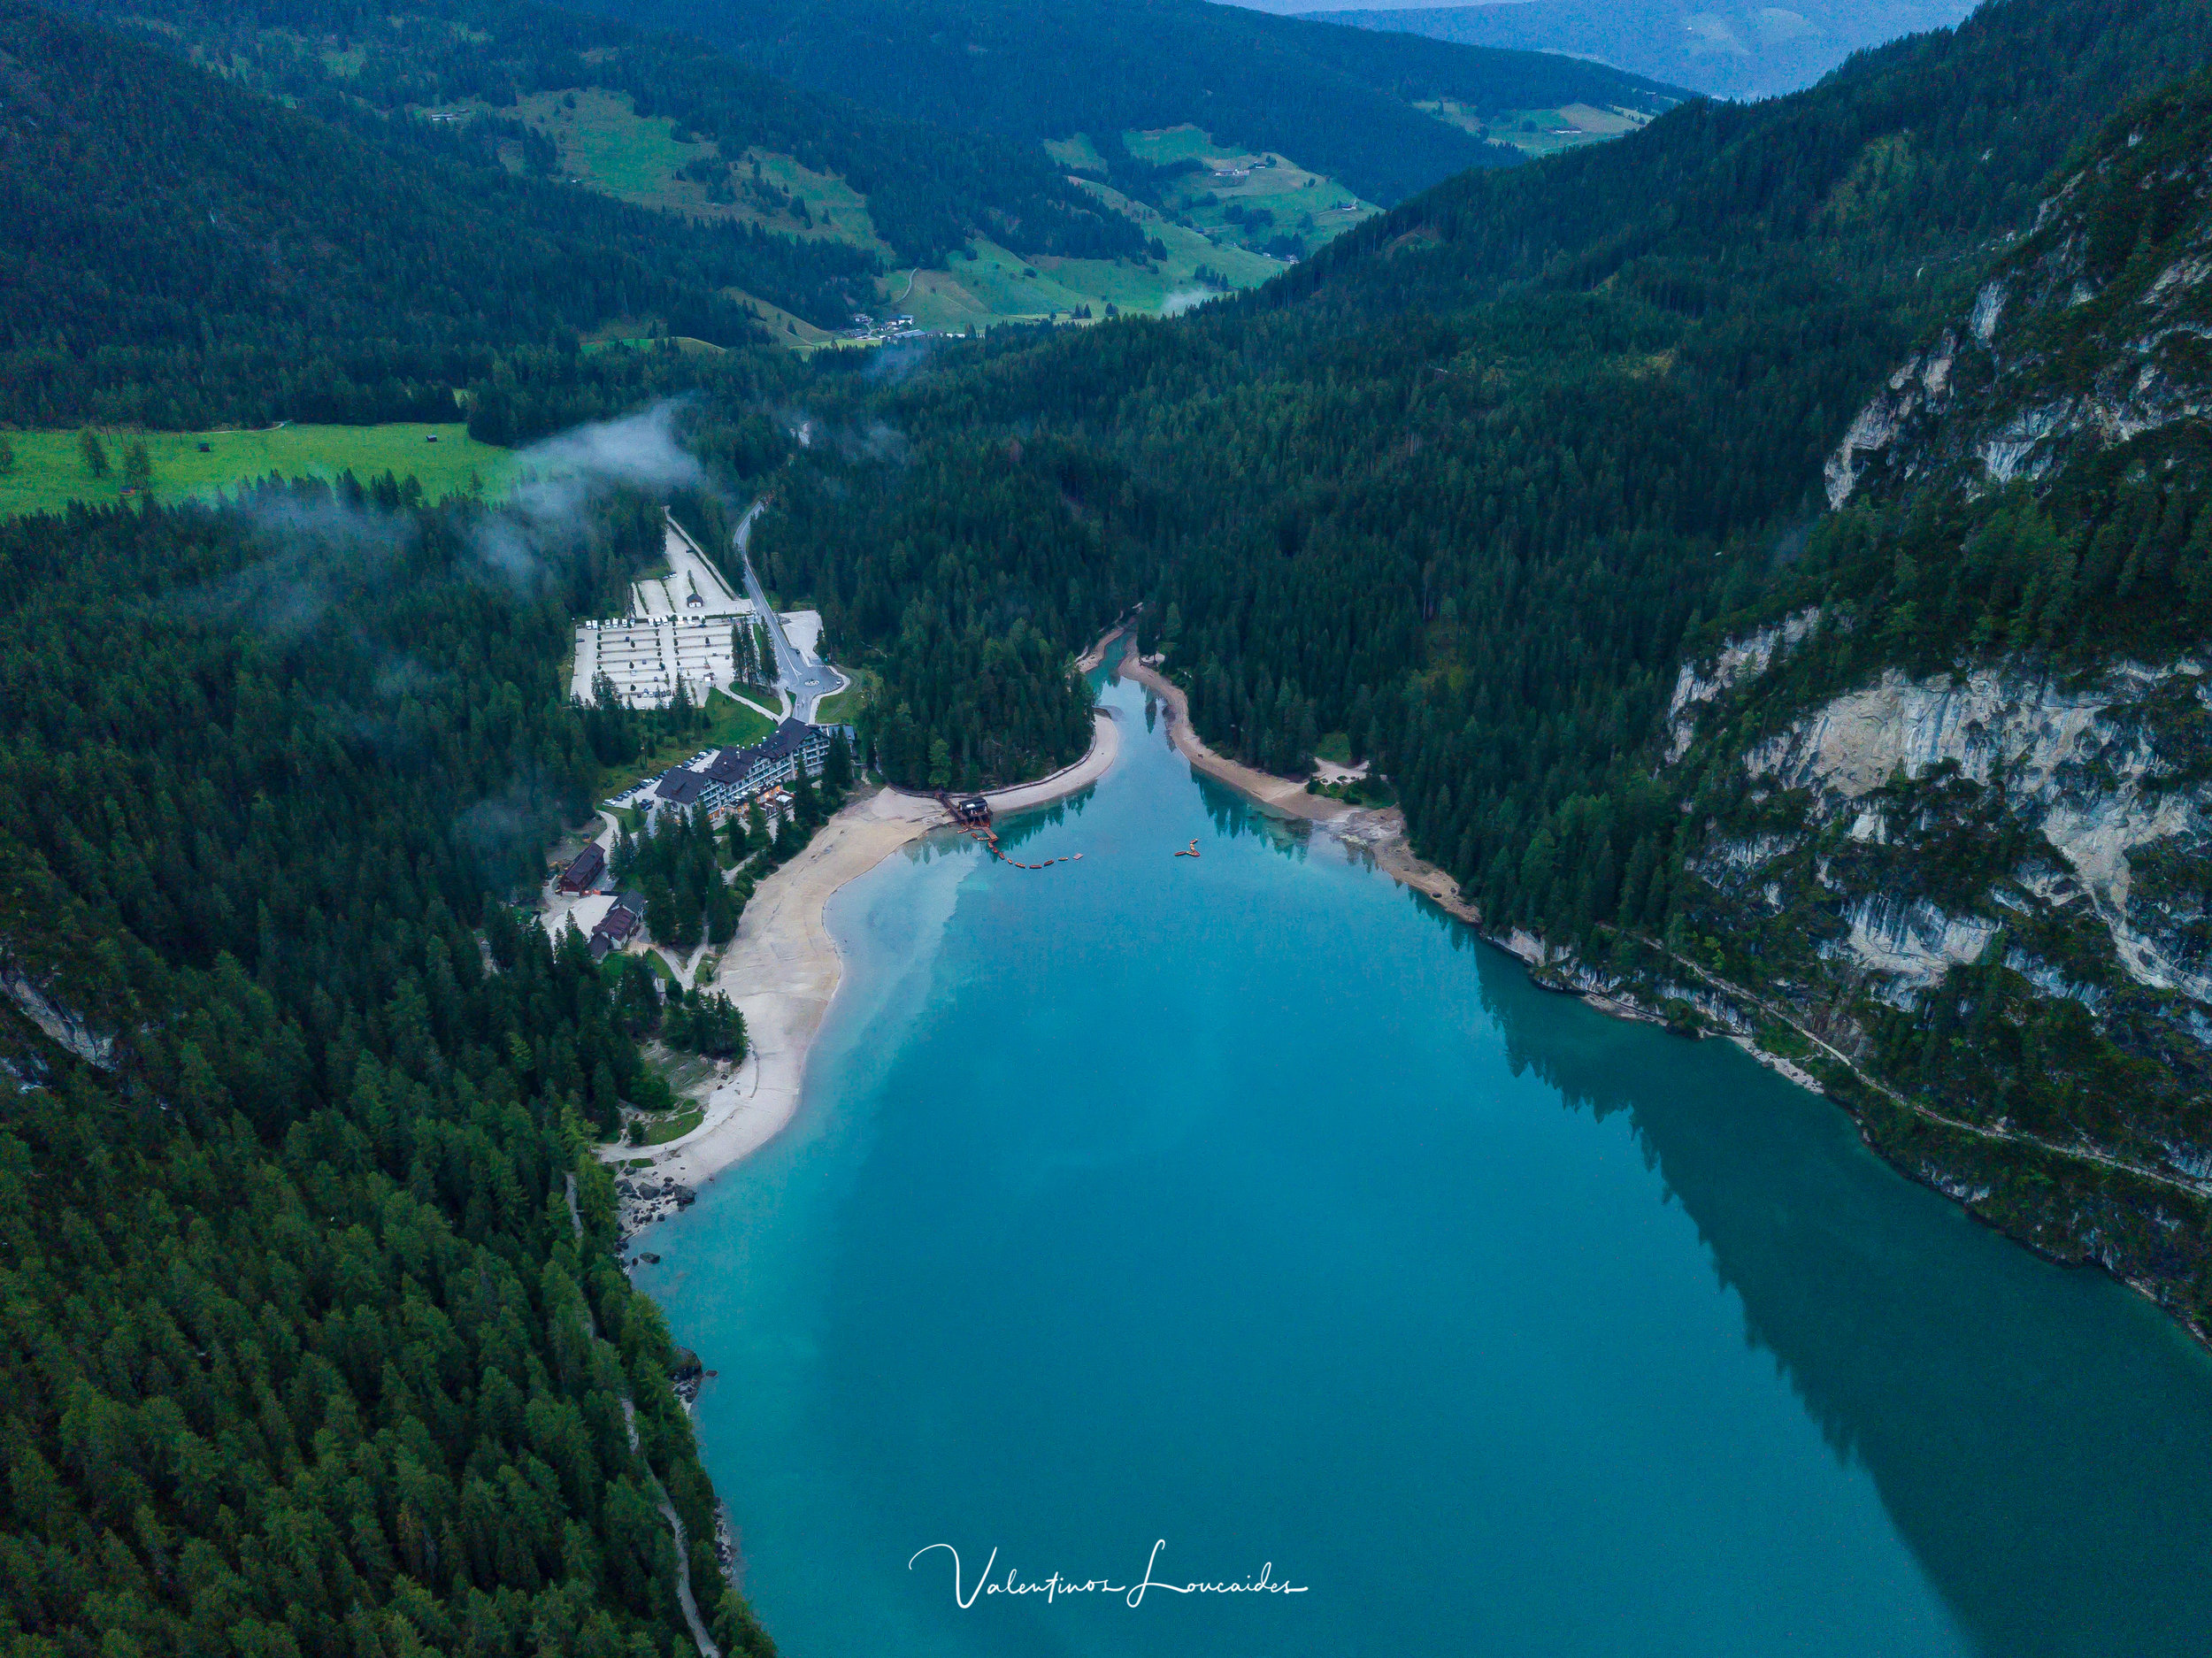
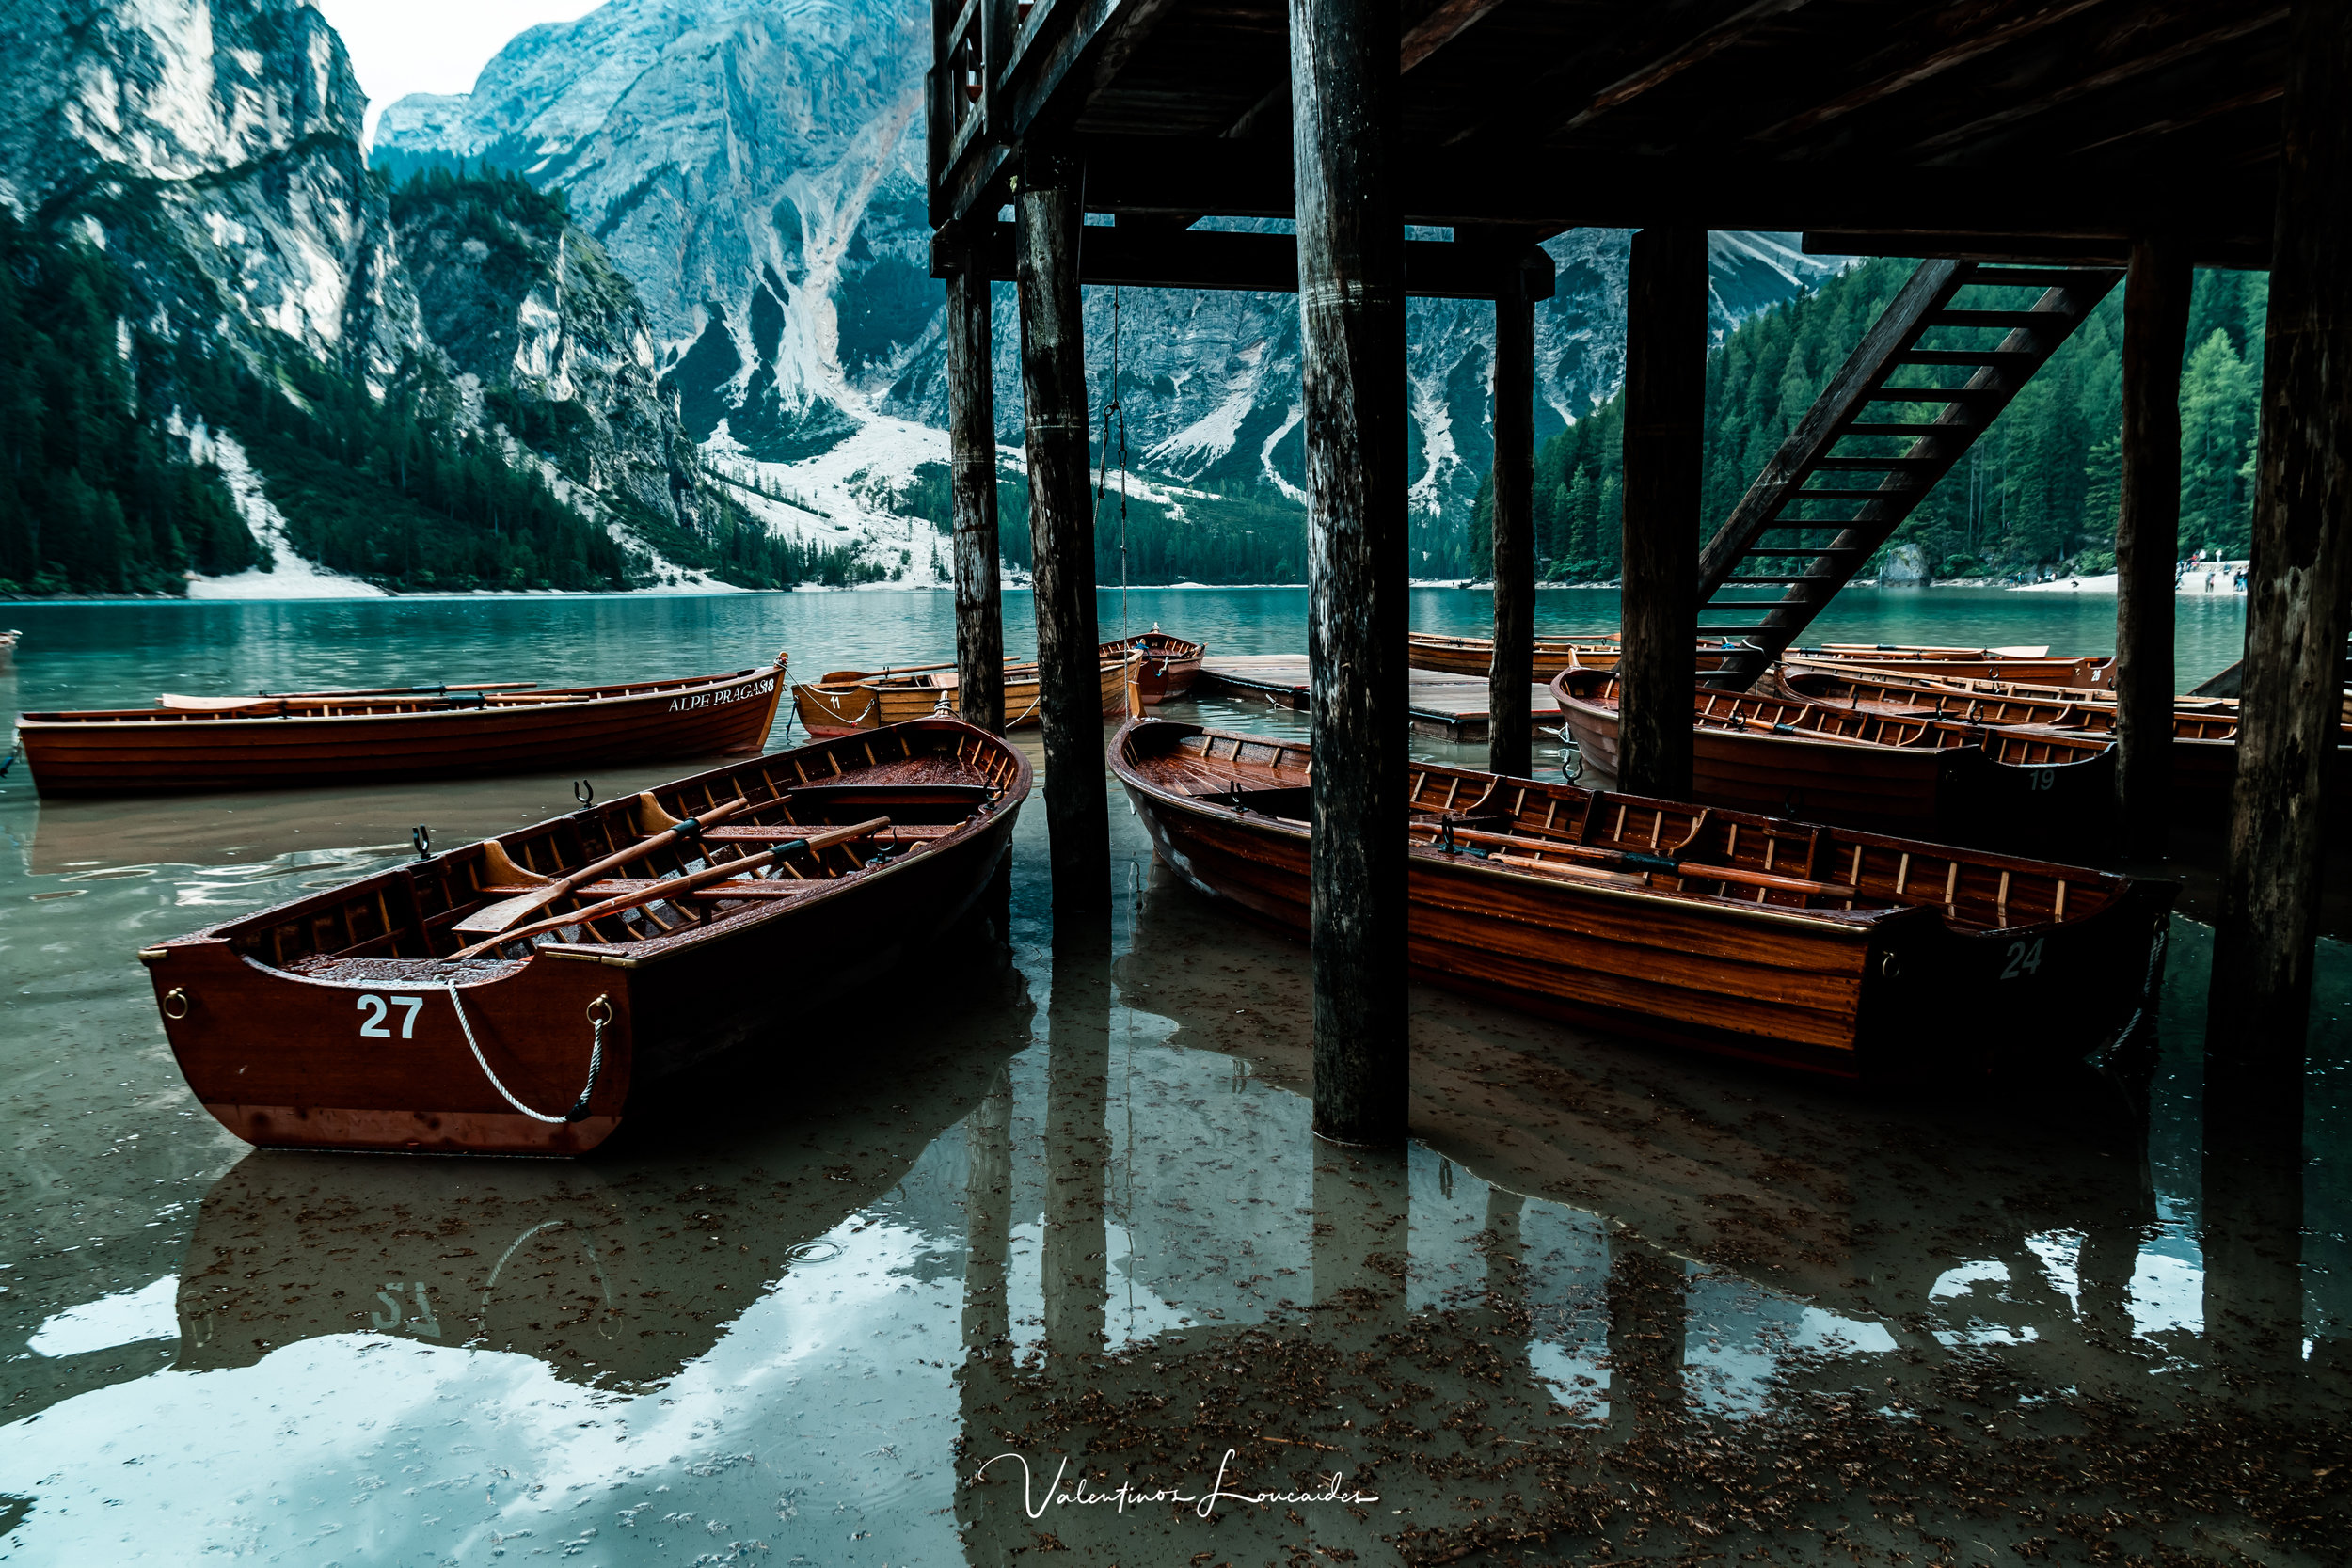
Αφού ξεκουραστήκαμε και φάγαμε το μεσημεριανό μας, απίστευτη ιταλική πάστα εννοείται, ξεκινήσαμε να ανεβαίνουμε προς τον τελικό προορισμό της ημέρας, την περίφημη Lago di Braies. Σκοπός μας, ήταν η φωτογράφιση τόσο στα κλασικά σημεία αλλά και εναλλακτικές λήψεις από μια άλλη μάτια. Κατά την διάρκεια της διαδρομής, ο καιρός ήταν τέλειος. Μερικά σύννεφα που ήταν διάσπαρτα στον ουρανό, θα ήταν απλά μια καταπληκτική προσθήκη στη σύνθεση της φωτογραφίας. Πλησιάζοντας λοιπόν στον χώρο στάθμευσης, σε λιγότερο από 5 λεπτά μαύρισε ο ουρανός, εξαφανίστηκε το βουνό από την πυκνή ομίχλη και άρχισε να βρέχει καταρρακτωδώς με δυνατούς ανέμους και κεραυνούς, σε σημείο που δεν μπορούσαμε να κατέβουμε από το αμάξι! Ο κόσμος έτρεχε πίσω στα αυτοκίνητά του και να αποχωρεί βιαστικά. Ο χώρος στάθμευσης άδειασε κυριολεκτικά σε διάσημα περίπου 25-30 λεπτών. Σιγά σιγά η βροχή άρχισε να κοπάζει και να γίνεται εντελώς ανάλαφρη. Εμείς, προετοιμασμένοι σχετικά για το σκηνικό, βάλαμε αδιάβροχο και κατεβήκαμε στη λίμνη. Το πρώτο πράγμα που θέλαμε να κάνουμε ήταν η βαρκάδα με κουπί. Για κακή μας τύχη όμως, η έντονη βροχή ανάγκασε τον ιδιοκτήτη να τα μαζέψει, να δέσει τις βάρκες όπως όπως και να κλείσει. «Ελάτε αύριο», μας λέει. Δυστυχώς, το πρόγραμμά μας δεν μας επέτρεπε να πάμε και την επόμενη μέρα εκεί, γιατί μέναμε περίπου 150χλμ μακριά. Χάσαμε λοιπόν τη διάσημη βαρκάδα στη λίμνη και τη λήψη της κλασικής φωτογραφίας.

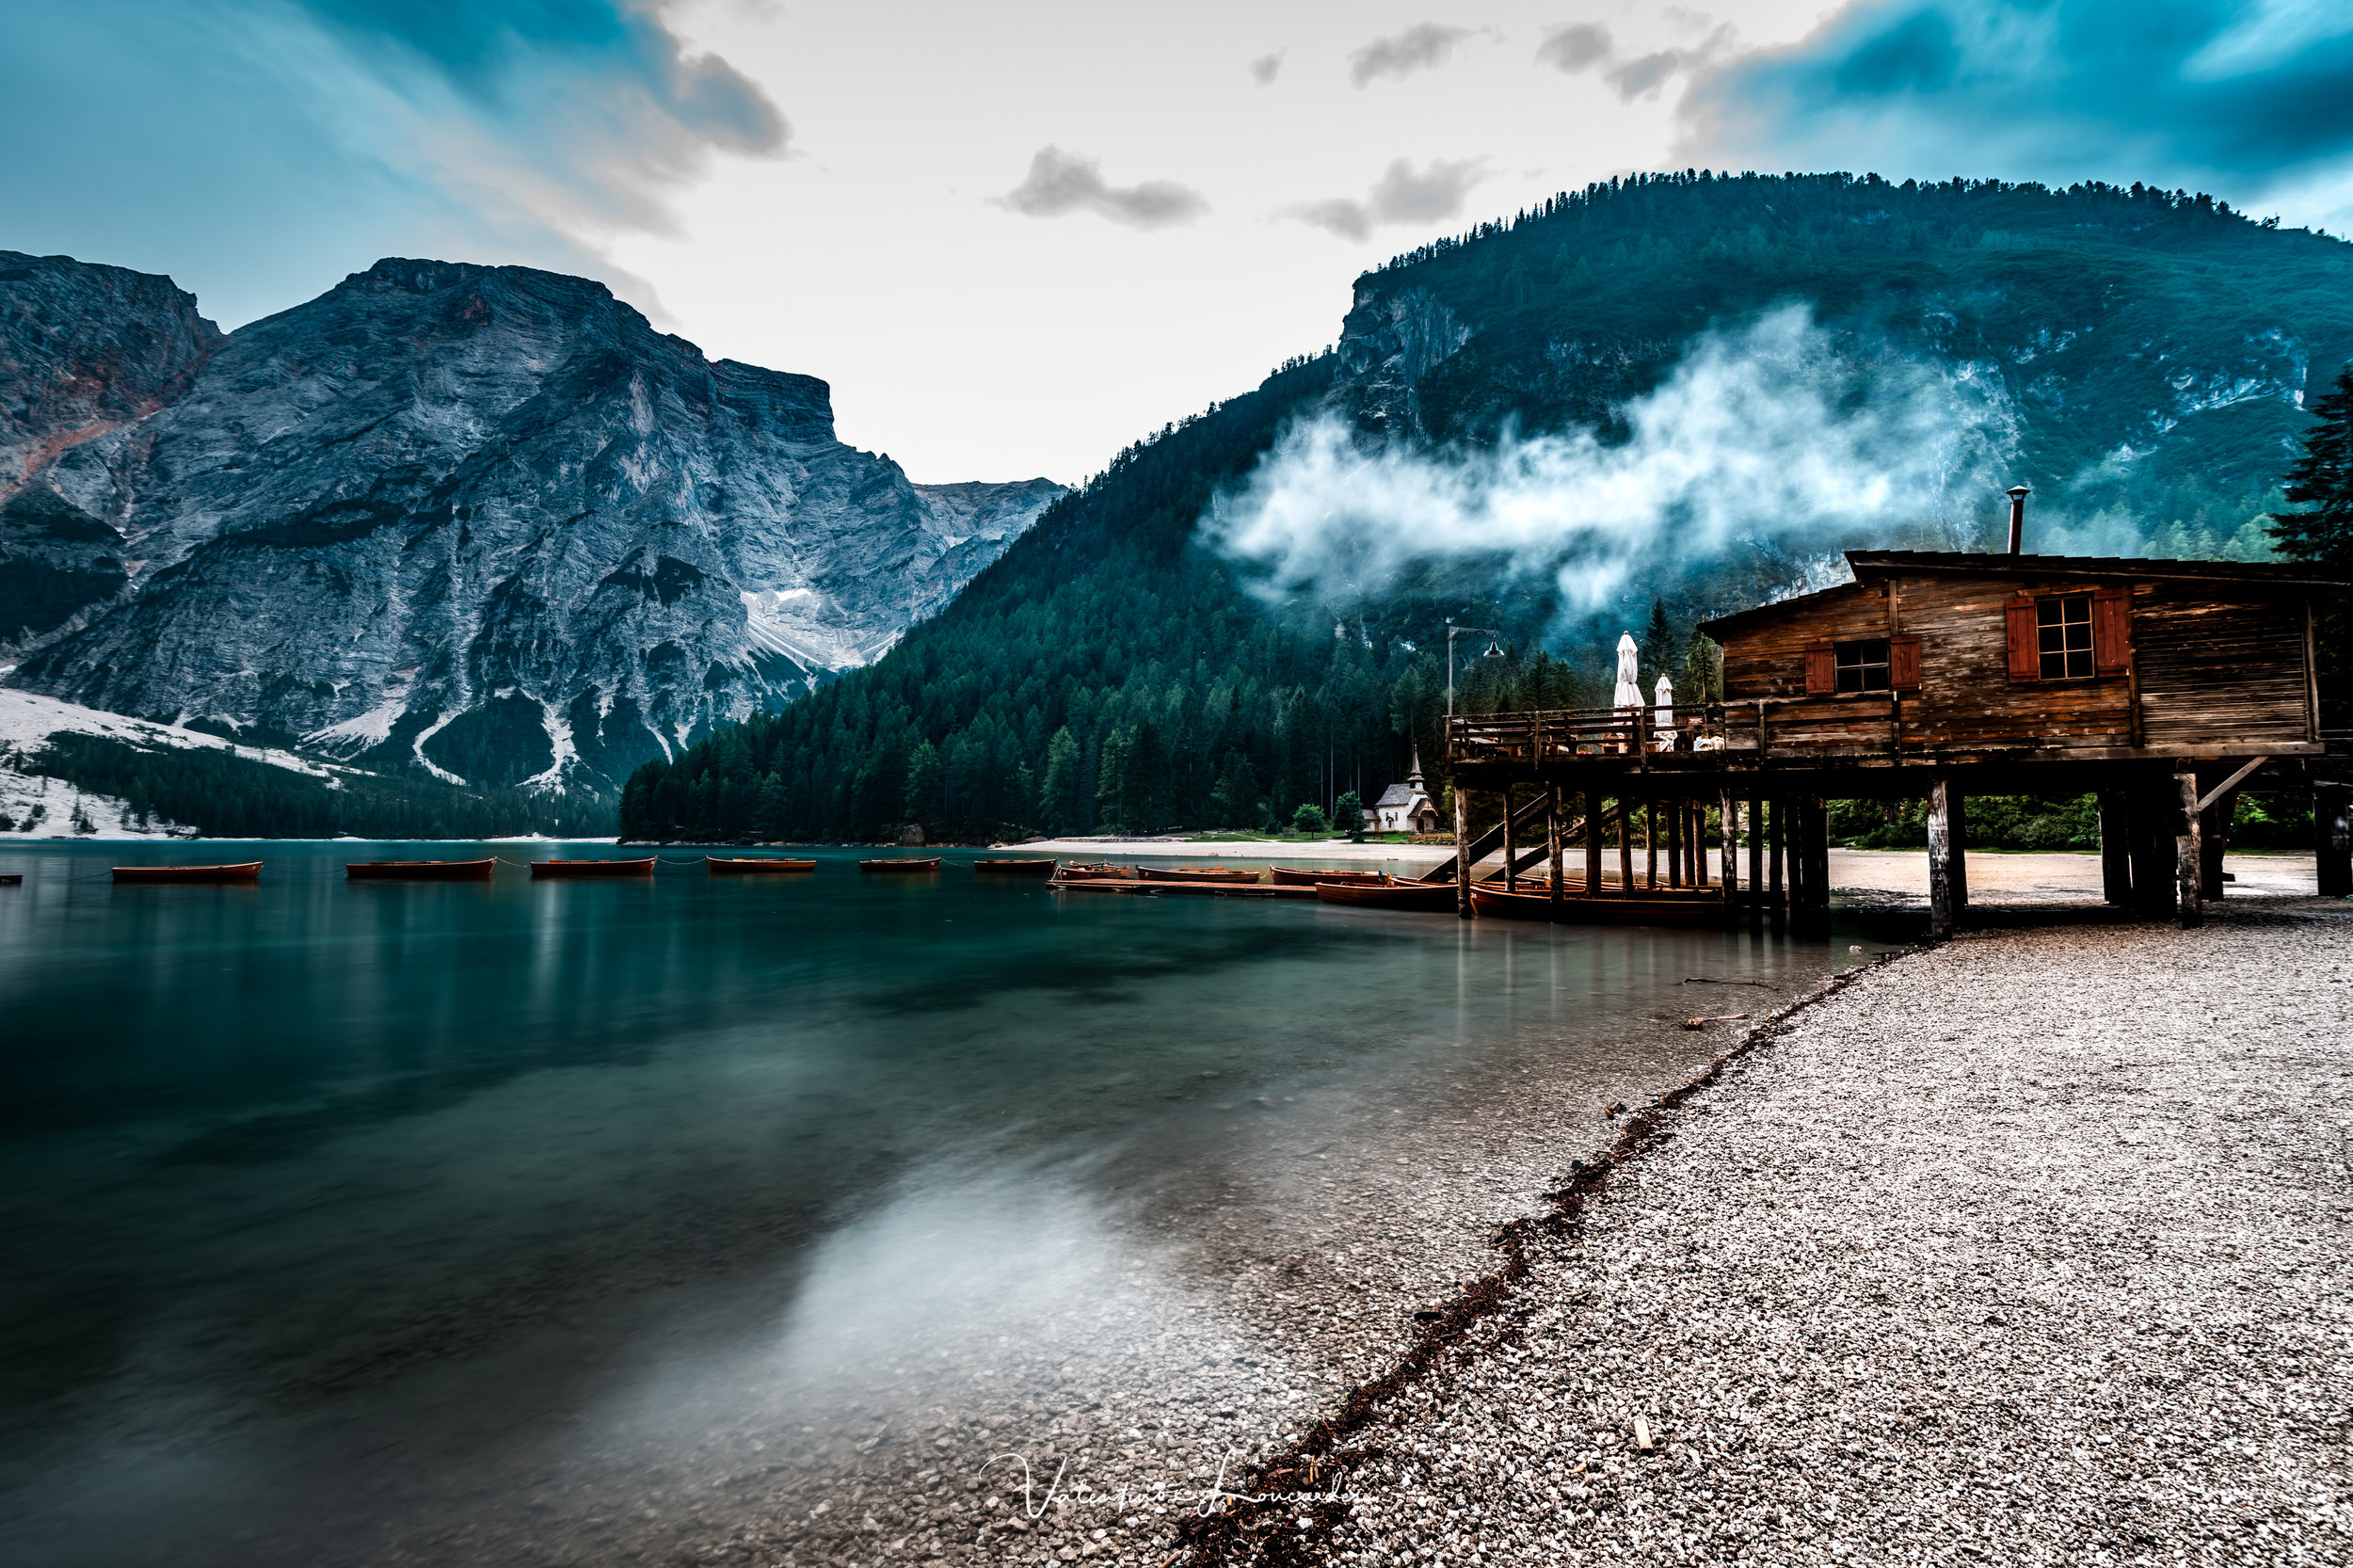
«Δεν πειράζει», είπαμε, «θα βγάλουμε εναλλακτικές». Συνέχισε, εν τω μεταξύ, να ψιλοβρέχει σε σημείο που δυσκόλευε αρκετά τις λήψεις μακράς έκθεσης με φίλτρα (long exposure with ND Filters), γιατί γέμιζε το φίλτρο σταγόνες βροχής και είχαμε ξεμείνει απο στεγνά πανιά για να καθαρίζουμε τα φίλτρα.
Το καλό με τη βροχή, ήταν ότι μείναμε σχεδόν μόνοι μας στην λίμνη. Όσοι δεν έφυγαν εντελώς, είχαν πάει στο παρακείμενο καφεστιατόριο. Μετά από καμιά ώρα, η βροχή σταμάτησε σχεδόν εντελώς και ο ουρανός καθάρισε αρκετά. Η λίμνη άρχισε να ηρεμεί και να εμφανίζει τις μαγικές αντανακλάσεις.
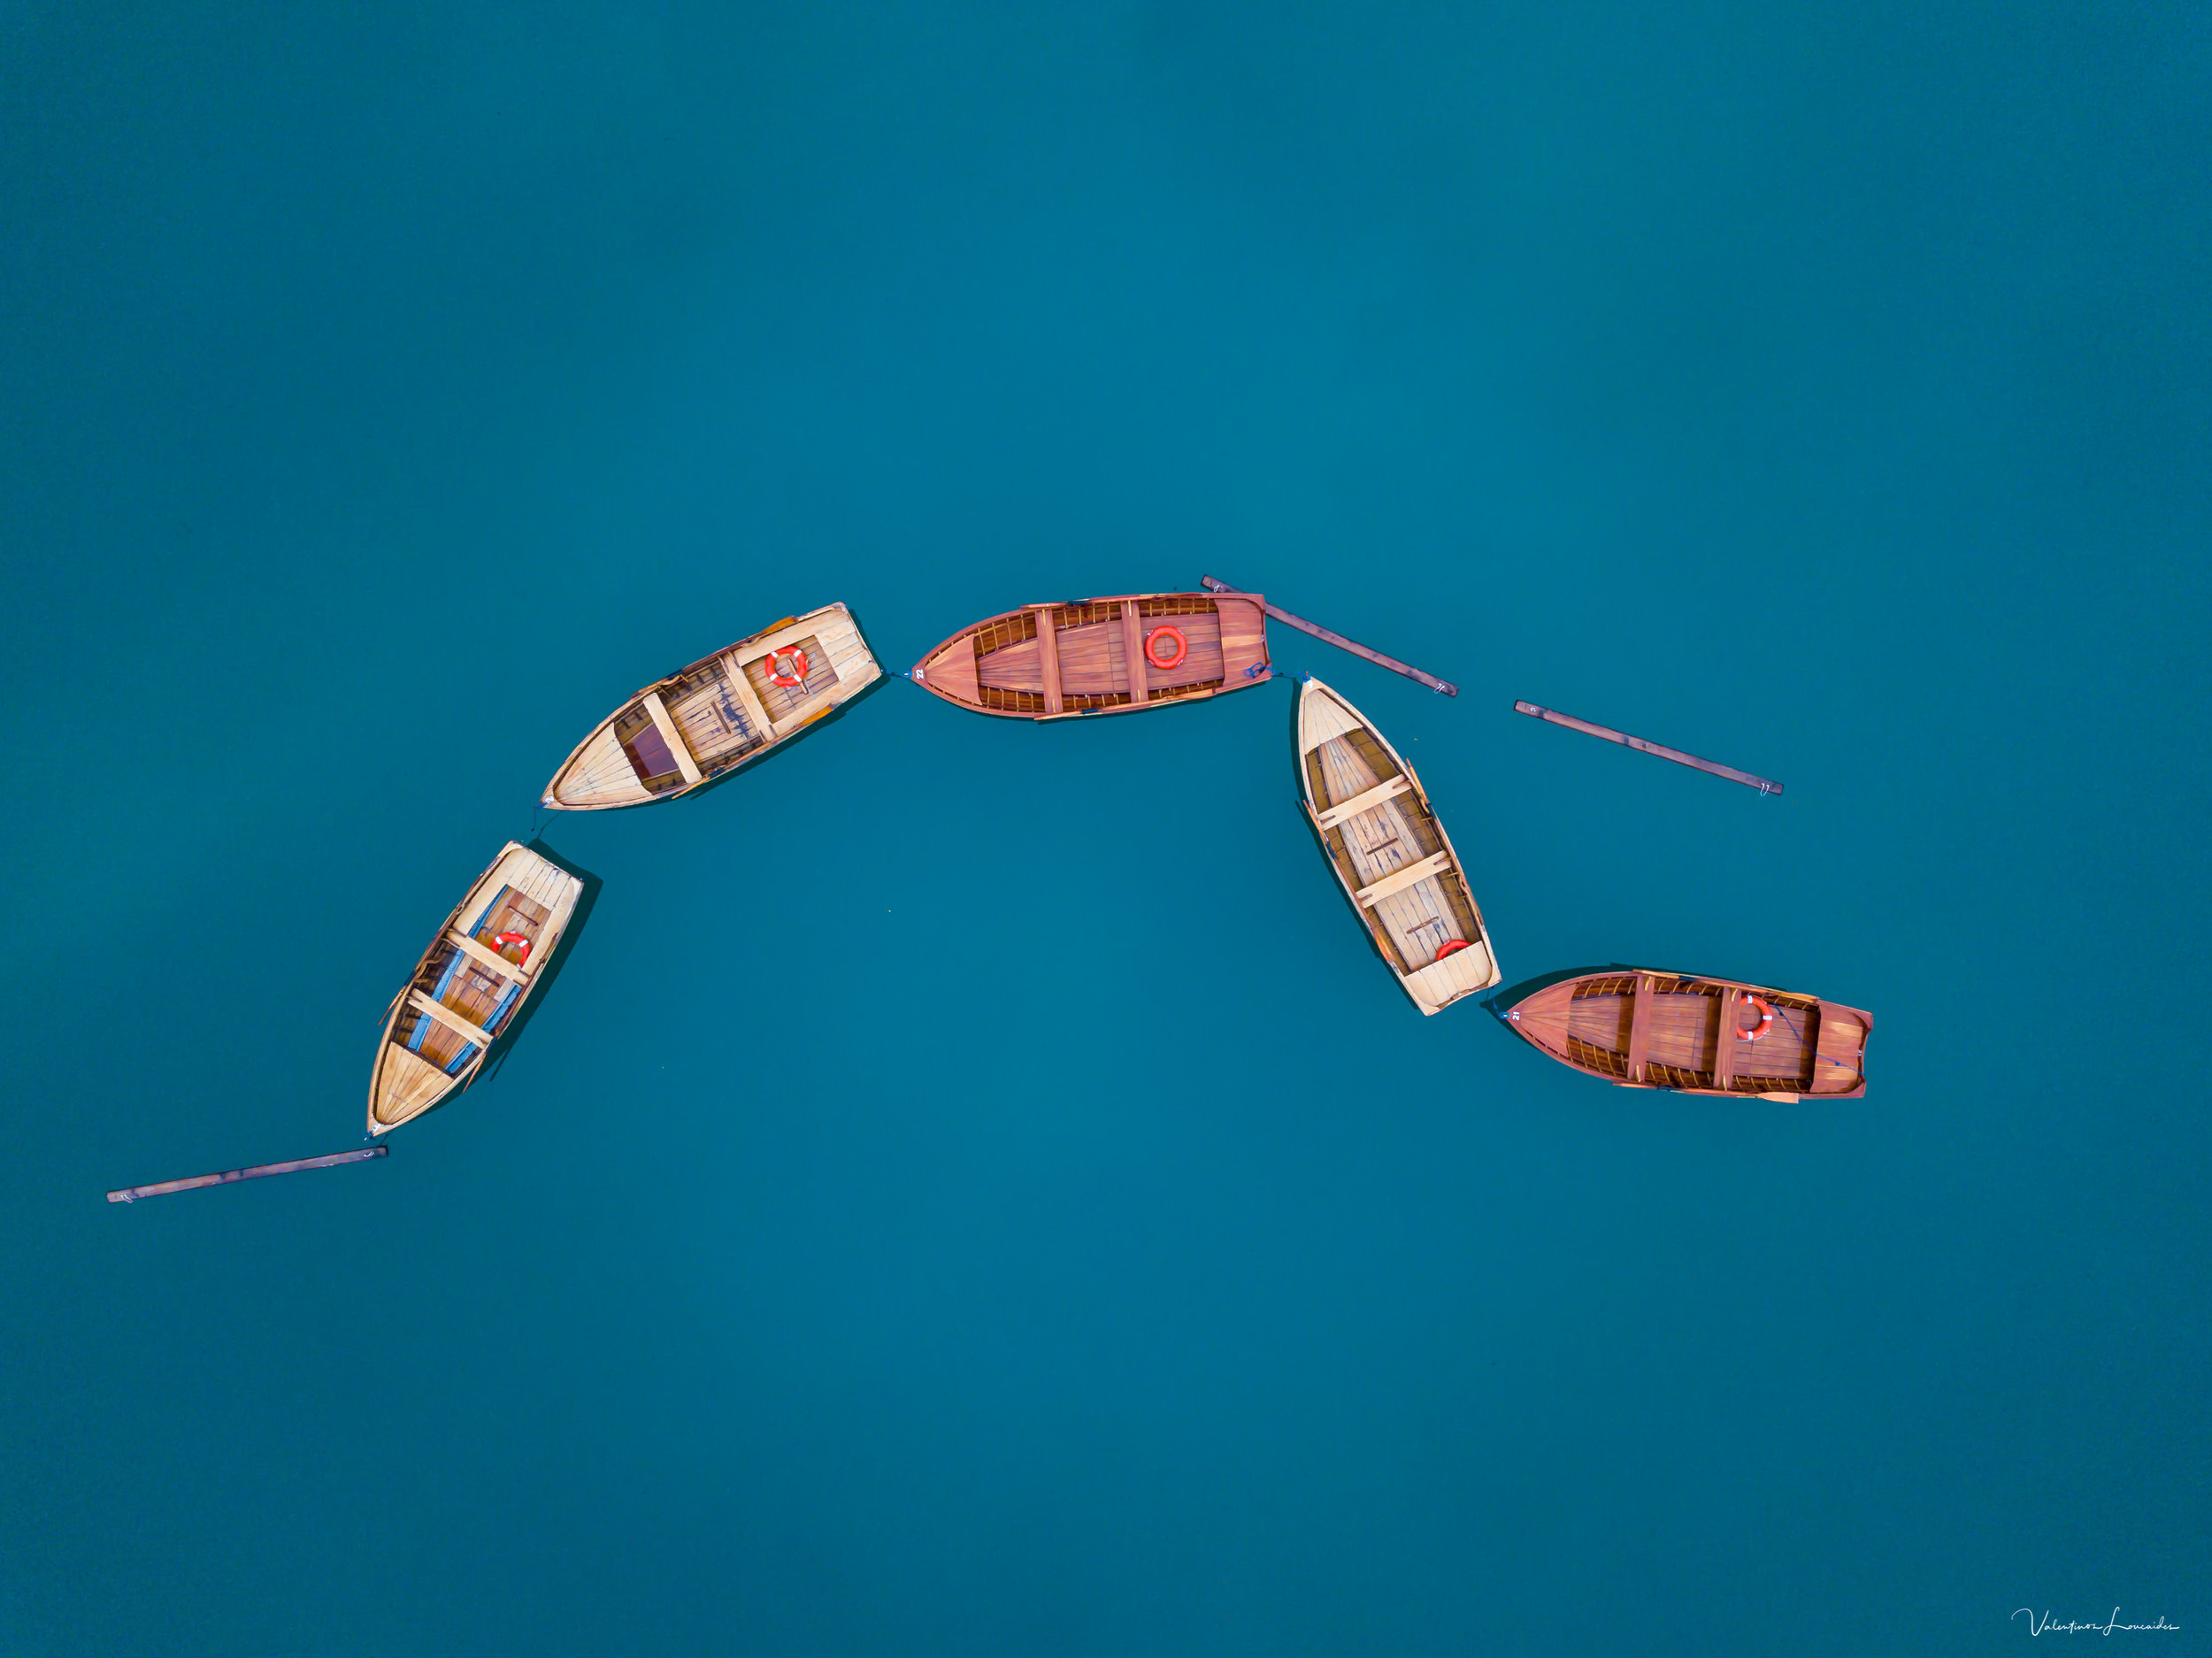
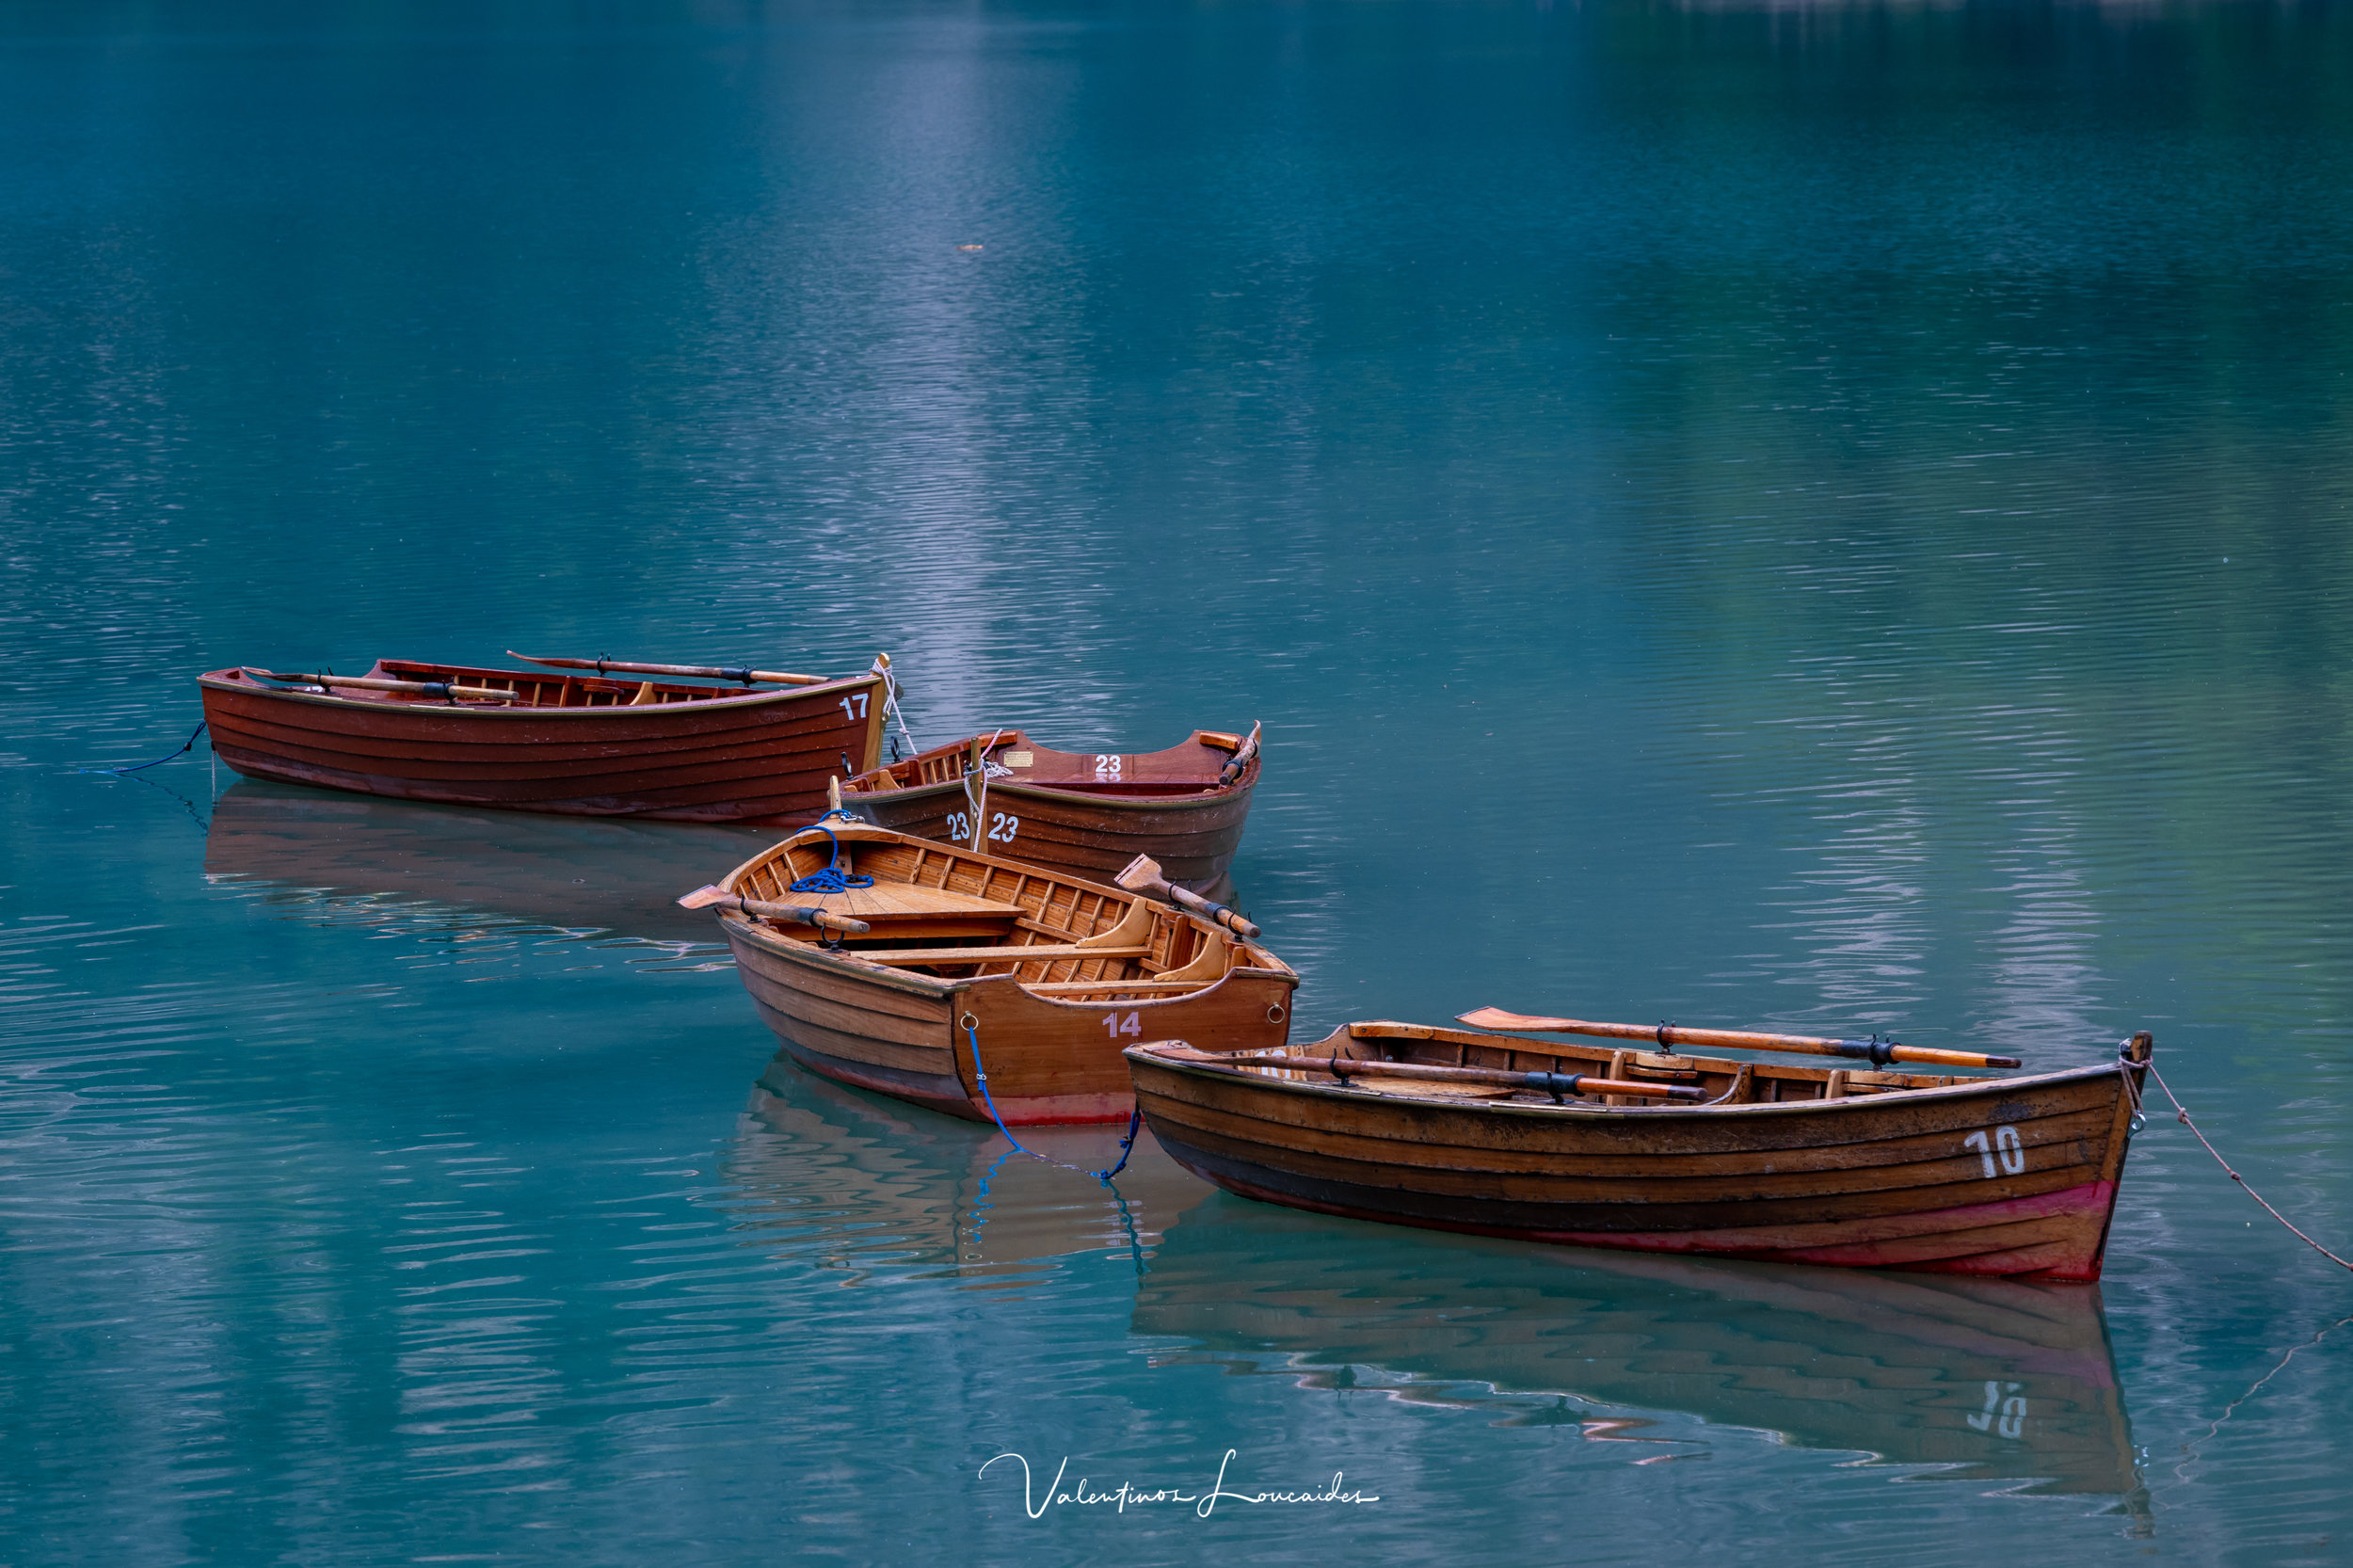
Ήταν η στιγμή για το Mavic Pro. Αν και έριχνε καμιά σταγόνα πού και πού, δεν μπορούσαμε να μην το ρισκάρουμε.
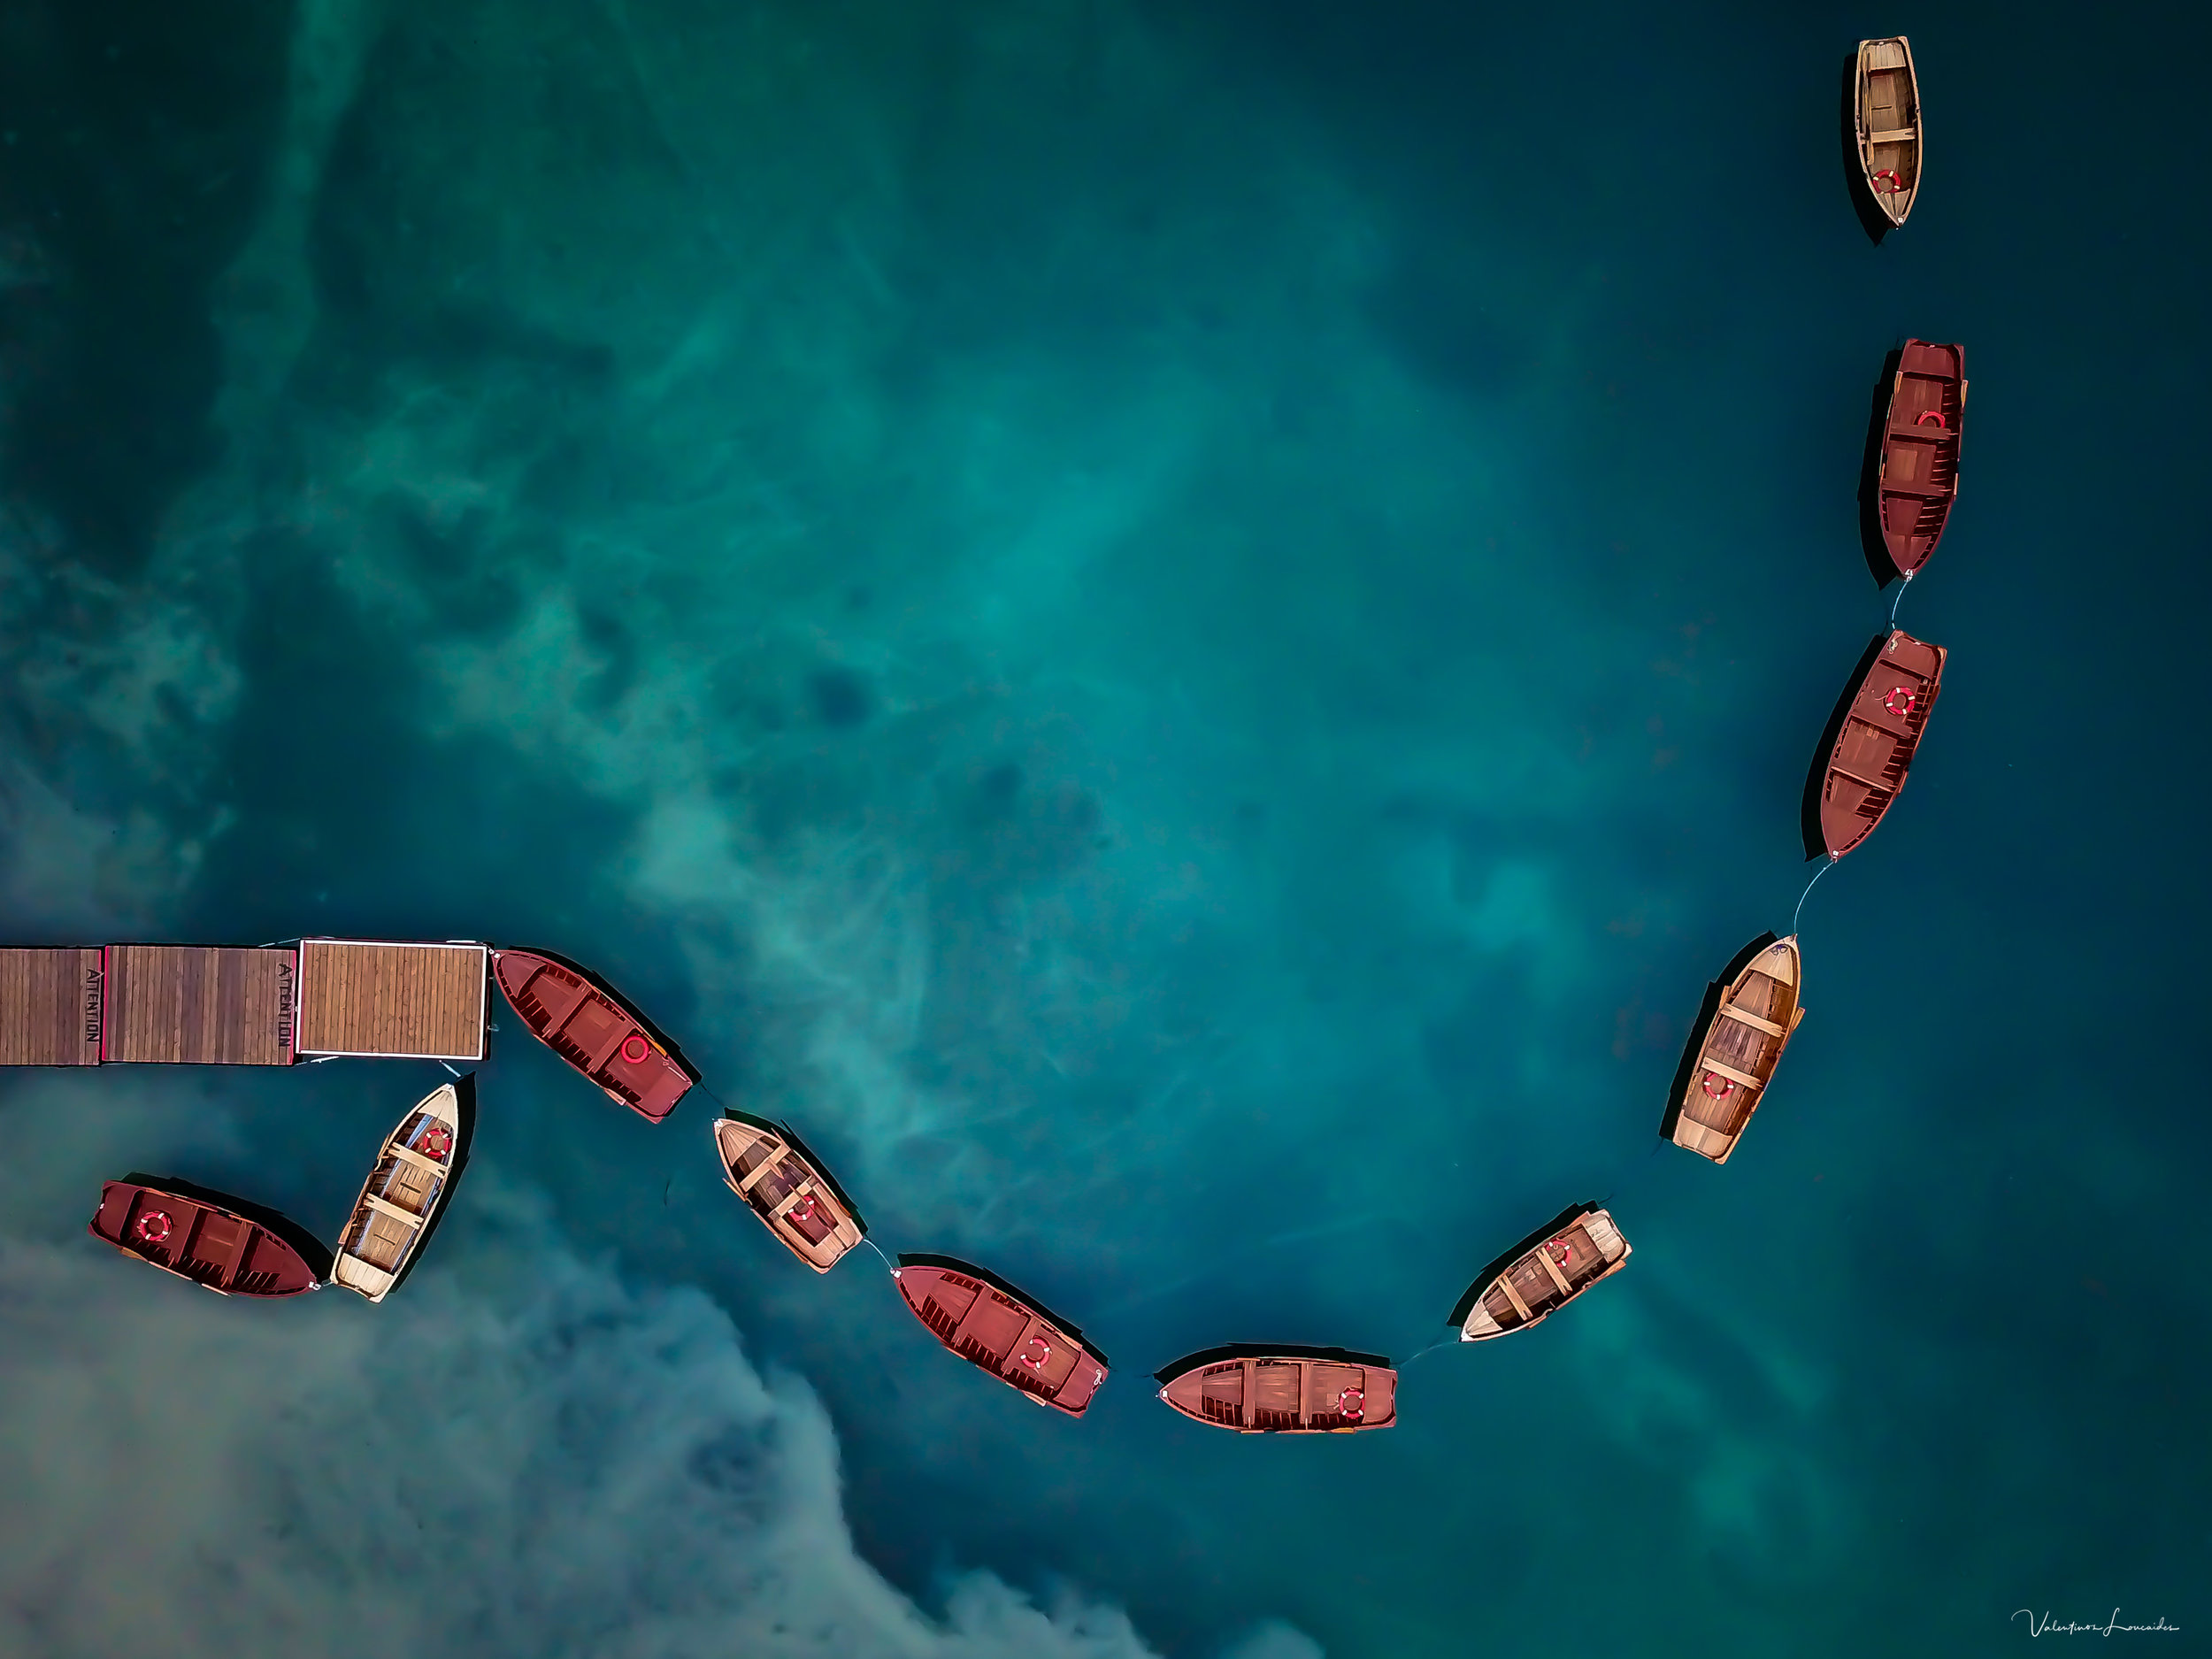
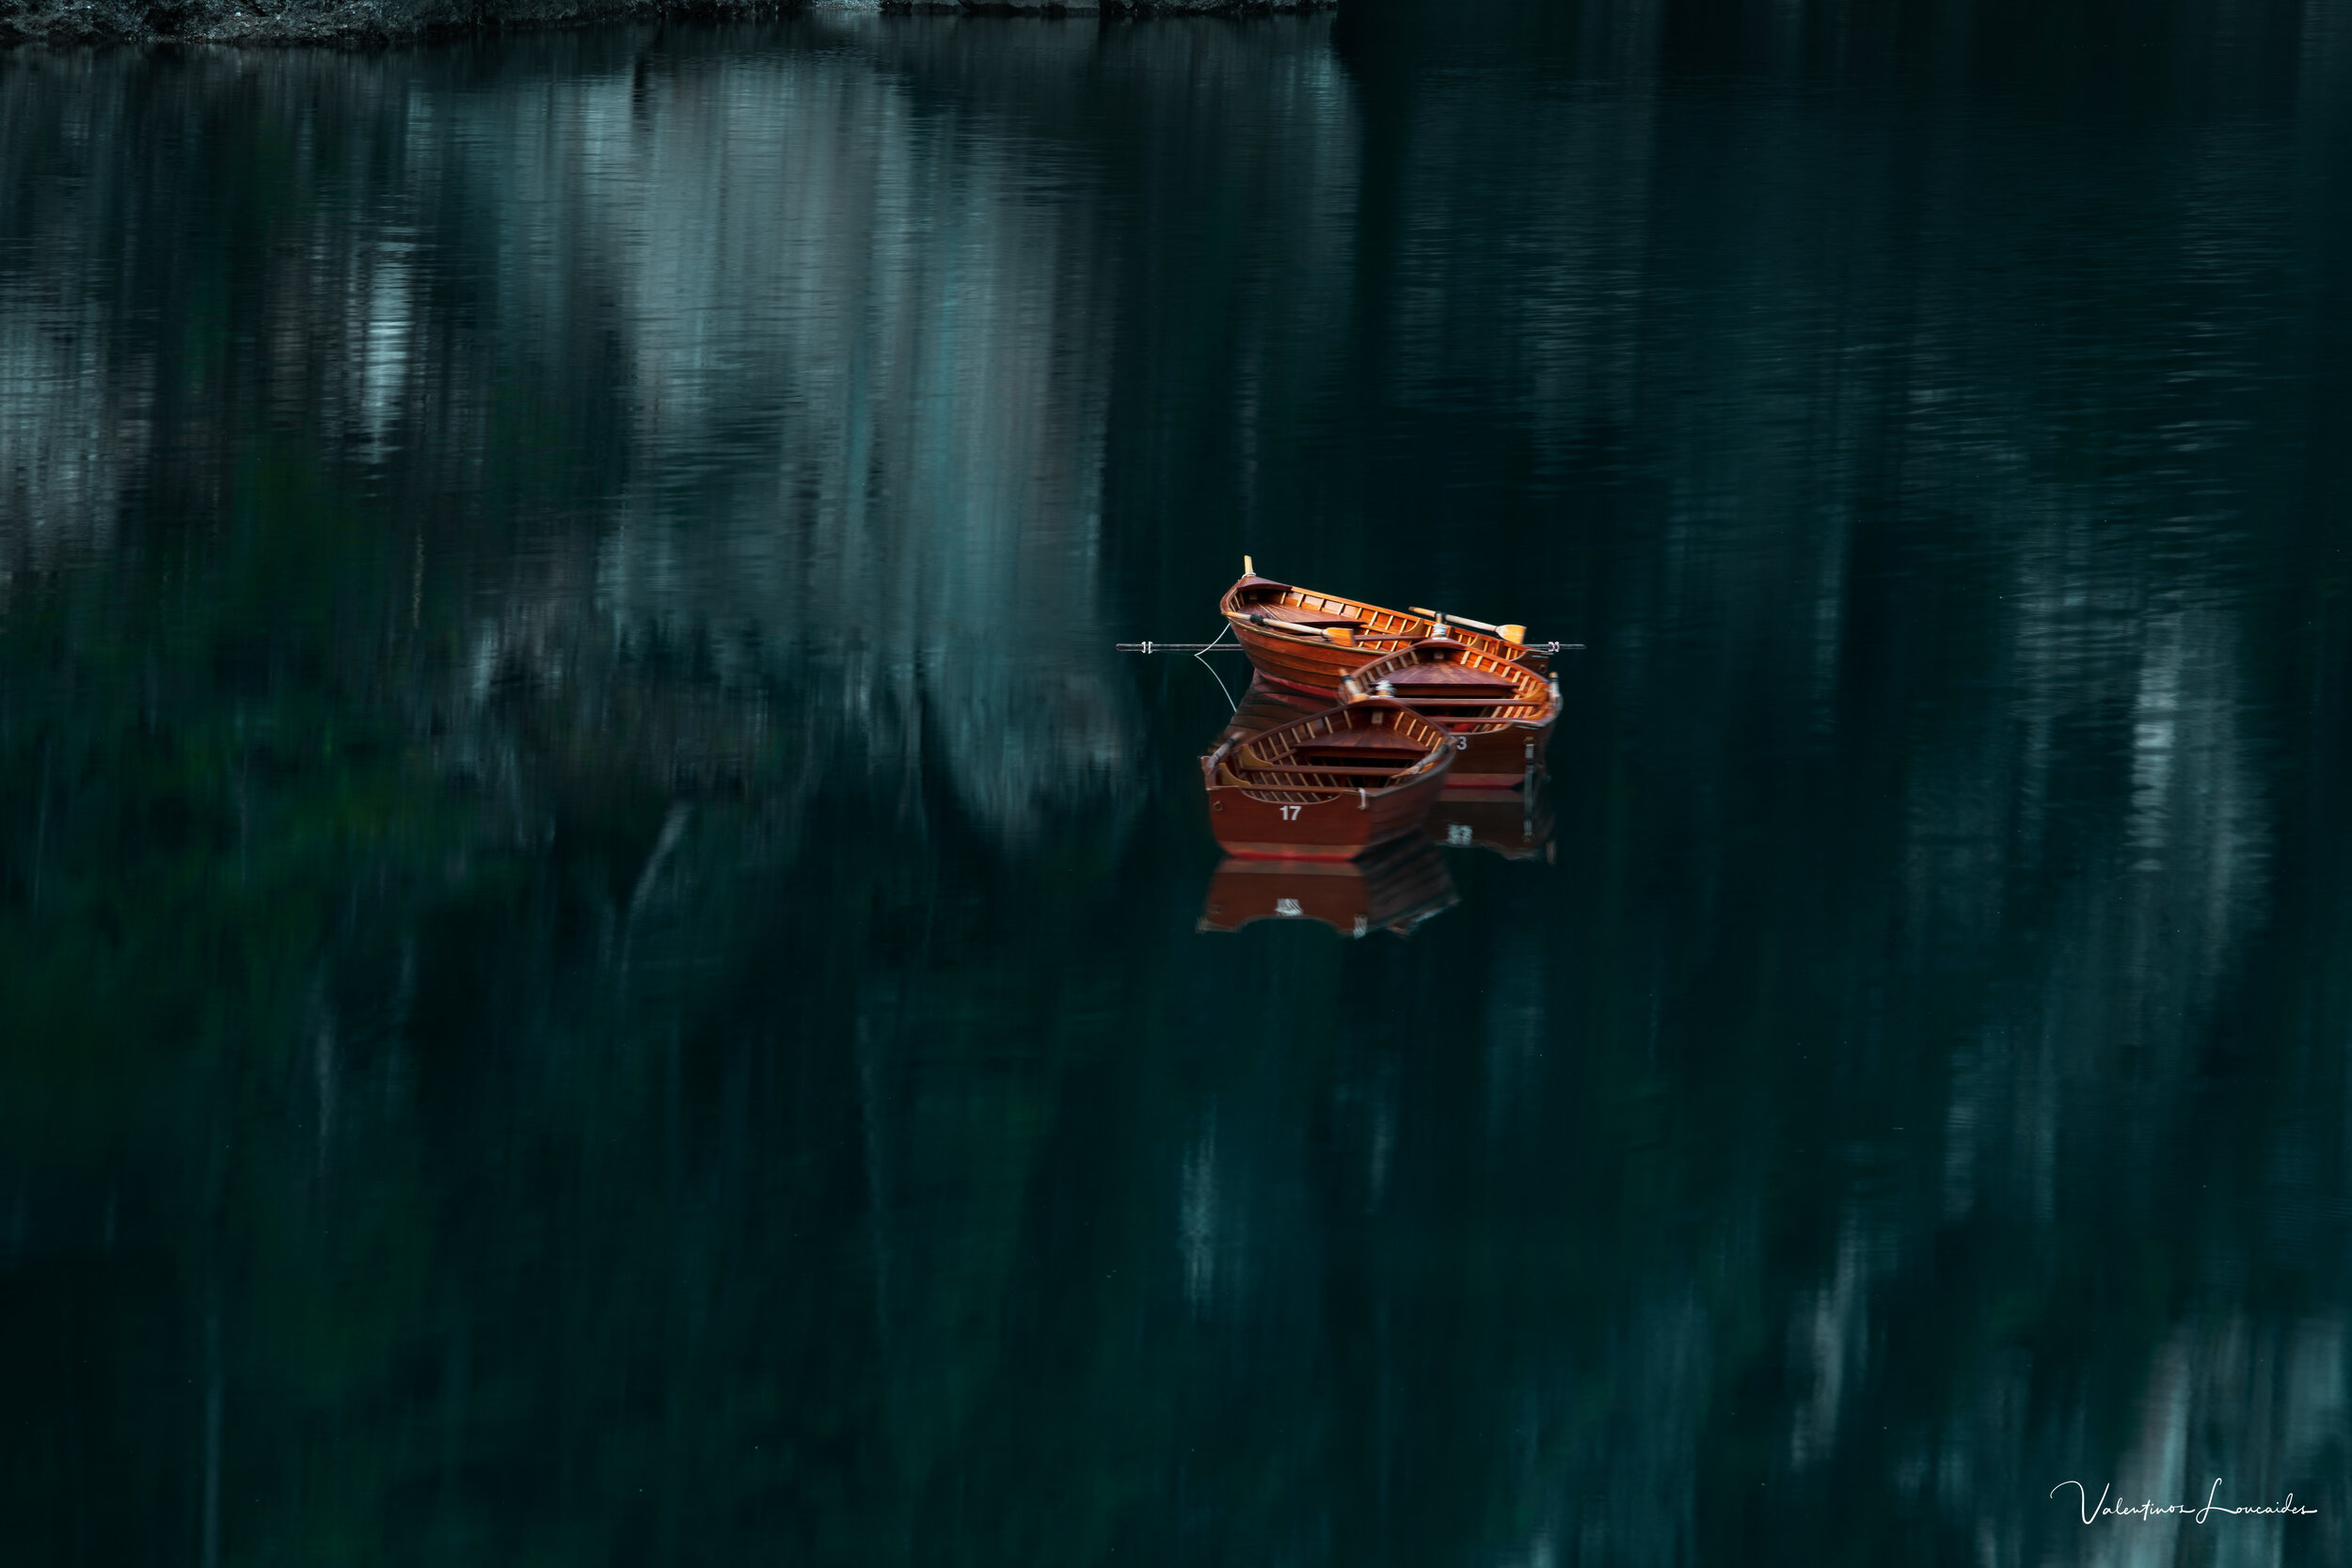
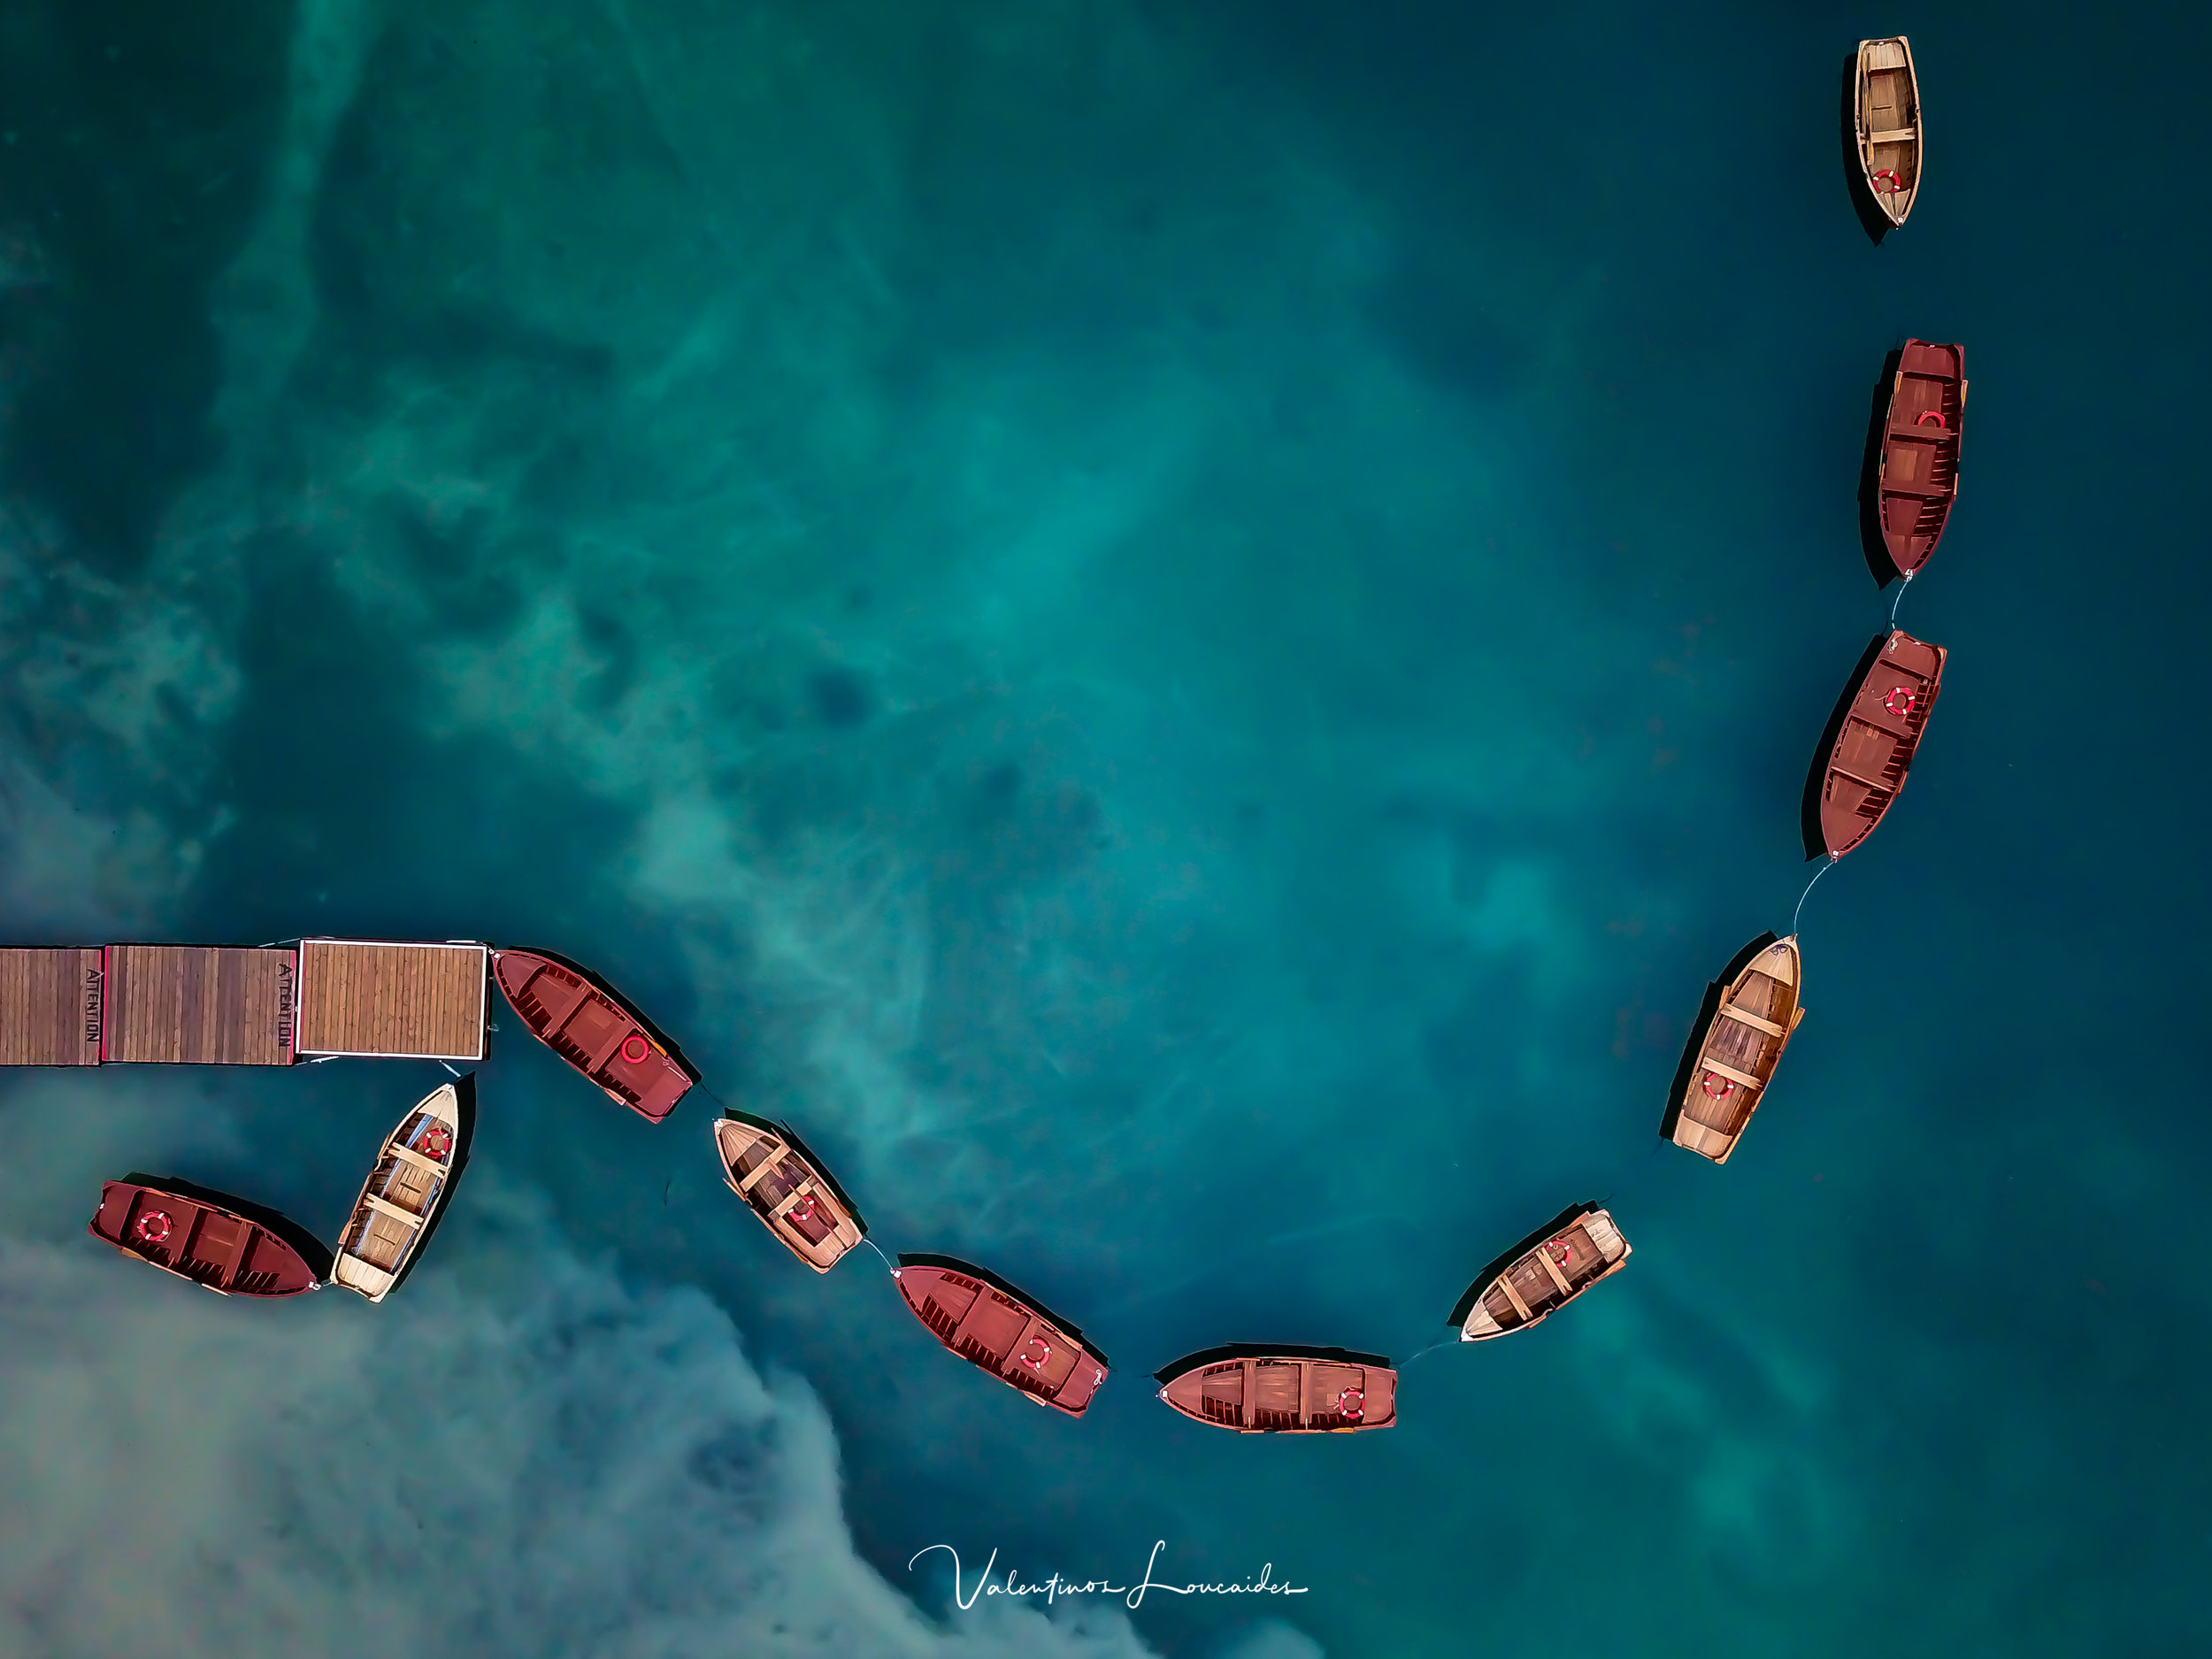
Βάλαμε πολωτικό φίλτρο και φύγαμε προς τα πάνω. Μετά από μερικές πανοραμικές λήψεις, εντόπισα τις βάρκες που ήταν δεμένες στη μέση της λίμνης και η ροή του νερού τις μετακινούσε κάθε μερικά λεπτά. Οι φωτογραφίες φαίνονταν εντυπωσιακές, ακόμα και στην οθόνη του κινητού, χωρίς καμία απολύτως επεξεργασία. Το πολωτικό φίλτρο ήταν ακριβώς στην σωστή γωνία 90° και η γυαλάδα είχε μειωθεί στο ελάχιστο! Έτσι λοιπόν βγήκε αυτή η φωτογραφία. Χάσαμε μεν την κλασική λήψη, αλλά βγήκε αυτή η μοναδική φωτογραφία. Μοναδική, λόγω της δυσκολίας για επανάληψη μιας τέτοιας λήψης, αφού χρειάστηκε η συμβολή διάφορων τυχαίων παραγόντων για τη δημιουργία των κατάλληλων συνθηκών, όπως η ένταση του ανέμου, τα σύννεφα, ο φωτισμός, η απουσία του κόσμου, το χρώμα της λίμνης, οι θέσεις των βαρκών, κλπ.
Shapes
Lago di Braies
Mavic Pro
Το πρώτο Mavic, λοιπόν, είναι έμπιστος φίλος εδώ και αρκετό καιρό. Έχει πετάξει σε Ελλάδα, Κύπρο και Ιταλία, διανύοντας περίπου 350χλμ σε 280 περίπου πτήσεις. Η κάμερα του, αν και 12 MP στις περιπτώσεις που είχε καλό φωτισμό, δεν με πρόδωσε ποτέ! Όταν ο φωτισμός είναι περιορισμένος, δεν μπορεί να αποδώσει, λόγω του ότι ο αισθητήρας είναι πολύ μικρός και ο ψηφιακός θόρυβος είναι αισθητά αυξημένος, κυρίως στις σκιές.
Ασφάλεια
Πριν από κάθε πτήση, κάνω πάντα ένα γρήγορο έλεγχο του drone εξωτερικά, για έλεγχο τυχόν φθοράς στους έλικες. Ένα μικρό ράγισμα ή φθορά στις εξωτερικές άκρες είναι σημαντικό, και δεν πρέπει να αγνοείται. Αλλάζουμε αμέσως όλους τους έλικες, αν παρατηρήσουμε την παραμικρή αλλοίωση σε οποιοδήποτε σημείο!
Μετά την απογείωση πάντα κάνουμε ένα σύντομο hovering για 15-20 δευτερόλεπτα και πριν φύγουμε προς τα πάνω, κάνουμε μια σύντομη κίνηση μπρος - πίσω, δεξιά - αριστερά, πάνω - κάτω και περιστροφή δεξιόστροφα και αριστερόστροφα.
Γενικά ακολουθούμε πάντα τους κανόνες ασφαλείας, για δική μας ασφάλεια αλλά και των γύρω μας.
Ρυθμίσεις
Όπως και στην DSLR μηχανή, έτσι και στο Drone, πολλοί με ρωτάνε την κλασική ερώτηση: «Φίλε τι ρυθμίσεις έβαλες;» Κατά τη φωτογράφιση με το συγκεκριμένο μηχάνημα, βγάζω πάντα τη φωτογραφία σε RAW DNG, άρα δεν έχω να ασχοληθώ ούτε με white balance ούτε με color profiles, αλλά ούτε και με τις ρυθμίσεις ευκρίνειας, αντίθεσης και κορεσμού χρωμάτων. Στο Mavic PRO δεν φωτογραφίζω πάντα manual, γιατί δεν υπάρχει έλεγχος στο διάφραγμα όπως στο Mavic 2 PRO που όλες μου οι λήψεις είναι αποκλειστικά manual με βοηθό το ιστόγραμμα που μας δίνει η εφαρμογή.
Επεξεργασία
Η επεξεργασία όλων των φωτογραφιών μου γίνεται κατά 95% στο Lightroom και κατά 5% στο Photoshop. Πρώτο πράγμα που κάνω πάντα σε κάθε επεξεργασία, είναι η διόρθωση προφίλ και φακού που δίνει το lightroom. Μετά από αυτό περνάω στη φωτογραφία ένα από τα δικά μου Presets (Μπορείτε να τα δείτε εδώ) και από αυτό το σημείο και μετά, κάνω τις διορθώσεις μου αρχίζοντας από τις καμπύλες (curves) και συνεχίζοντας στις βασικές διορθώσεις αμέσως μετά. Μετά την ολοκλήρωση της διόρθωσης αφήνω τη φωτογραφία και επανέρχομαι να την εξετάσω ξανά αργότερα, με μια νέα ματιά και πάντα, μα πάντα, κάνω ξανά μικροδιορθώσεις.
Επειδή αυτό το κομμάτι με τις ρυθμίσεις και τις διορθώσεις δεν τελειώνει ποτέ, θα το αφήσω μέχρι εδώ και αν κάποιος θέλει να μάθει περισσότερα μπορεί να ρωτήσει στα σχόλια.
Διαγωνισμός φωτογραφίας.
Αρκετοί φίλοι και γνωστοί μου, μου έλεγαν επανειλημμένα να υποβάλω τις φωτογραφίες σε κάποιο διαγωνισμό φωτογραφίας, γιατί έμοιαζαν να είναι βγαλμένες από ταινία. Με τη δική τους παρότρυνση, λοιπόν, αναζήτησα τη διαδικασία υποβολής φωτογραφιών σε διεθνείς διαγωνισμούς. Πρώτη μου επιλογή, ήταν φυσικά ο ελληνικός διεθνής διαγωνισμός “Greek Photographic Circuit”, όπου η σελίδα τους είχε κατανοητές οδηγίες και ο τρόπος υποβολής ήταν απλός. Έφτιαχνες λογαριασμό, διάλεγες κατηγορία, έβαζες ένα τίτλο και ανέβαζες τη φωτογραφία στις διαστάσεις που ζητούσαν. Πλήρωνες για ποσό για τις κατηγορίες που επέλεγες και ήσουν πλέον διαγωνιζόμενος.
Δεν περίμενα σε καμία περίπτωση να βραβευτεί μία φωτογραφία μου με χρυσό μετάλλιο και αν μη τι άλλο σίγουρα δεν περίμενα να είναι αυτή από το Mavic PRO, με την τόσο χαμηλή ανάλυση.
Και όμως τελικά αυτό που μετράει σε ένα διεθνή διαγωνισμό, είναι η σύνθεση της φωτογραφίας, η διαφορετική οπτική, αυτό που σε κάνει να σταματήσεις τη ροή των φωτογραφιών και να αναζητήσεις την ιστορία πίσω από τη φωτογραφία.
“Σας αφήνω λοιπόν με την ιστορία πίσω από το οδοιπορικό στους Δολομίτες...”
Hello, everyone, I’m Valentinos Loucaides and lately I’ve been getting a lot of questions about long exposure photography, what filters I use, what you should buy, how to use them and many more that come along the world of Filter Photography.
I'm going to split this post in sections so you can get what you need! From beginner to advanced photographer and from cheap to expensive gear and also tips and tricks and mistakes I’ve done along the way so you can avoid them.
Please feel free to ask anything in the comments below and I'll do my best to get it in the post!
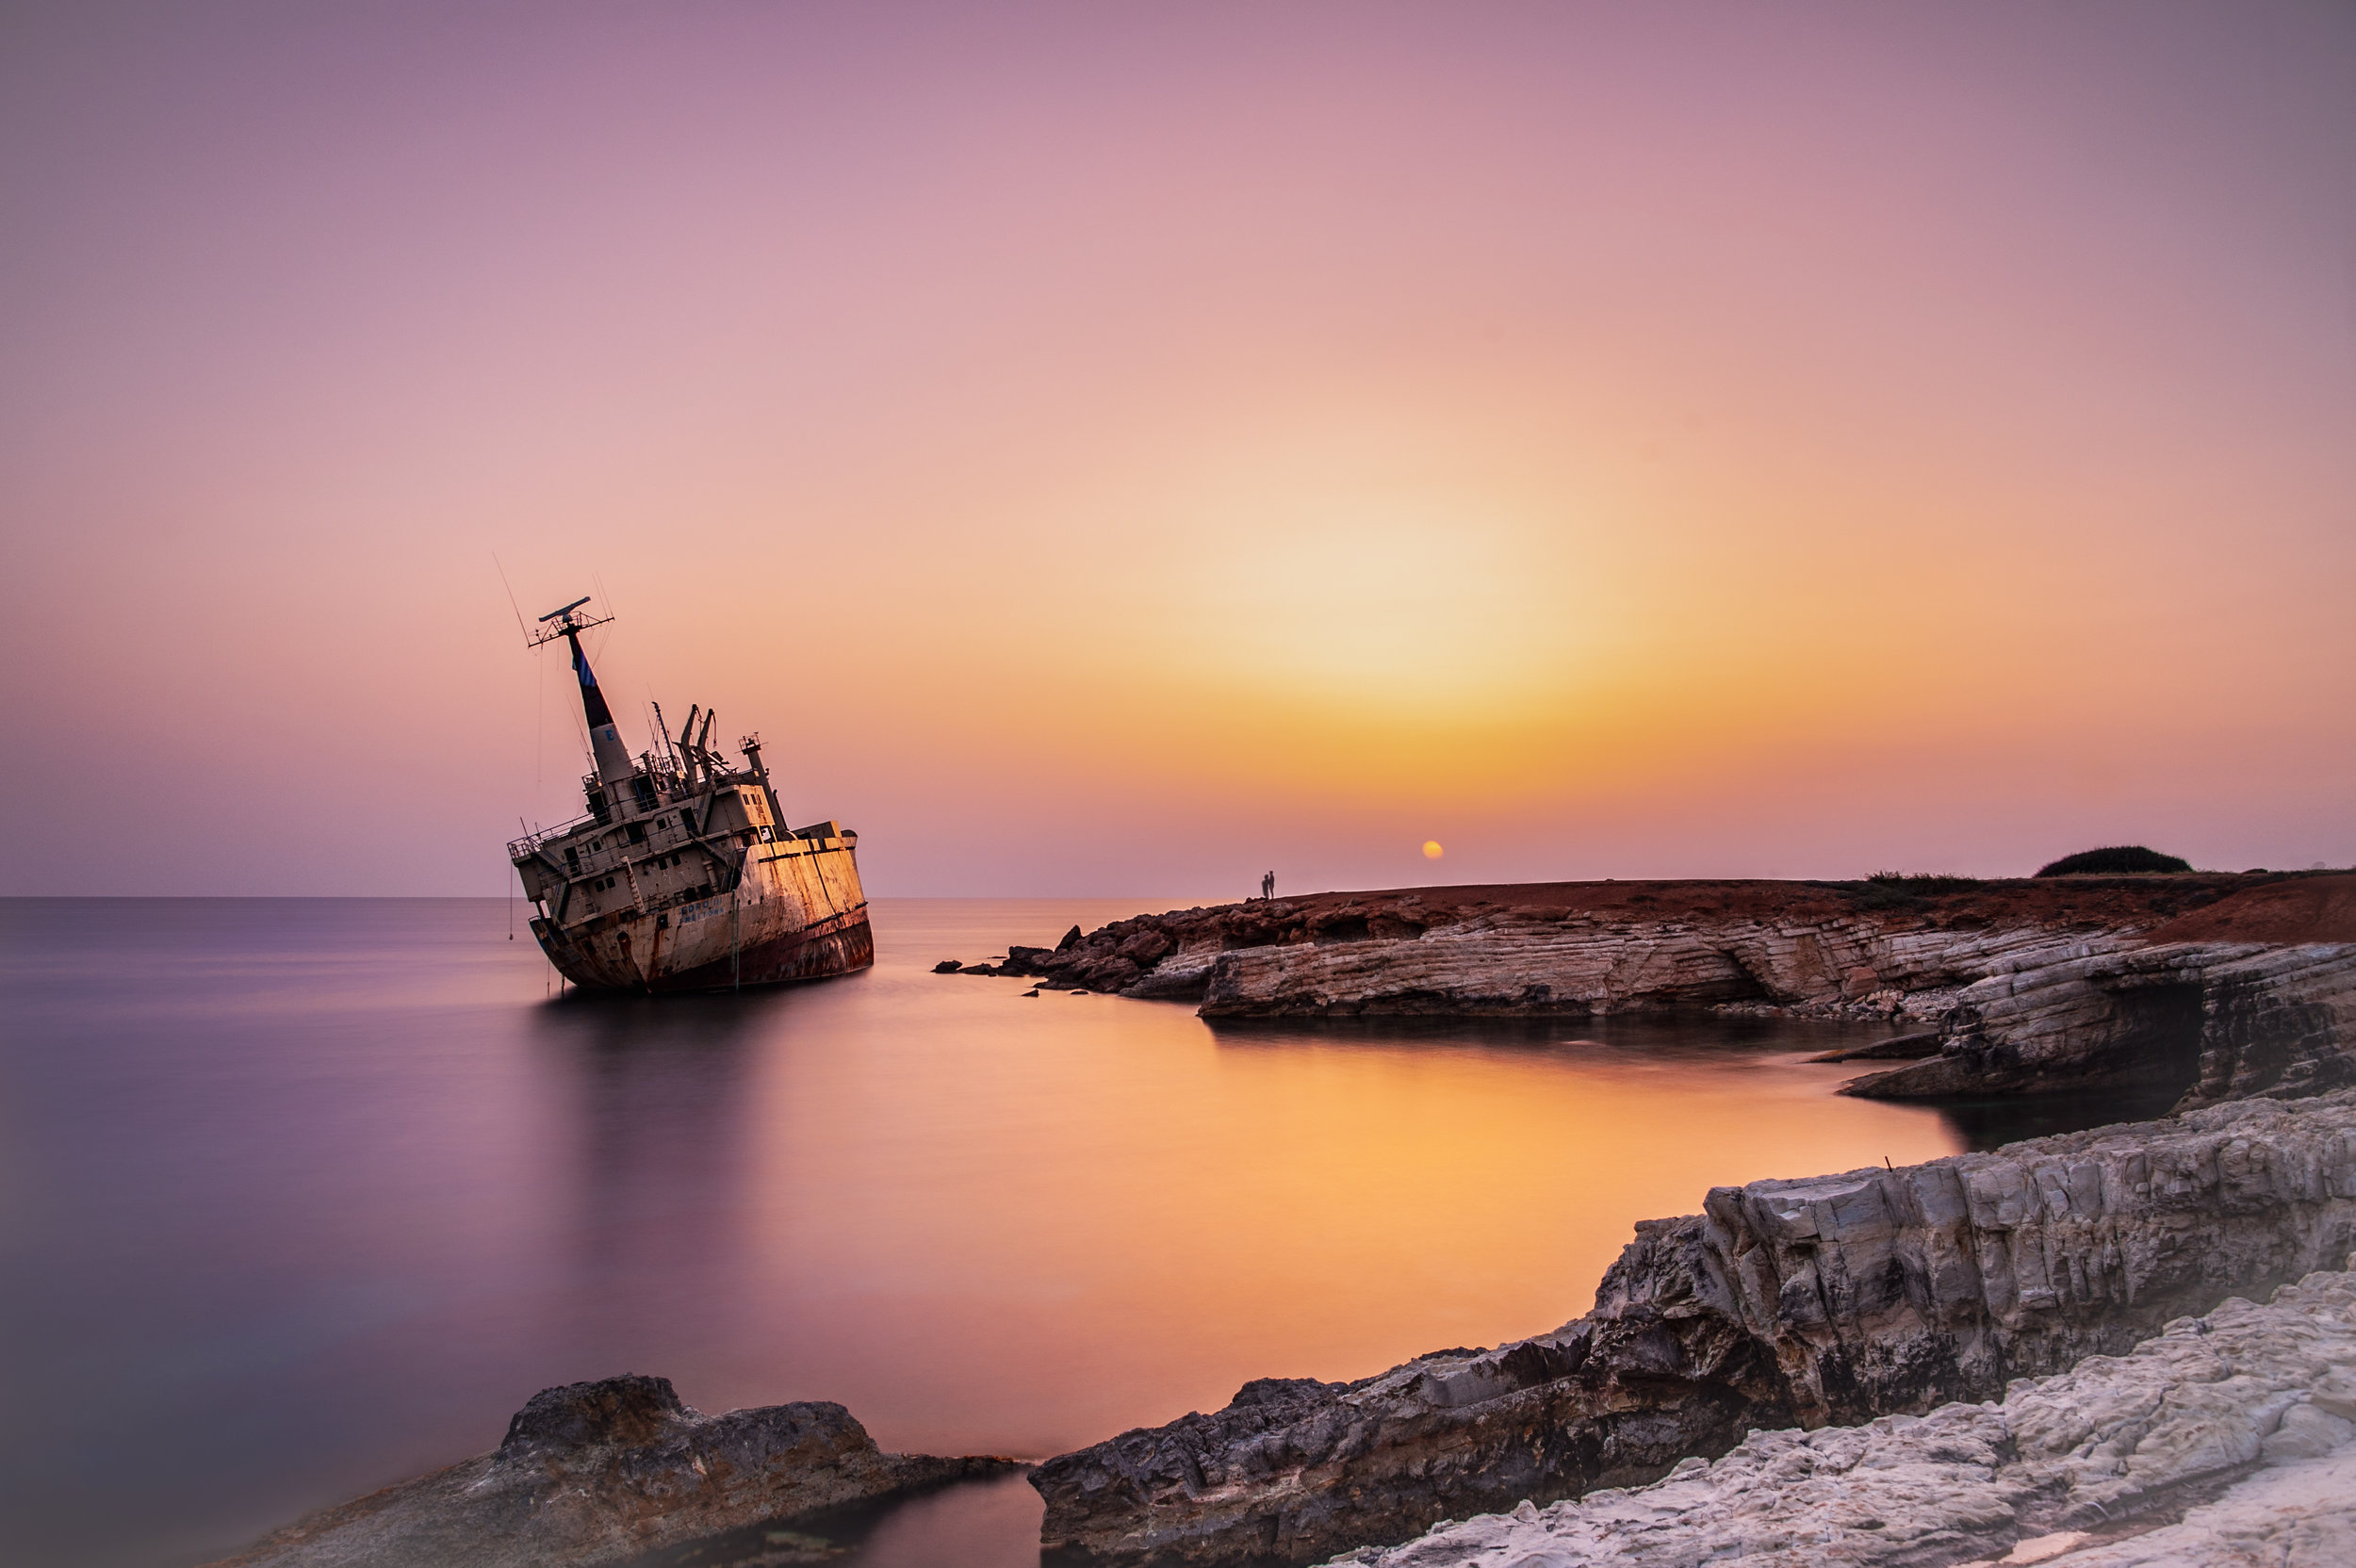
D850 + 16-35mm f/4 @ 16mm 40Sec f/10 ISO 64 + CPL + NiSi 10Stop IR ND + Nisi IR Med. Grad 0.9
What is a filter? A filter is something that you can put in front of your lens to achieve something that is not provided by the lens alone, for example, protection from scratches and cracks of the front element (glass), reduction of the amount of light entering the lens, achieving the effects of polarized light. I will explain below what is everything you didn’t possibly understand.
What are the most common filters to use? The most used filter is the UV filter, that is just for protection of your lens and does not offer any additional effect to your photography, it could in some cases have negative results if it’s bad quality or not very clean. The next most used filter is the circular polarizer (CPL) I’ll explain in detail below about the polarizing filter. And lastly, comes the Neutral Density (ND) filters with all their variations that achieve reduction of the amount of light entering the lens.
Do I need a filter? Well here there are many opinions going around, the truth is NO you don't need any filter other than the Circular Polarizer (CPL) which offers an effect that cannot be reproduced digitally. So for me here there are 2 ways.
If you like to work for hours on a single photo on a computer (Photoshop person) to get it to your desired result then you only need a CPL
If you want to get the photo on camera and then fine tune it on a computer (Lightroom Person), like me, then get the filters!
What is an ND Filter? An ND filter is the Neutral Density filter and it's a black piece of glass that goes in front of your lens and works exactly like sunglasses for your eyes!
What is a GND? A GND (Graduated Neutral Density) filter is an ND which is darker on one end and it gradually becomes transparent on the other end.
What is a CPL? A CPL (Circular PoLarizer) is a rotating filter that goes in front of your lens and polarizes the light that is coming in your lens, (Geek Explanation here). In simple photography world, a CPL will remove reflections and glare from water and will saturate your colours. (Further explanation below).
What is a UV Filter? Its a transparent piece of glass that will protect your lens from scratches.
What is vignetting? Its the effect that sometimes on the four corners of your photo you can see reduced brightness in comparison to the centre of the image. (A black shadow on the corners)
What is Long Exposure Noice reduction? On this mode, your camera will take a second image just right after the first one but with the mirror locked down so the photo comes entirely black, after this it will automatically calculate the digital noise from the second image and remove it from the first one. In our case here we don't need it because we are going to shoot at the lowest possible ISO and also it will take double the time to get the shot.
What is Vibration Reduction (VR)? VR is a feature the will stabilize handheld shots so you can take a shot at lower shutter speeds without blurry images. It used to be only the lenses but lately is available on the camera sensors for some Sony cameras. This feature is not offering anything if your camera is stable on a tripod, and in fact, it will make your image a little bit blurry because its gonna try to look for micro vibrations that are not there since you are on a tripod!
What is a cable release? A cable release or a remote shutter as you may hear it is a cable connected to your camera that will allow you to release your shutter and keep it open for as long as you like without touching the camera and thus avoiding causing vibrations.
What is bulb setting? When you are in Manual mode you will see that the lowest possible shutter speed you can get out of your camera is 30sec. after that there is a setting for the shutter speed that will say Bulb, on this setting your shutter will remain open for as long as you keep holding down your shutter button (on your camera or on you release cable).
What is a step up ring? It's a ring that will go on the front of your lens and will allow you to screw a larger filter on a smaller lens. For example, if your lens has a 67mm filter threat and your filter is 77mm you can use a 67 to 77mm step up ring so you can use that filter instead of buying one for every lens you own.
What can i do with a CPL? As i said above it can remove the glare from water. e.x. Lets say for example you have a waterfall or a river coming down and all the rocks are wet and looking nice but when you take the photo there is reflecting light from the wet parts of the rock and you cannot get the nice details at that point. Having a CPL along will let you remove that glare by simply rotating the filter!
Gives you the ability to photograph below the surface of water, e.x. you can shoot a shallow river and get the amazing patterns below the water surface.
It will also add more saturation and contrast to your images. e.x. Lets say you have clouds in the sky, point the camera at the sky and rotate your filter to make the blue of the sky pop and enhance the clouds.
It will offer a slight light reduction of light entering the lens (Works like an ND).
I'm rotating my CPL and nothing happens, Why? So you got a CPL, you put it on the lens and you go out point your camera at something and rotate.... and nothing happens no change what so ever. No, your filter is not broken! The CPL will not have any effect if you are pointing in the direction of the sun or it's opposite!
RULE: CPL Works best when you point your camera 90 degrees from the sun.
Memory Rule: Make you palm as a pistol grip and point your index finger at the sun and rotate your palm clockwise or anti-clockwise while pointing at the sun, you thumb will give you the best angle to take your photo to maximise the effect of the CPL.
Types of CPL
Screw on Filter: It will screw on the front of your lens and you can rotate it from there.
Pros: Cheaper than buying a square system and easy to carry and use
Cons: Cannot be combined with other filters easily. If you do combine them:
you will get a lot of vignetting at wide angles
with a high-density ND you wont be able adjust the polarizer to the desired position because you won't be able to see anything from the viewfinder.
extremely hard to combine with a GND.
CPL for Square filter mounting system: This can be a part of a group of filters that can be mounted together in the front of your lens.
Pros:
Minimal to no Vignetting at wide angles
Can be combined with 3 or more filters ND + GND + 2nd GND
Can be adjusted independently of the other filters.
Better Quality
Cons:
Larger than the screw on filter and is a pain to curry.
Much more expensive
Takes some time to install and use
Screw on CPL
Nisi CPL System
Lee Square System CPL
As we said above the ND Filter will reduse the light coming in your camera. The question is why would you want to do that since we all know the more light the better? There are a couble of reasons but what i will talk about will be about redusing the shutter speed and thus getting a long exposure shot during the day.
Types of ND Filters, just like the CPL there are the exact same categories for ND Filters.
Screw on Filters: Just like the CPL they can be screwed directly on your lens.
Pros:
Cheaper than Square filters.
Don't need a mount.
Can be used on several lenses with Step up rings.
Easy to carry.
Cons
Too much vignetting if you stuck them together.
Next to impossible to use with a GND.
Very hard to use with a CPL.
Usually lower quality than Square.
Square filters: these are the best option if you want to get the best results
Pros:
Very good quality (Depending on what you buy)
Can be stacked together with next to no vignetting.
Can be removed from the lens very fast to adjust
your frame and exposure
Cons:
They get very expensive
You can get them dirty really fast with your fingers.
You need to be very careful while installing them on
the mount because if you don't adjust them precisely you will get some ugly light leaks.
You need to be extra careful not to break them
You need a large pouch to carry them and keep them safe.
What are Stops (ADVANCED)? I'm sure you heard before about filter stop or F-Stops so let's see what those are by the help of the following 2 images. Every large point on the photos below is 1 - Stop.
Let's go with an example.
We have a shot and we want to reduce light by 6-Stops in order to get a long exposure shot.
Let's assume that the shot is taken at the lowest possible iso to get the best dynamic range and the least amount of noise.
Let's say we got the shot at F/11 and 1/125''.
We need to make our exposure longer, what possible ways do we have?
1. Smaller Aperture
2. Add a Filter.
3. Lower the ISO
Since we are doing a long exposure the only way to go is by adding a filter because lower iso is not an option since we are already at the lowest possible iso, also also closing our aperture down to f/22 will introduse other problems and it's also only 2 stops.
If our filter is 6 - Stops we need to keep our exposure the same, so we increase our shutter speed by 6 stops. if you count below 6 major points 1/125'' will become 1/2'' so we managed a quite long exposure time!
What you will need: Camera, Tripod, Cable release, ND
You are at your location, you got your frame and you are ready to measure your exposure and get the shot.
Mode: Any.
Let's use the example below to get step by step process:
Find your frame
Setup the tripod (make sure is steady)
Connect your shutter release cable
Turn off VR (Vibration Reduction OFF)
Set your ISO to the lowest Possible setting.
Focus your camera and then Switch to Manual Focus and make sure you don't touch the focus ring on your lens or move the tripod. This step is the most important in order to get a sharp image with an ND Filter. The reason we use manual focus is that after we install the filter on our lens we will see complete black from the viewfinder and there is no way to focus!
Measure your shot. You should avoid (P) Mode but this will work even in that. In whatever mode you are, write down or remember the settings that the camera has calculated (For example (ISO 100, f/10, 1/25 Sec)
Carefully install your ND Filter without touching the focus.
Find a way to cover the eyepiece of your viewfinder. You can use a small piece of aluminium. This step does not apply if you are using a mirrorless camera.
Now is the step that is you need to calculate your shutter speed with an ND Filter... The easiest way to do so is by downloading an app called LEE Stopper (its available for both iOS and Android). After getting the app is a straightforward process. You select your filter stops on top (6/10/15 Stops) you input your shutter speed and it will give you the new shutter speed you need to use. ex for me 1/25 sec was 40Sec with the 10 stop filter.
Set your camera to Manual Mode, Set the shutter speed to Bulb and the Aperture and ISO to what you noted on step 8.
Take the shot with your cable release. Leave the shutter open for the amount of time you got from the app.
You are done.
What you will need: Camera, Tripod, Cable release, CPL, ND
You are at your location, you got your frame and you are ready to measure your exposure and get the shot.
Mode: Any.
Let's use the example below to get step by step process:
Find your frame
Setup the tripod (make sure is steady)
Connect your shutter release cable
Turn off VR (Vibration Reduction OFF)
Set your ISO to the lowest Possible setting.
Adjust your CPL (if you are using one)
Focus your camera and then Switch to Manual Focus and make sure you don't touch the focus ring on your lens or move the tripod. This step is the most important in order to get a sharp image with an ND Filter. The reason we use manual focus is that after we install the filter on our lens we will see complete black from the viewfinder and there is no way to focus!
Measure your shot. You should avoid (P) Mode but this will work even in that. In whatever mode you are, write down or remember the settings that the camera has calculated (For example (ISO 100, f/10, 1/25 Sec)
Carefully install your ND Filter.
Find a way to cover the eyepiece of your viewfinder. You can use a small piece of aluminium. This step does not apply if you are using a mirrorless camera.
Now is the step that is you need to calculate your shutter speed with an ND Filter... The easiest way to do so is by downloading an app called LEE Stopper (its available for both iOS and Android). After getting the app is a straightforward process. You select your filter stops on top (6/10/15 Stops) you input your shutter speed and it will give you the new shutter speed you need to use. ex for me 1/25 sec was 40Sec with the 10 stop filter.
Set your camera to Manual Mode, Set the shutter speed to Bulb and the Aperture and ISO to what you noted on step 8.
Take the shot with your cable release. Leave the shutter open for the amount of time you got from the app.
You are done.
What you will need: Camera, Tripod, Cable release, CPL, ND, GND
You are at your location, you got your frame and you are ready to measure your exposure and get the shot.
Mode: Manual (M)
Let's use the example below to get step by step process:
Find your frame
Setup the tripod (make sure is steady)
Connect your shutter release cable
Turn off VR (Vibration Reduction OFF)
Turn off Long Exposure Noise Reduction
Make 100% sure Auto ISO is OFF
Adjust your CPL (if you are using one)
Focus your camera and then Switch to Manual Focus and make sure you don't touch the focus ring on your lens or move the tripod. This step is the most important in order to get a sharp image with an ND Filter. The reason we use manual focus is that after we install the filter on our lens we will see complete black from the viewfinder and there is no way to focus! (Expert Mode: Focus Stack your image for the best possible sharpness)
Measure your shot. At the image below (left) I want to expose at f/10 ISO64 so I need to have a shutter speed of 1/25Sec according to my camera. I take the shot and check my histogram and I adjust until I get the best possible histogram.
If you are using a GND now is the time to install it and adjust it. (Expert Mode: Switch to Spot metering and measure your highlights and shadows separately, figure out the difference in stops and use the appropriate GND filter to compensate)
Carefully install your ND Filter. (Make sure the filter foam is fit on the square mount and is not allowing light leaks)
Find a way to cover the eyepiece of your viewfinder (High-end Nikon's have a shutter closing lever). You can use a small piece of aluminium. The reason we do this is to avoid any light leaks from the viewfinder to the sensor. This step does not apply if you are using a mirrorless camera its only valid for DSLRs.
Now is the step that is you need to calculate your shutter speed with an ND Filter... The easiest way to do so is by downloading an app called LEE Stopper (its available for both iOS and Android). After getting the app is a straightforward process. You select your filter stops on top (6/10/15 Stops) you input your shutter speed and it will give you the new shutter speed you need to use. ex for me 1/25 sec was 40Sec with the 10 stop filter.
Set your camera to Bulb
Take the shot with your cable release. Leave the shutter open for the amount of time you got from the app.
Check your histogram,adjust, retake until you are satisfied with the histogram, never relay on your screen.
You are done.
1/25sec f/10 ISO64
40Sec f/10 ISO 64
Turn OFF VR (Vibration Reduction).
Turn OFF Auto ISO.
Turn OFF Long Exp. Noise reduction.
Use manual focus.
Learn to read and understand your camera's histogram and never trust your camera screen for correct exposure.
Make sure you close your eyepiece during the daytime.
Use a Good Steady Tripod.
If your tripod is on the sand use 3 cds under the tripod legs to prevent it from sinking in the sand and cause blurry images.
Make sure you lock all axis of your tripod head.
Use your camera's Accelerometer to Level your shot.
Shoot in Uncompressed RAW
Make sure your filters are clean.
Have a piece of cloth to clean your camera and your filters if there is moisture around. (for example when shooting near the beach)
Have extra batteries because long exposure will drain your batteries fast.
Shoot during the Golden Hours
If you are shooting near water bring some anti-insect spray.
Plan your shot if possible before arriving on location.
2Sec timer is your friend
and many others i cannot remember at the moment... i'll keep this list going
Ok, what to buy is the question most people want to know? what to begin with? There is no single way to go.... I'll give you my thoughts but you need to decide what is best for you!
Before you go out and buy stuff make sure you know what they do! Go out at late afternoon or early morning and try without filters to see what happens... some test settings, set your camera to the lowest possible ISO and your aperture to the lower possible value (Largest F-Number, f/22 +) so let's say aperture priority mode (A or Av) set ISO200 F/22 and take the shot to see what happens... try again.... and again.... and again... until you like one image
Ok, now you should be ready to take it one step further, so here are my recommendations... (Don't buy all at once!!)
Tripod: Manfrotto MKBFRA4-BH Befree
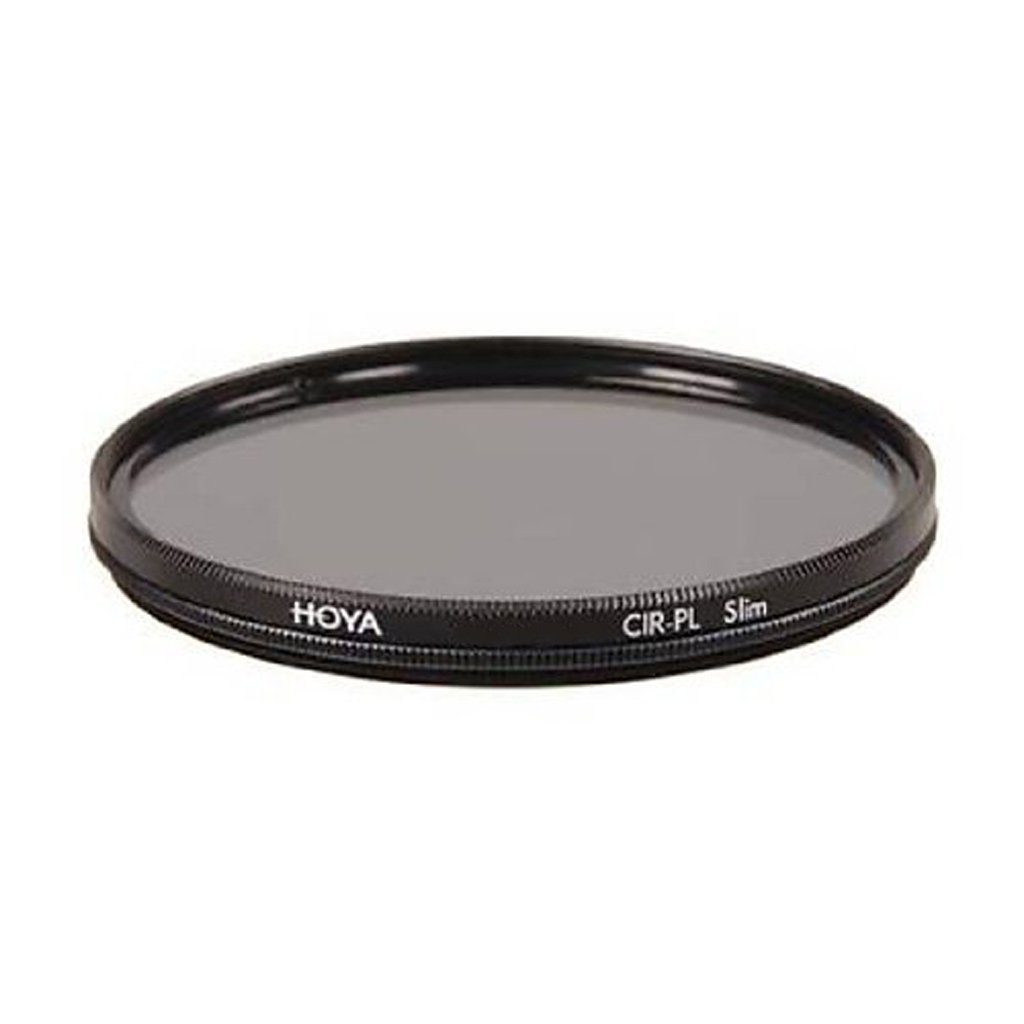
CPL : Hoya Polarisation filter Cir. Pro1 Digital (Make sure you get the correct mm for your lens)
10 Stop ND: Hoya Pro ND-Filter (Neutral Density 1000, 58mm)
Cheap 3rd party release cable (Neewer® LCD Display Timer)
Here I'll give you a list of what I use now... (Note that all this was purchased over time and one piece at a time!)
Tripod: Manfrotto XProb (10-year-old tripod not available anymore, the alternative is Manfrotto MT055CXPRO4 055 Carbon)
Ball Head: Manfrotto MHXPRO-BHQ2 XPRO Magnesium
CPL: Mounting System: NiSi V5-Pro Filter Kit 100mm-System + Landscape NC CPL
Filter Carry Case: Lowepro S&F Filter Pouch
Release Cable: Nikon MC-36A
The most important thing about all this is to enjoy the moments!
Please tell me your thoughts or questions or whatever you want to ask....
Thank you,
Valentinos
All the links above are affiliate links.
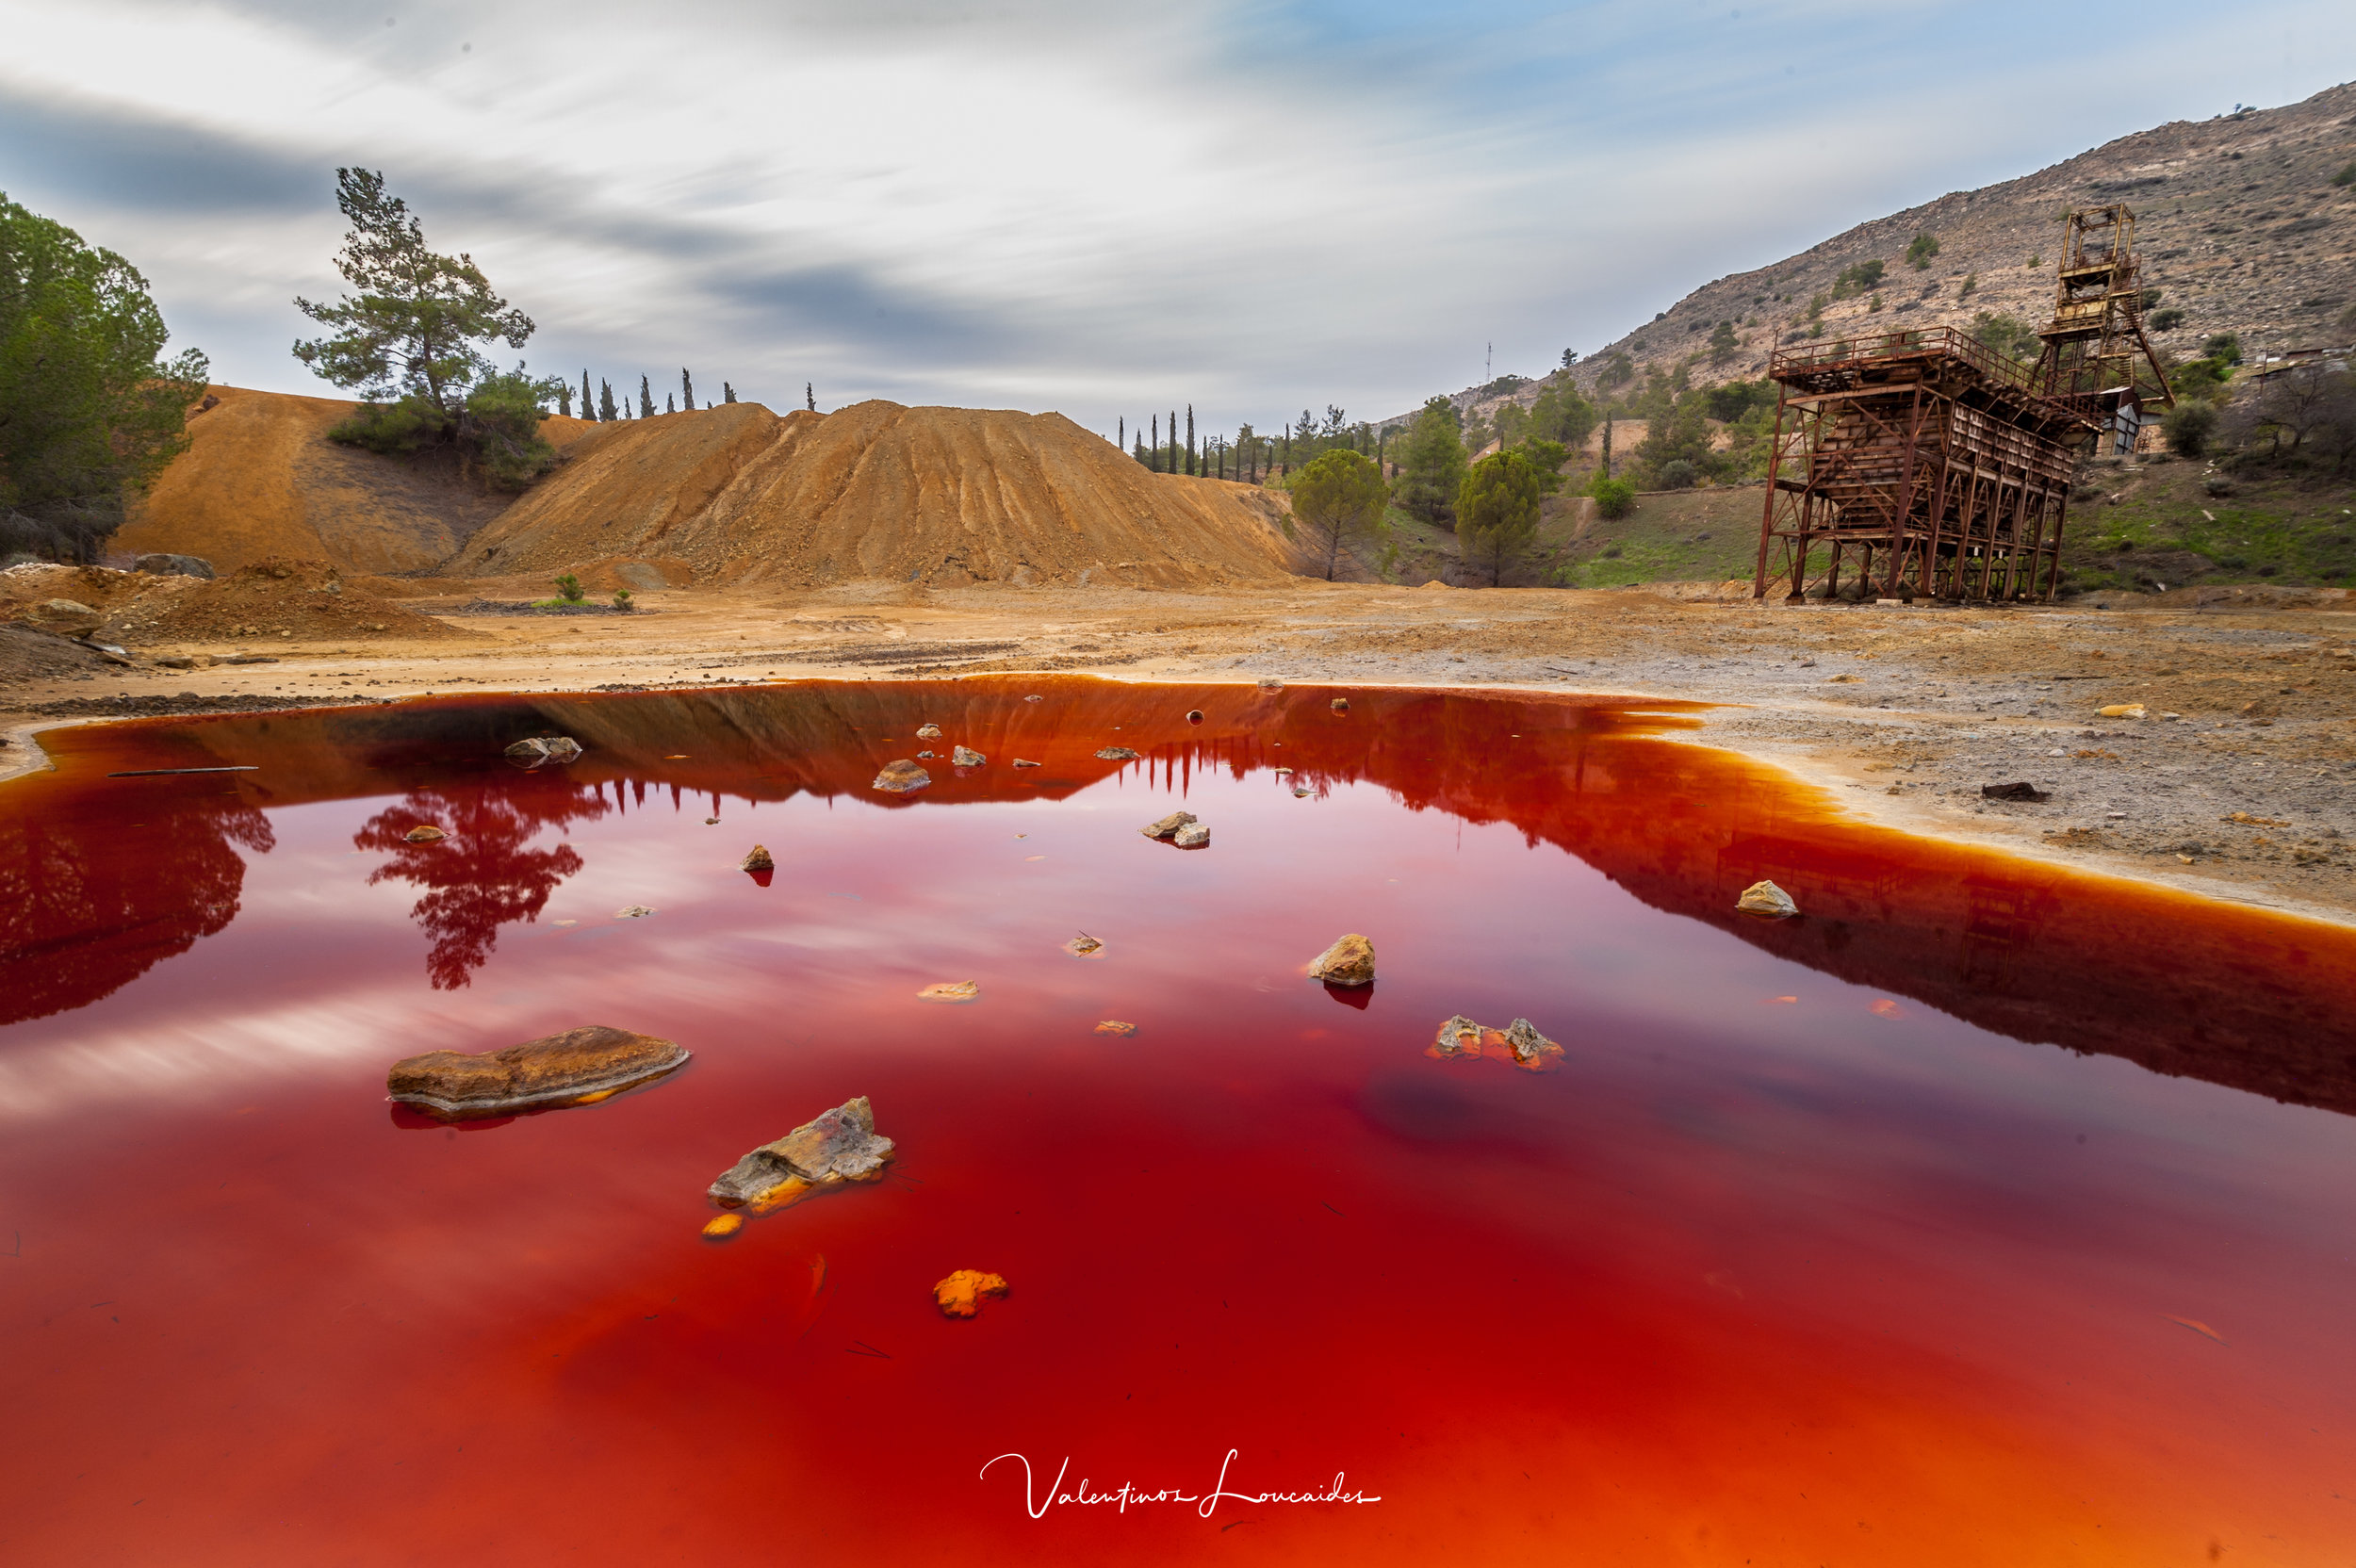
Today we ventured to and old, abandoned mine near Xyliatos Village.
The Memi Mine operated in the community during the years 1954-1971 and partly during the period between 1987 and 1990. The extraction was done on the surface using the closed excavation method and approximately 2.125.000 tons of pyrite with a mean content of 26% S were extracted.
The ore was processed at a metal enriching factory in Mitsero so that a Sulphur condensate would be produced using flotation. Up until 1974 the final product was loaded on boats in Karavostasi and from there it was exported, while after 1974 exportation took place at the port of Vasiliko. What is noteworthy is that towards the end of the 1980s, the final product supplied the Sulphur Acid and Fertilizer factory in Vasiliko.
This mine is located very close to the residential area of the village. Today, there is a crater at the extraction area which, after an initiative by the Community Council, has been filled with rainwater, thus creating a wonderful lake which dominates the area.
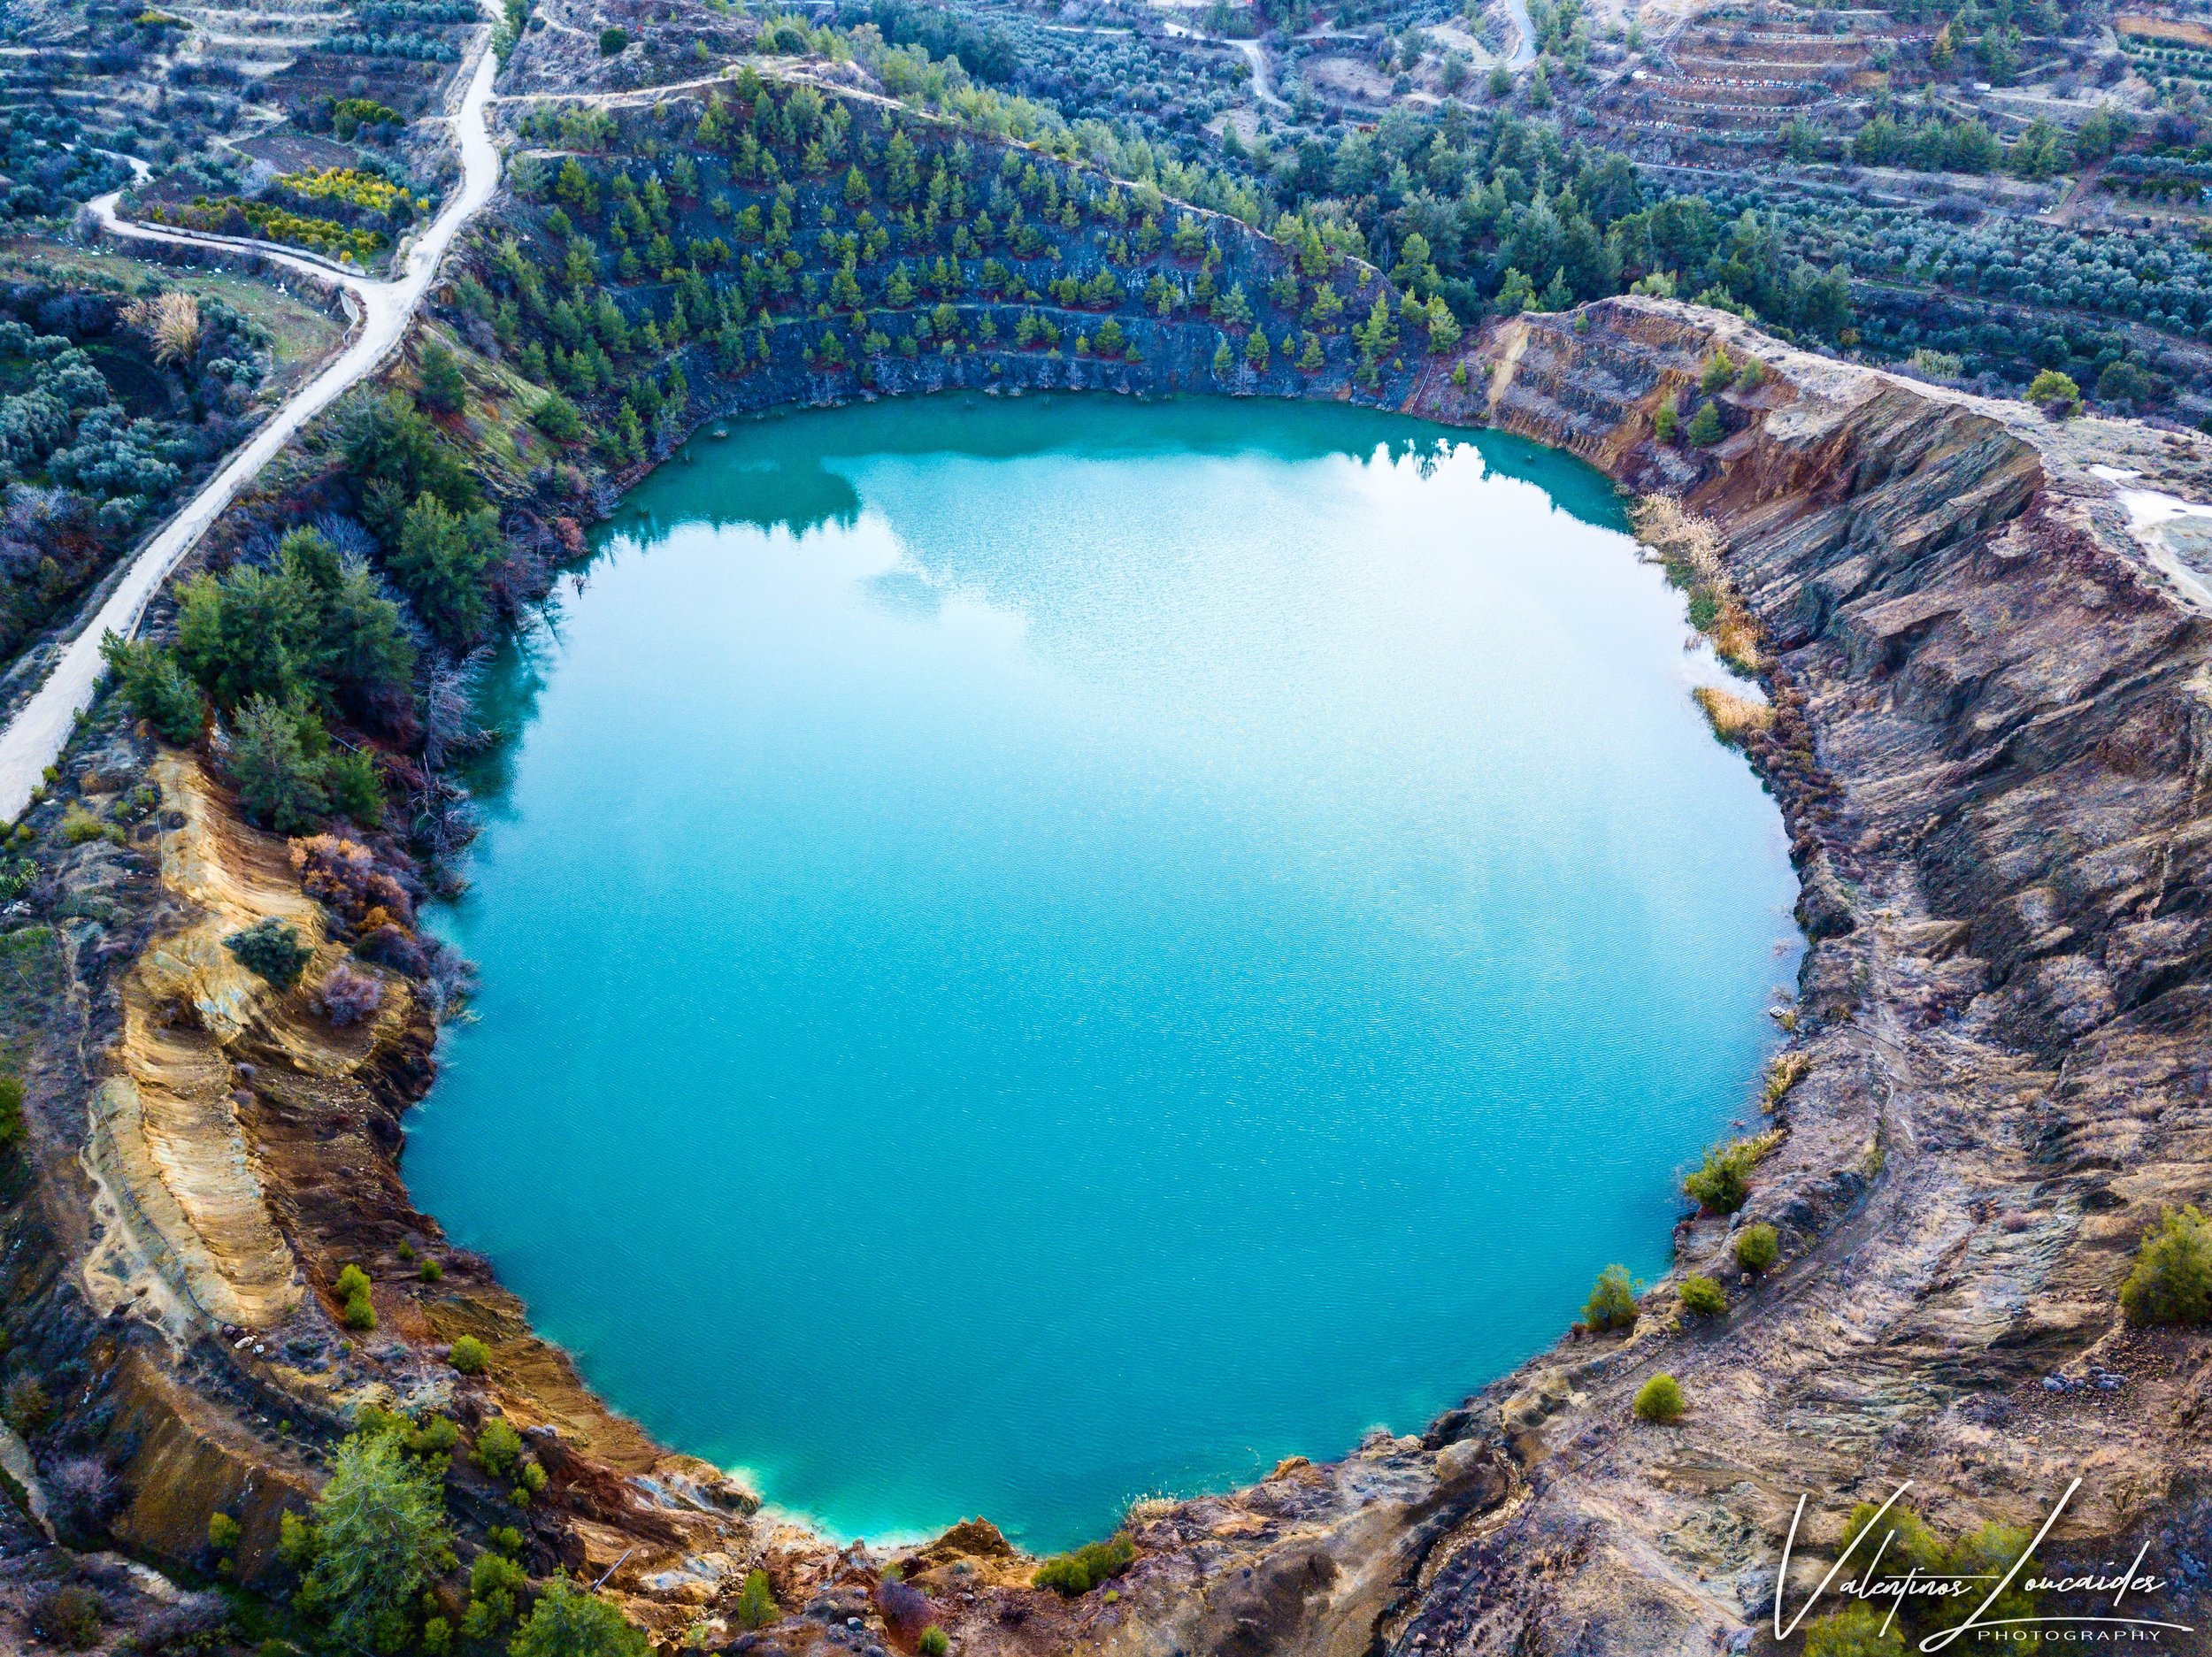
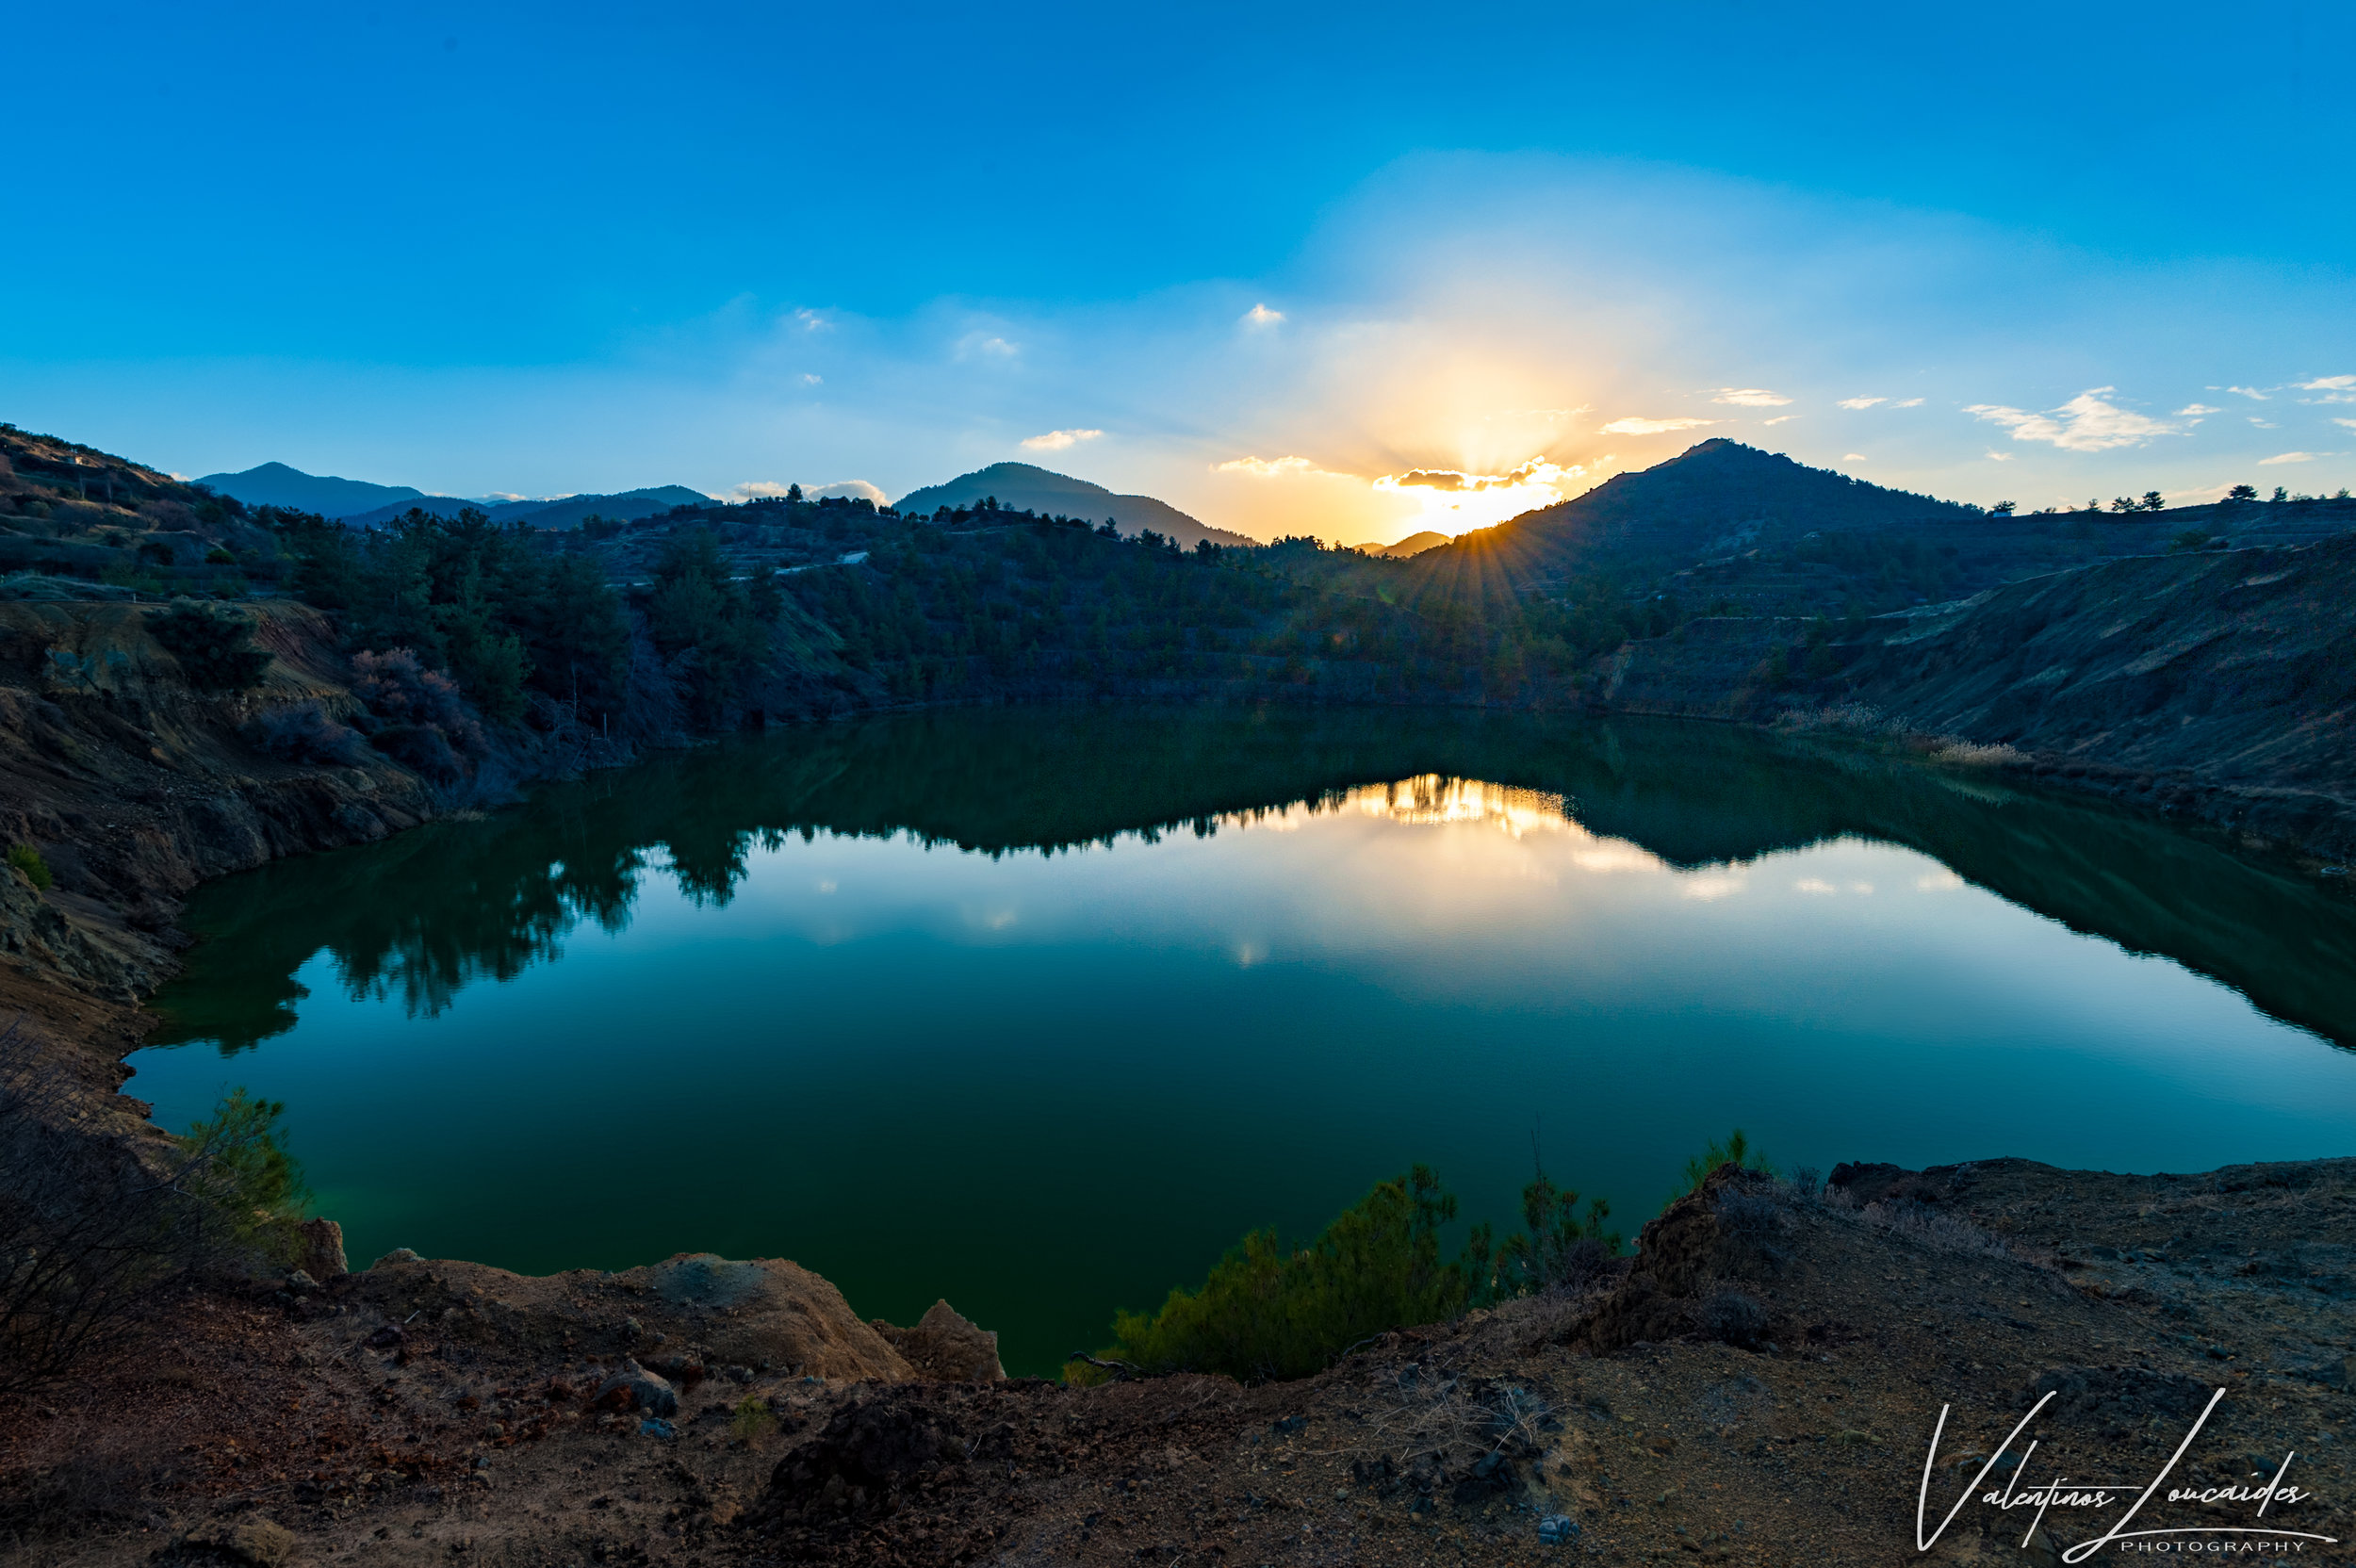

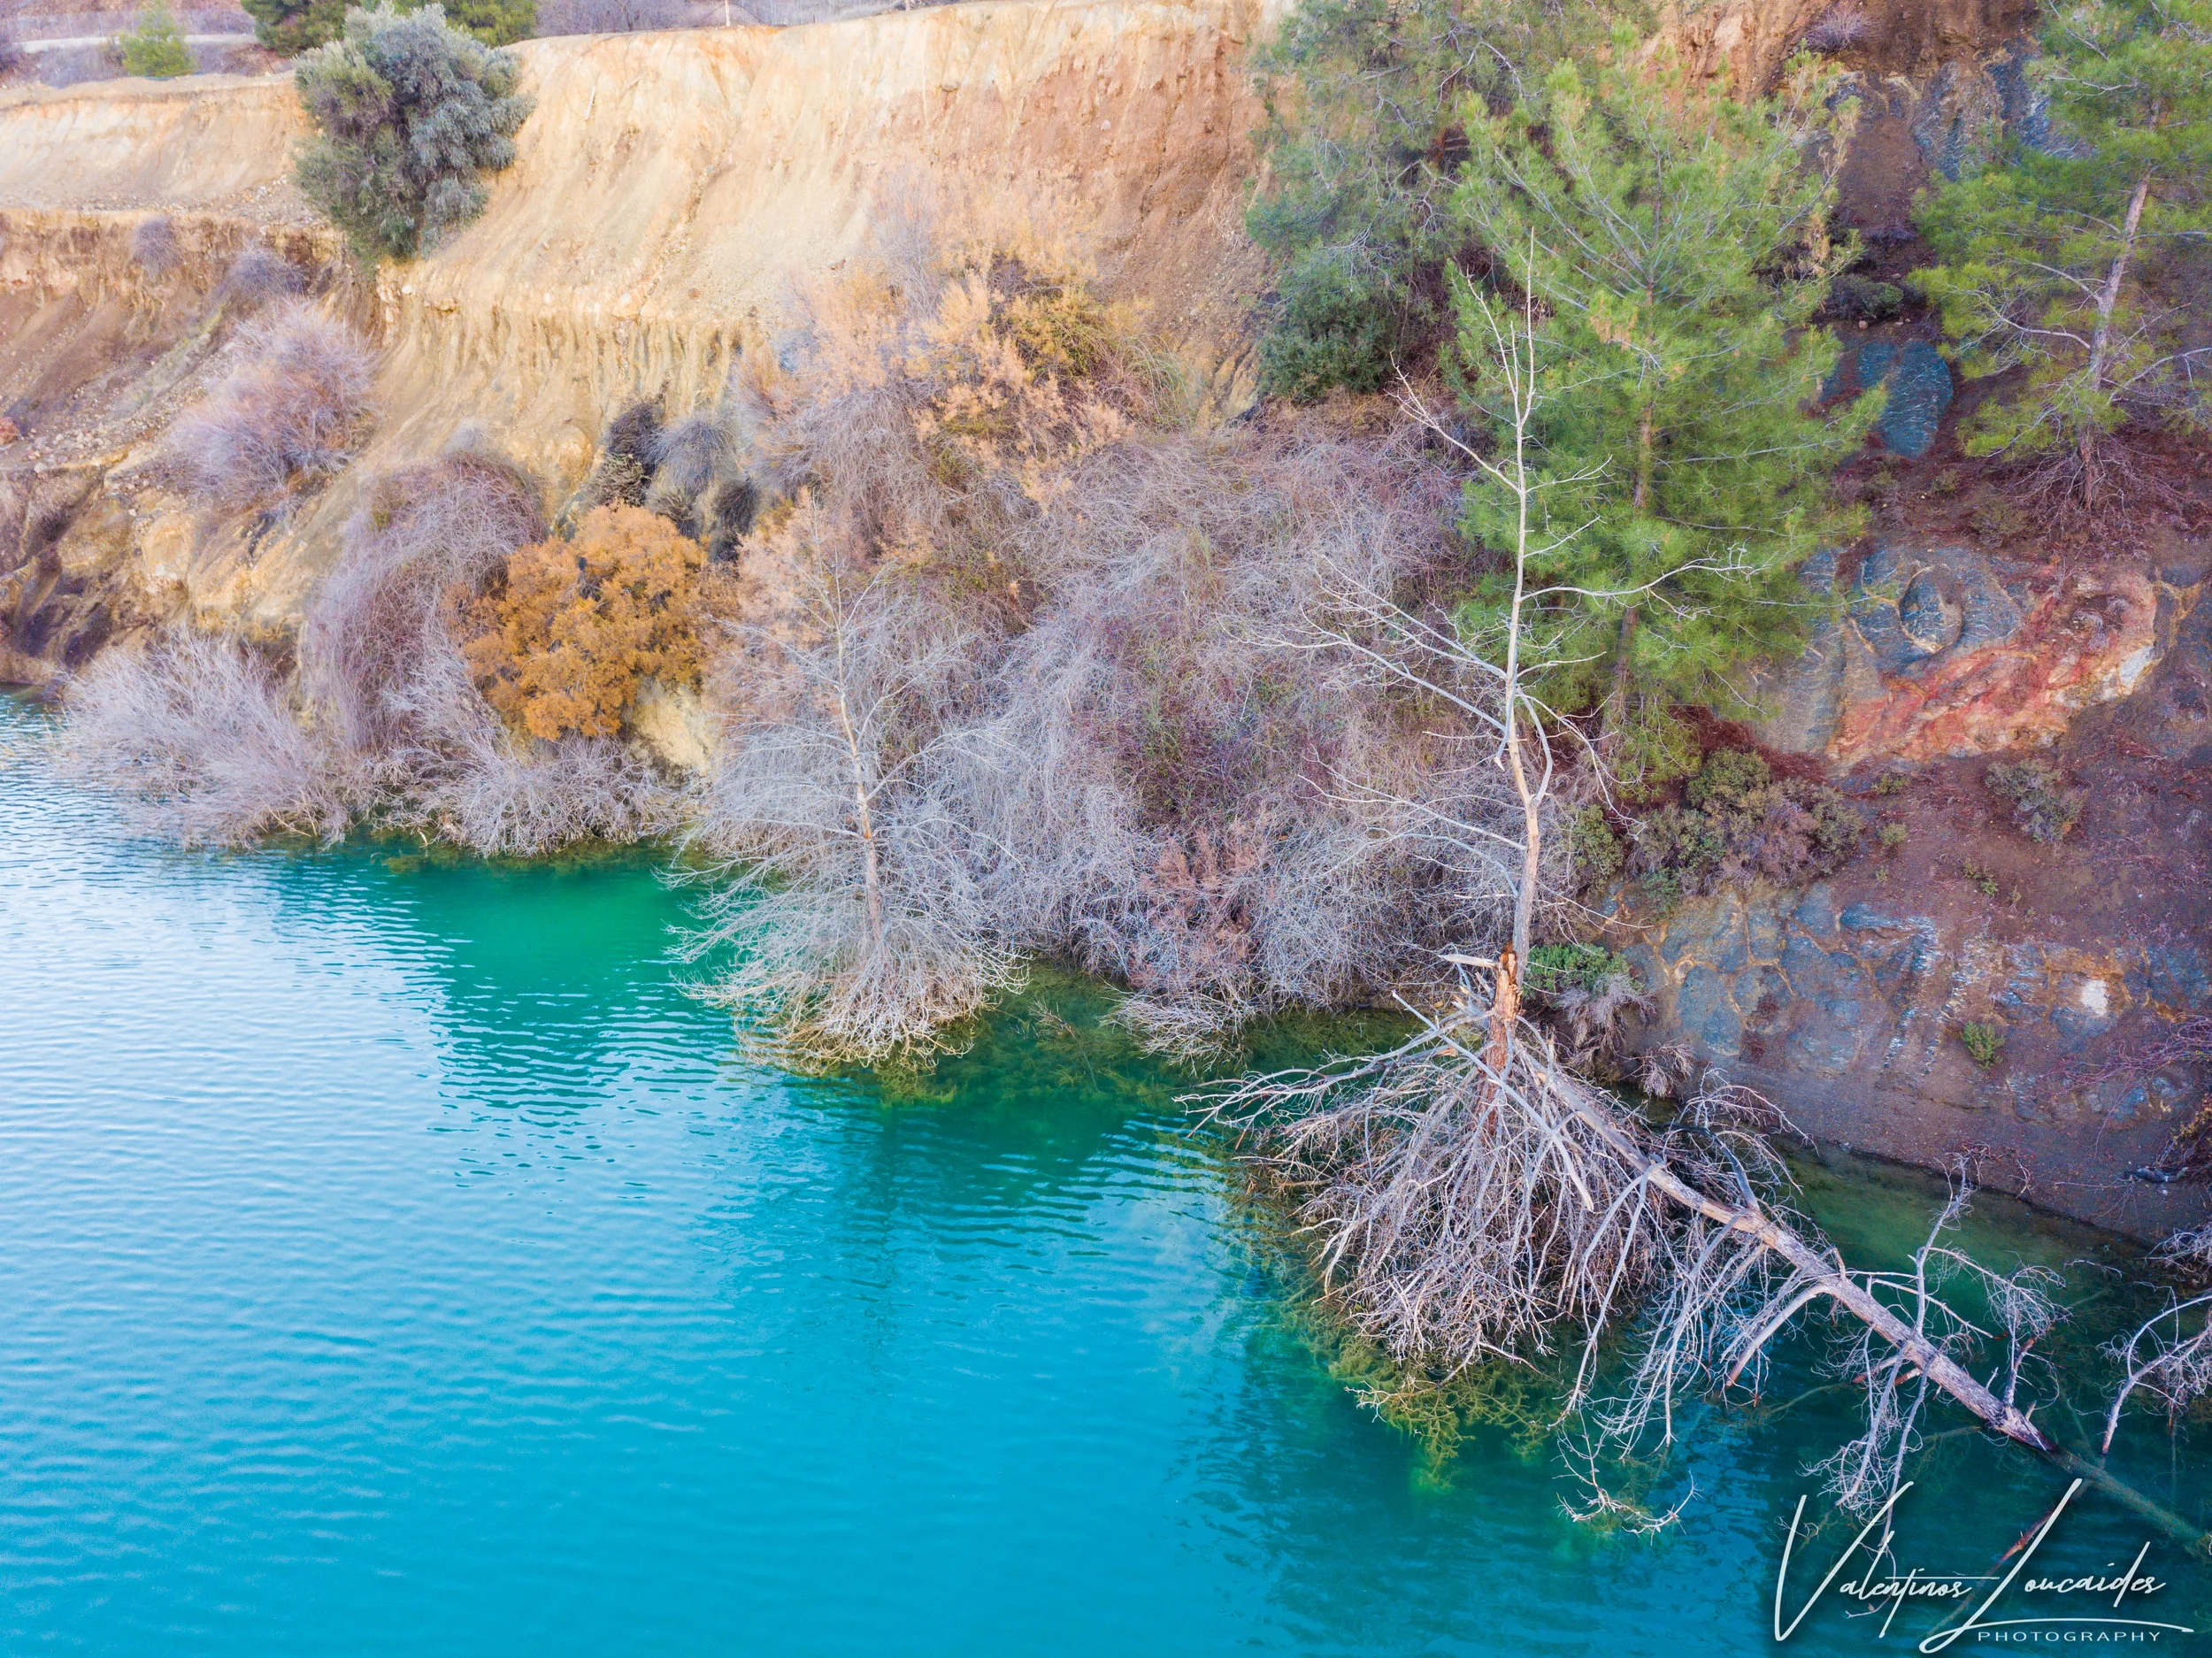
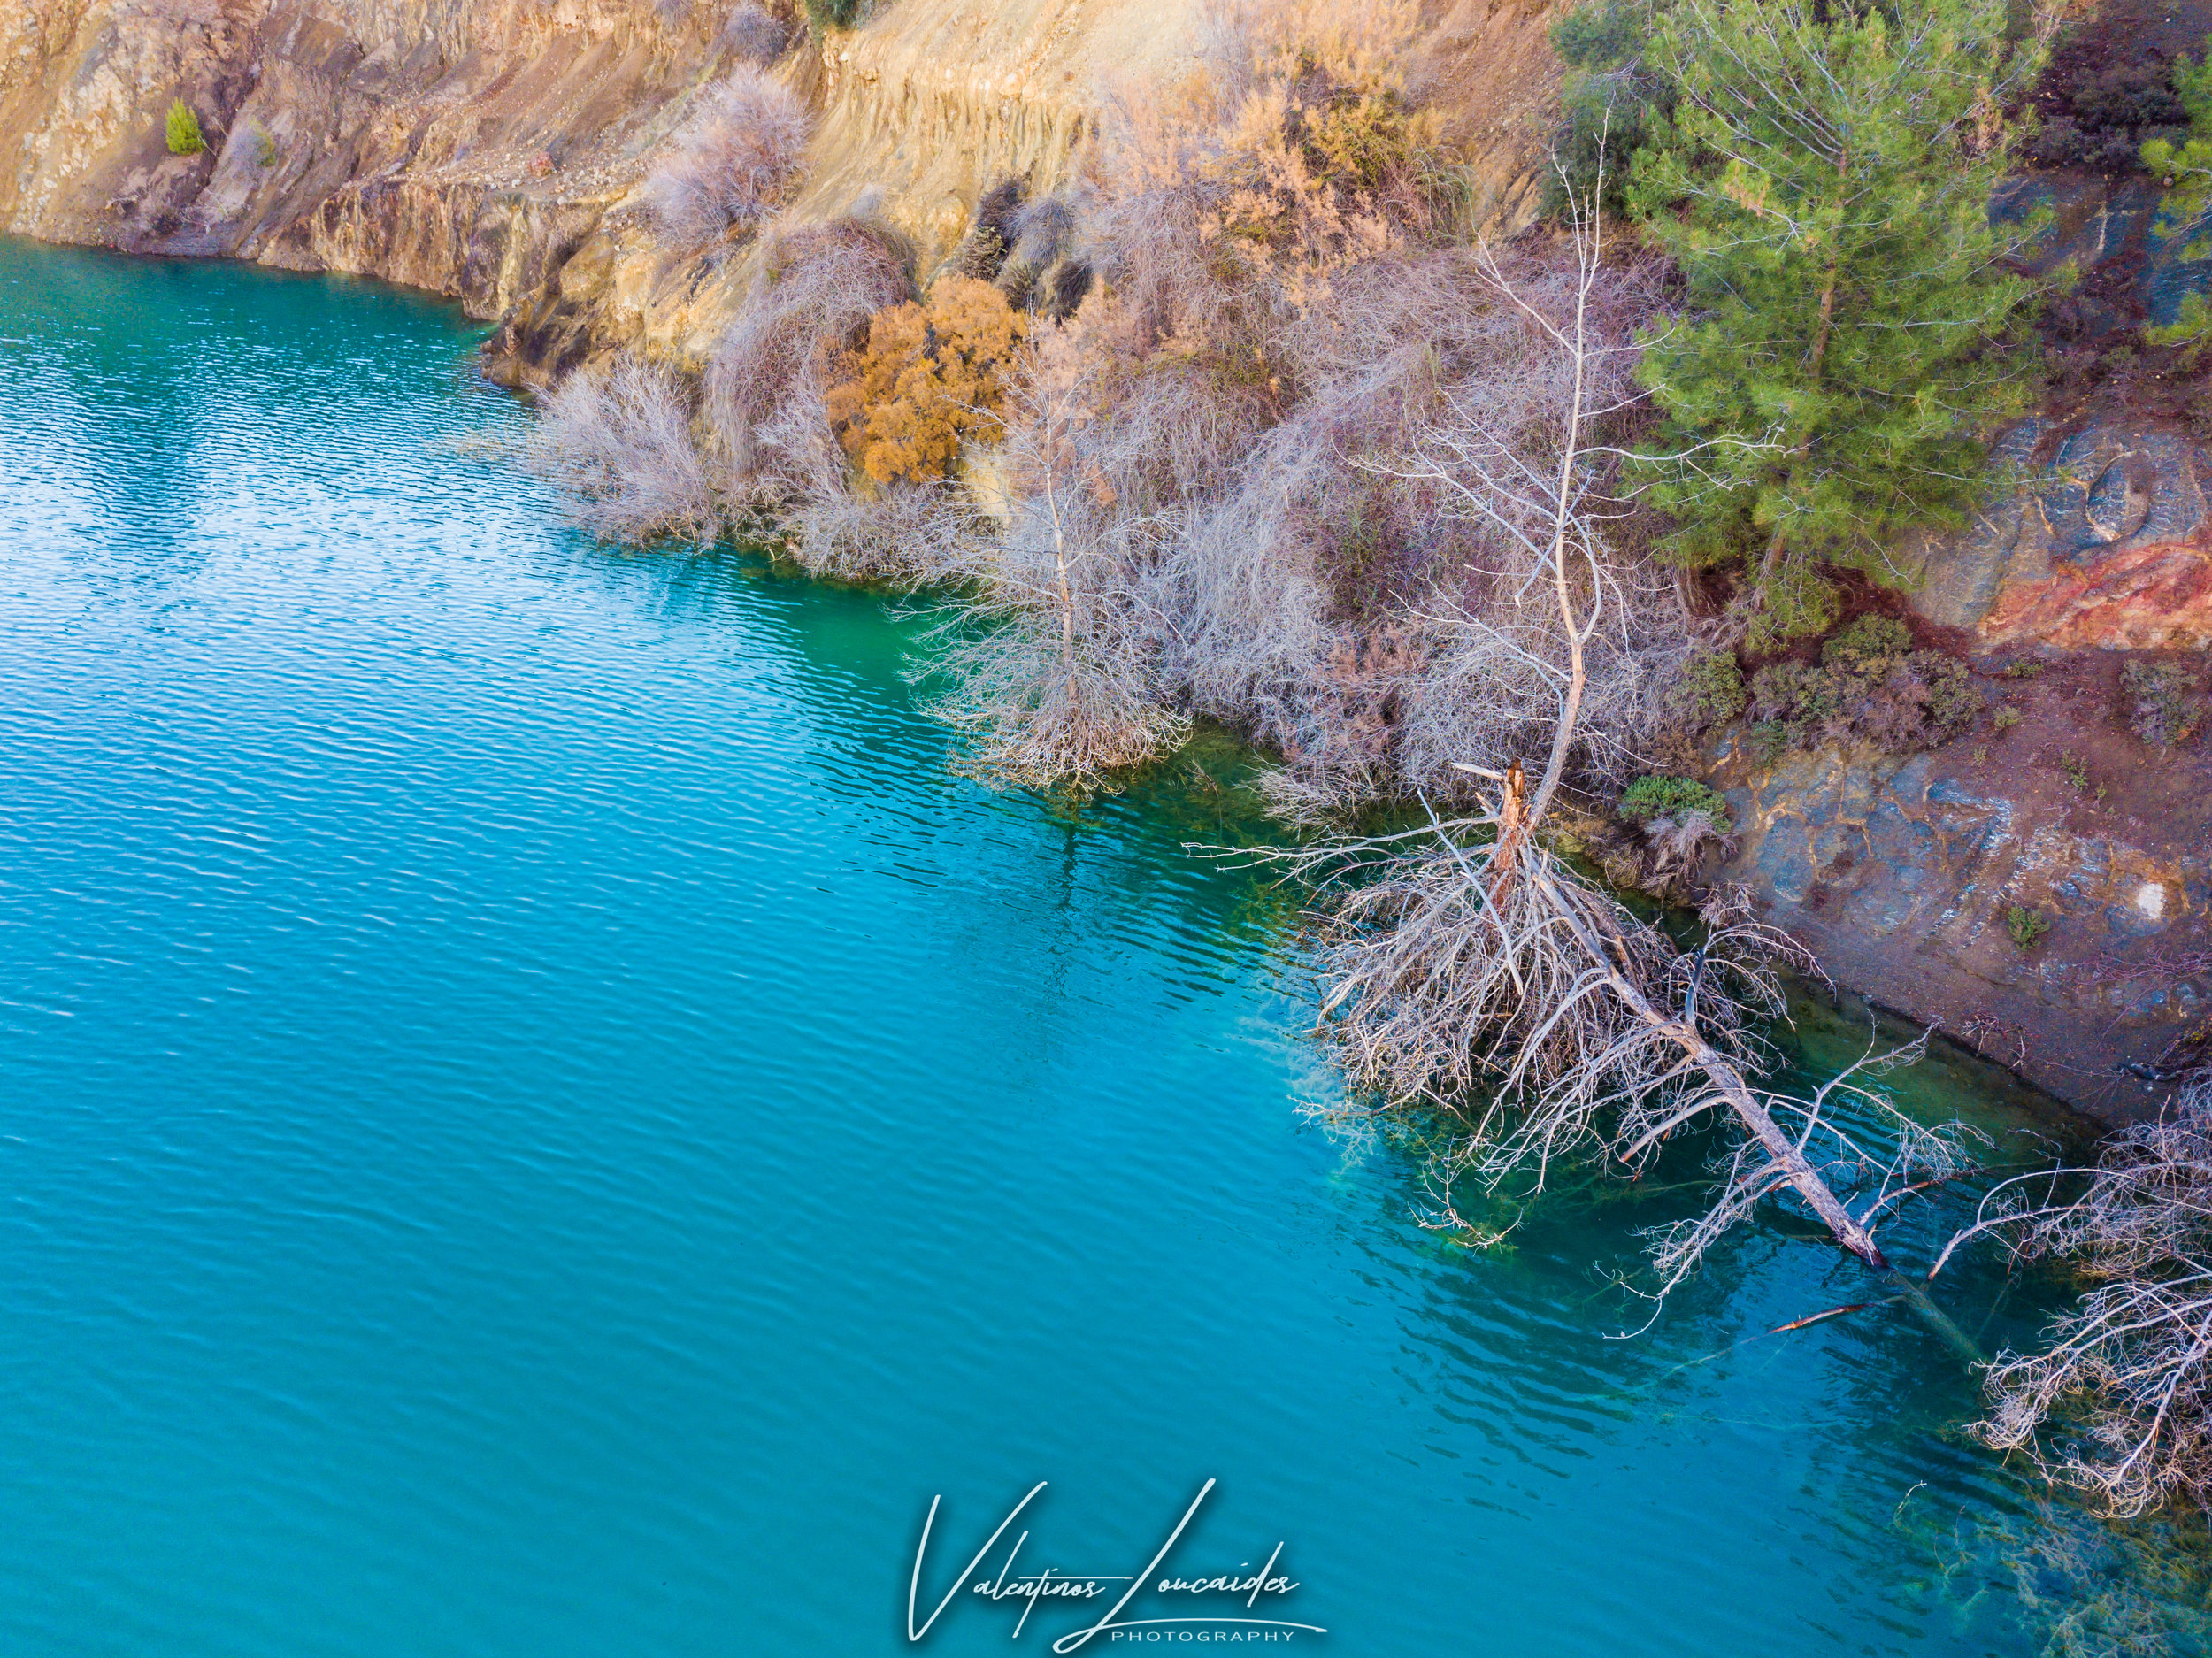
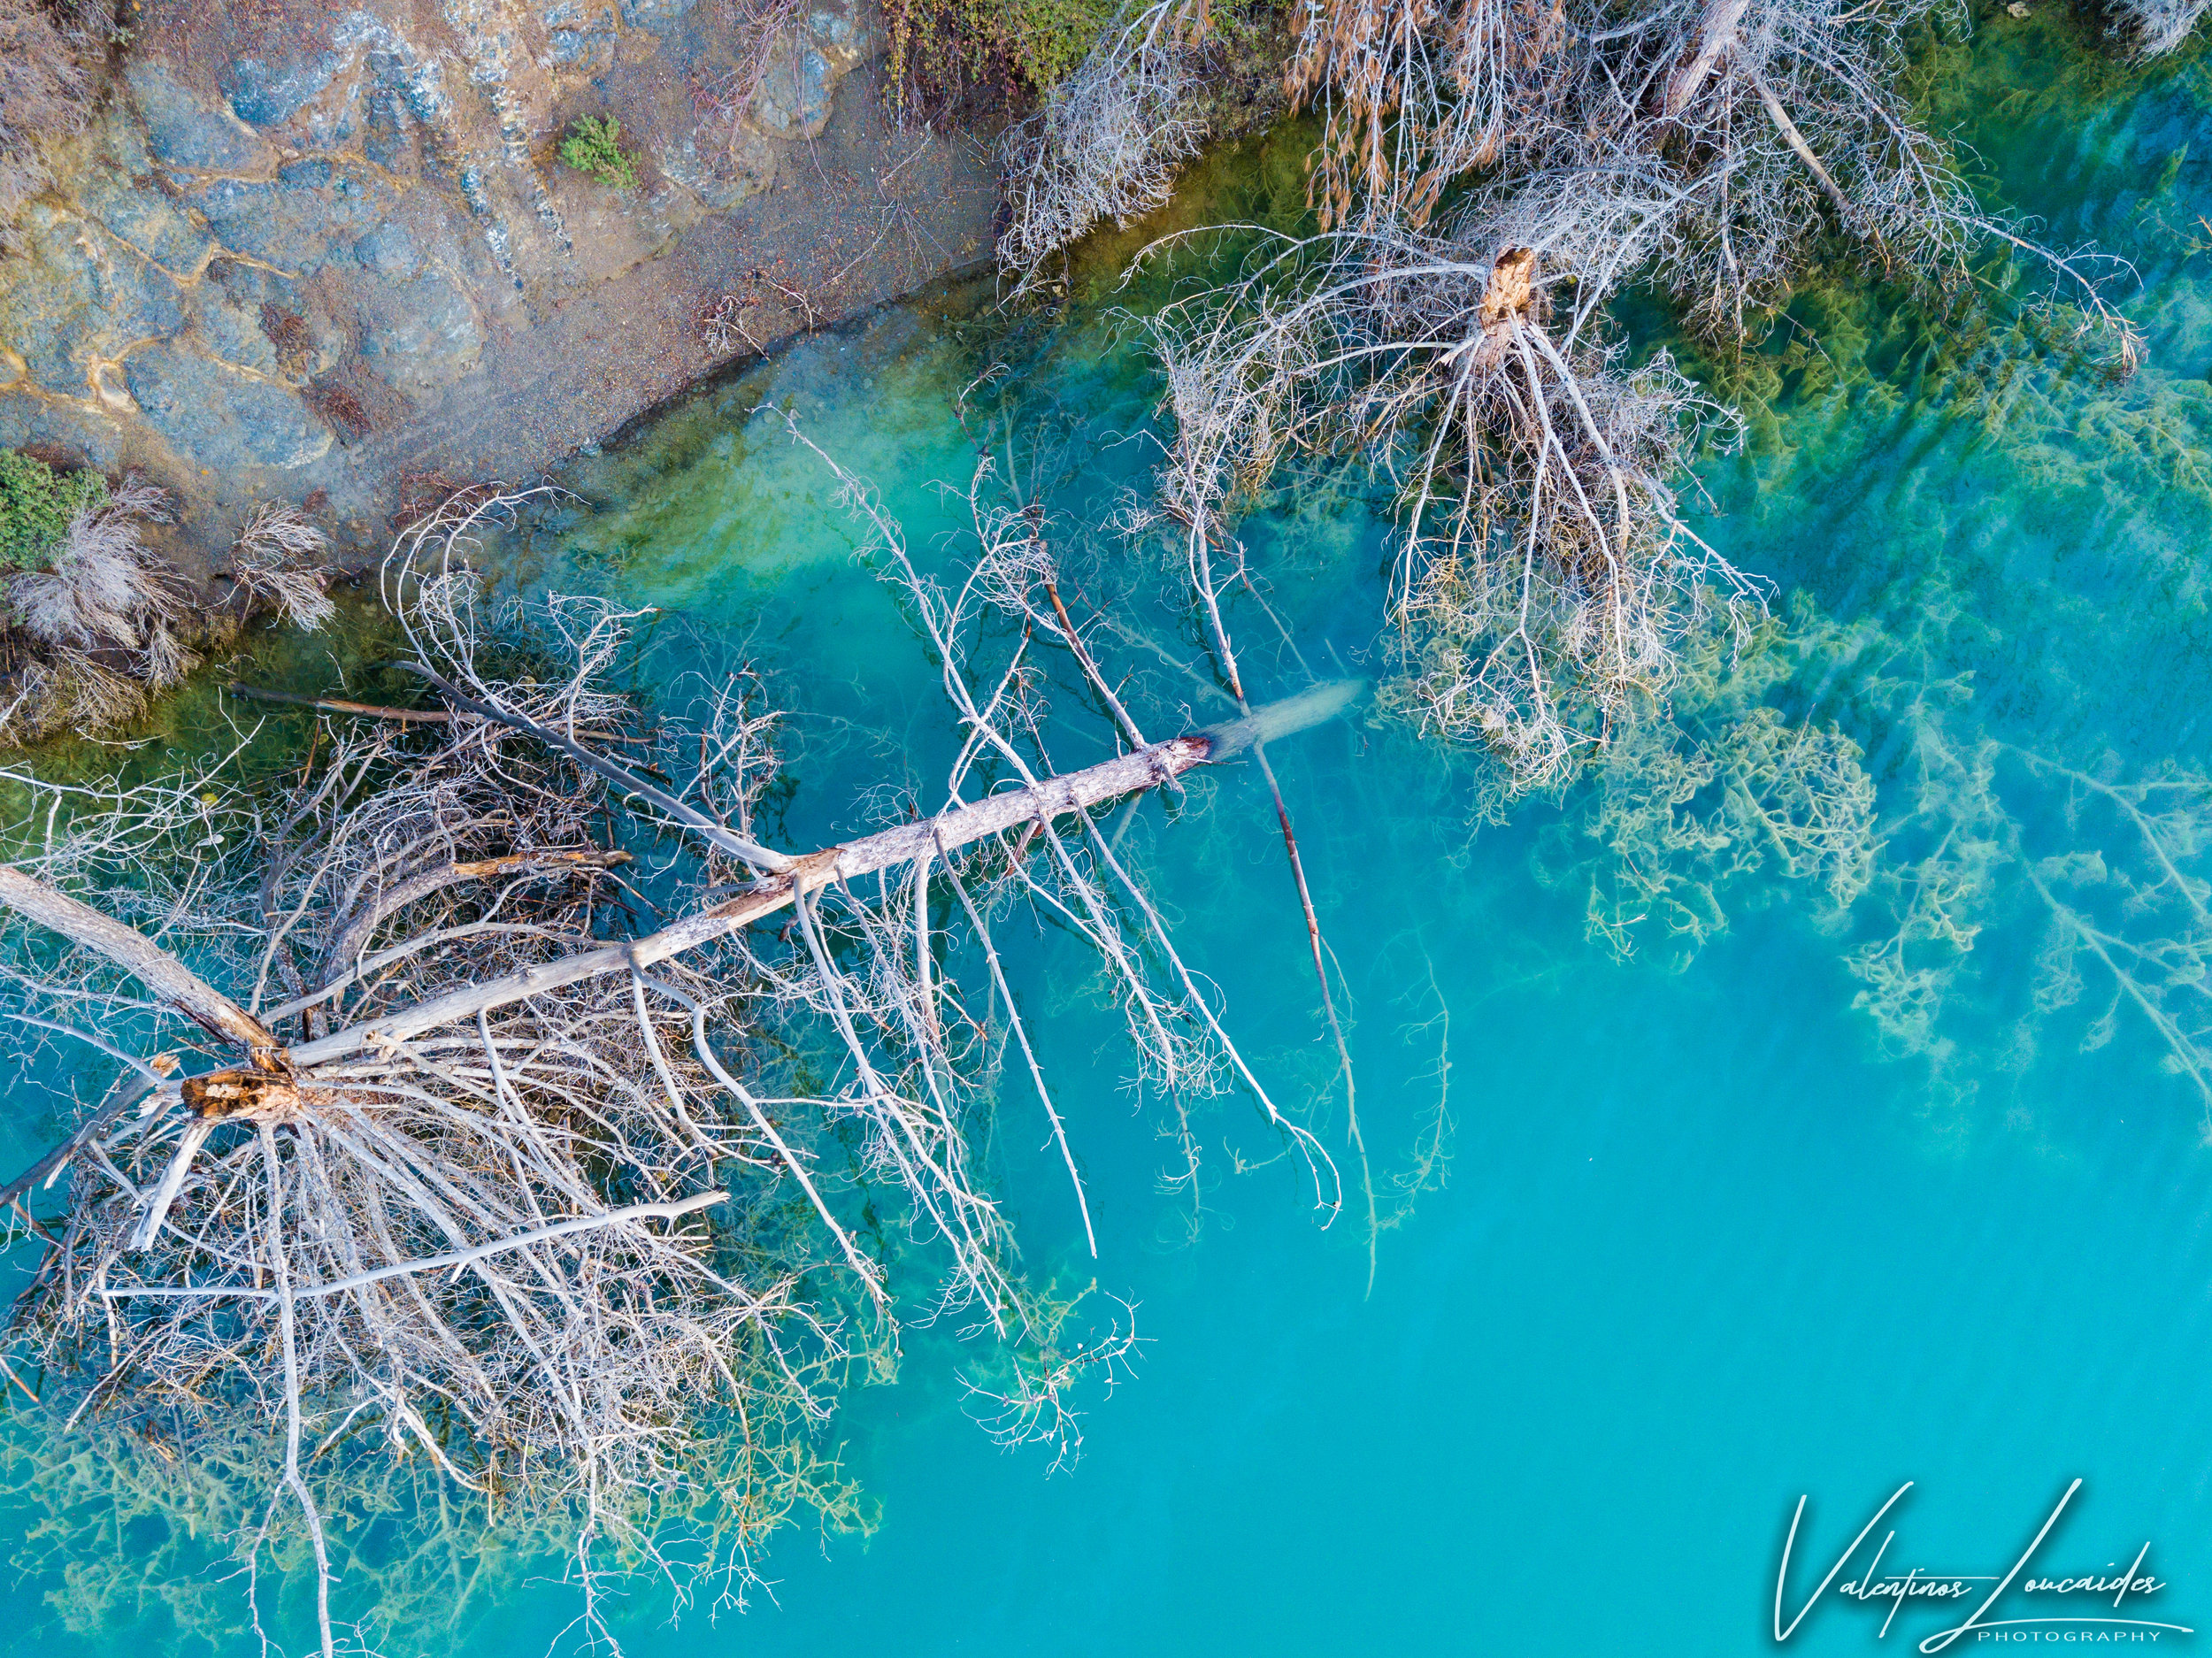
In fact, the waters of the lake, due to the existence of pyrite alloy at its bottom and on the sides, change colour according to different seasons. In winter, the colour is dark green, which changes to a majestic turquoise in spring, while in the summer the water acquires a deep ocean blue colour, while its banks maintain the wonderful turquoise colour of the seas. Finally, in the autumn, the water changes completely, acquiring a light green colour while preparing to welcome the winter green colour of the forests..
Source: http://www.xyliatos.org/en/minings-len/memi-len